
Introduction
API keys grant external applications access to the Manor API. Use them to connect external software, sync financial or project data, automate repetitive tasks, and build custom integrations. Because API keys provide programmatic access to your Manor organization, managing them securely and setting appropriate role permissions is essential.
Key Fields
When viewing or configuring API keys, you will encounter the following fields:
- Name: A descriptive label for the API key (e.g., "BI Integration Key" or "Accounting Sync Key"). Use this to identify the connected service or integration purpose.
- User: The system user account linked to this API key. The API key inherits all permissions assigned to this system user. Only system users can be assigned to API keys — regular human users cannot.
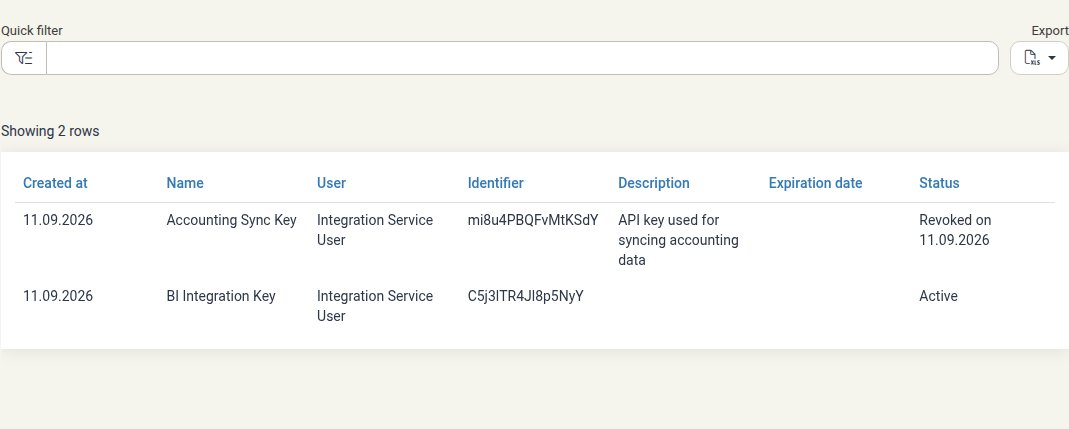
- Identifier: A unique token identifier displayed in the list view. This identifier helps match system requests or logs to a specific key without revealing the secret token.
- Expiration date: An optional cutoff date when the API key automatically expires. Once expired, external applications can no longer authenticate using this key.
- Description: An optional note documenting the key's intended workflow, connected environment, or responsible team.
- Status: The current operational state of the key — either Active or Revoked on [date].
- Created at: The date the API key was generated.
Creating a New API Key
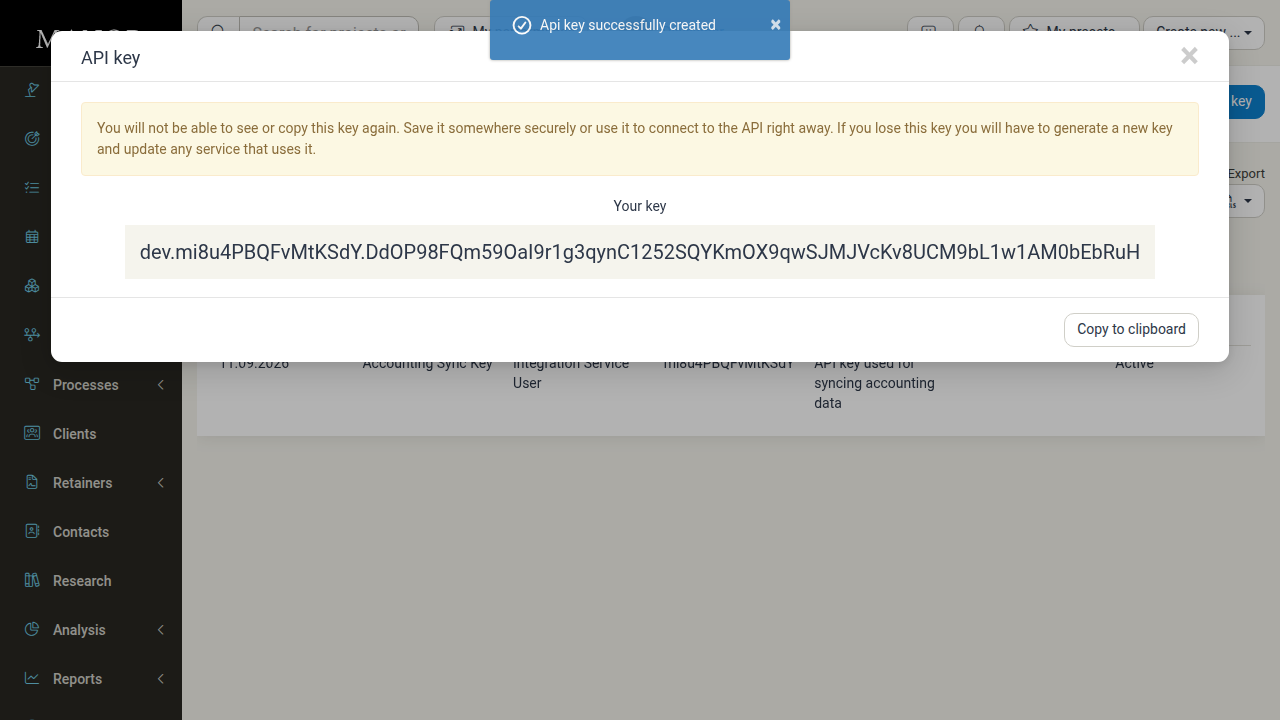
Important: The complete secret token is shown only once immediately after generation. For security reasons, Manor will never display it again. Copy and store the token in a secure password manager or secret store before closing the dialog.
Follow these steps to create an API key:
-
Navigate to Administration → API keys in the side navigation.
-
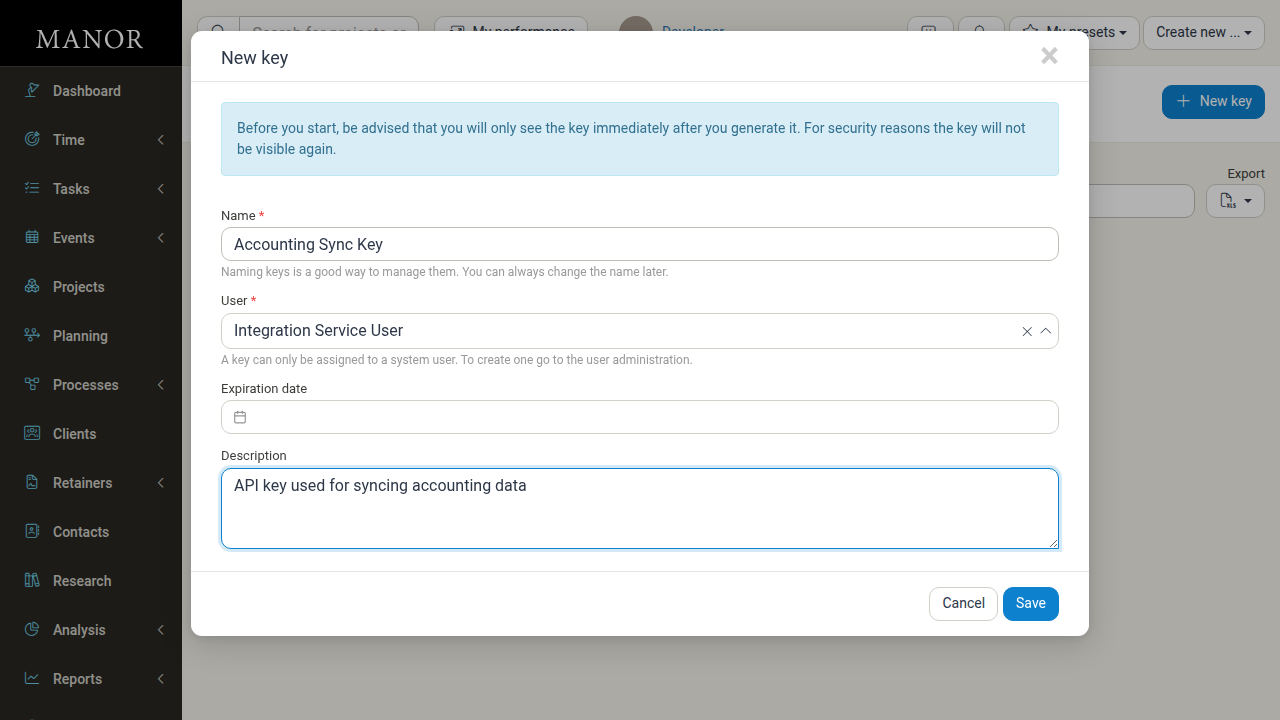
Click the New key button in the upper-right corner.
-
Enter a descriptive Name (required).
-
Select a system user from the User dropdown (required).
Note: If no system user exists yet, navigate to Administration → Users and click New system user for integrations to create one. System users do not consume standard user seats or trigger subscription fees.
-
Optionally select an Expiration date using the datepicker.
-
Optionally enter a Description explaining what the key is used for.
-
Click Save.
-
Copy the generated key immediately from the confirmation dialog.
-
Click Copy to clipboard and store the key securely, then close the dialog.
Managing API Keys
You can monitor, modify, and retire API keys from the API keys list page.
Finding API Keys
Type a name, system user, or identifier into the Quick filter search box above the table to instantly narrow down the list.
Editing an API Key
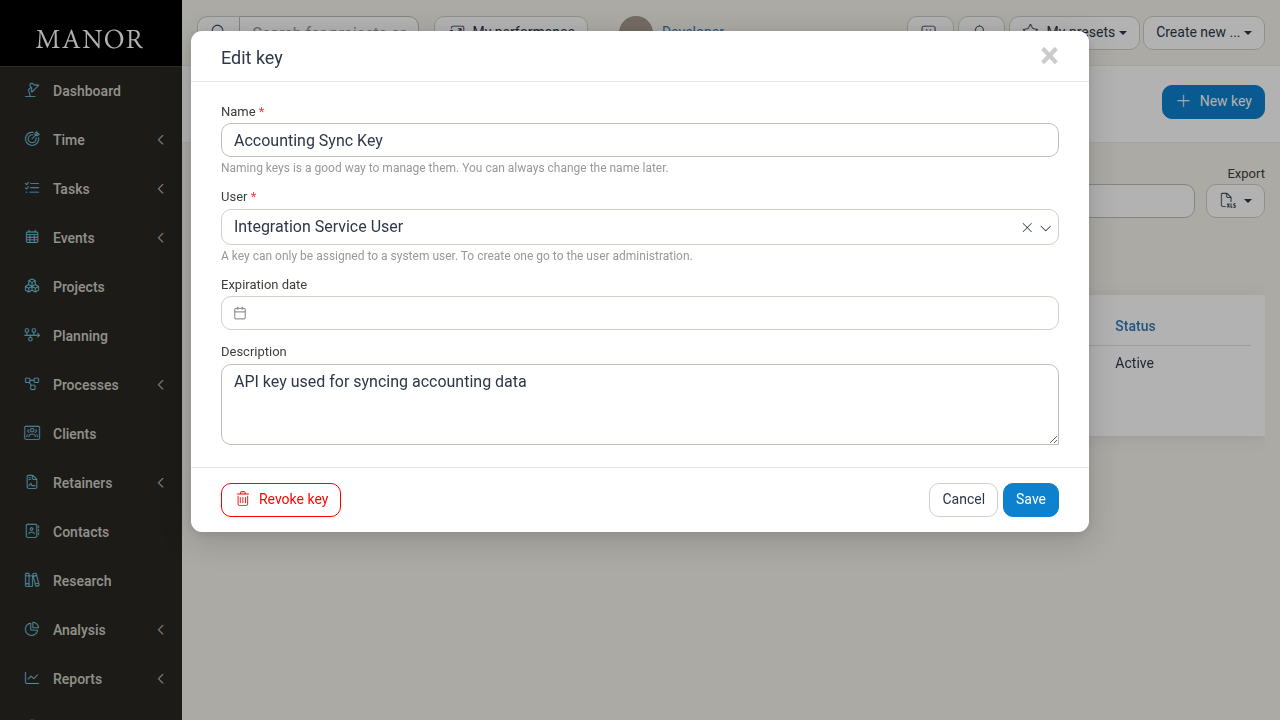
- Click on the row of the API key you want to update.
- In the Edit key modal, modify the Name, Expiration date, or Description as needed.
- Click Save.
Revoking an API Key
If a key is compromised, decommissioned, or no longer required by an integration, revoke it immediately:
- Click the row of the active key to open the Edit key dialog.
- Click the red Revoke key button in the bottom-left corner.
- In the confirmation dialog, click Confirm.
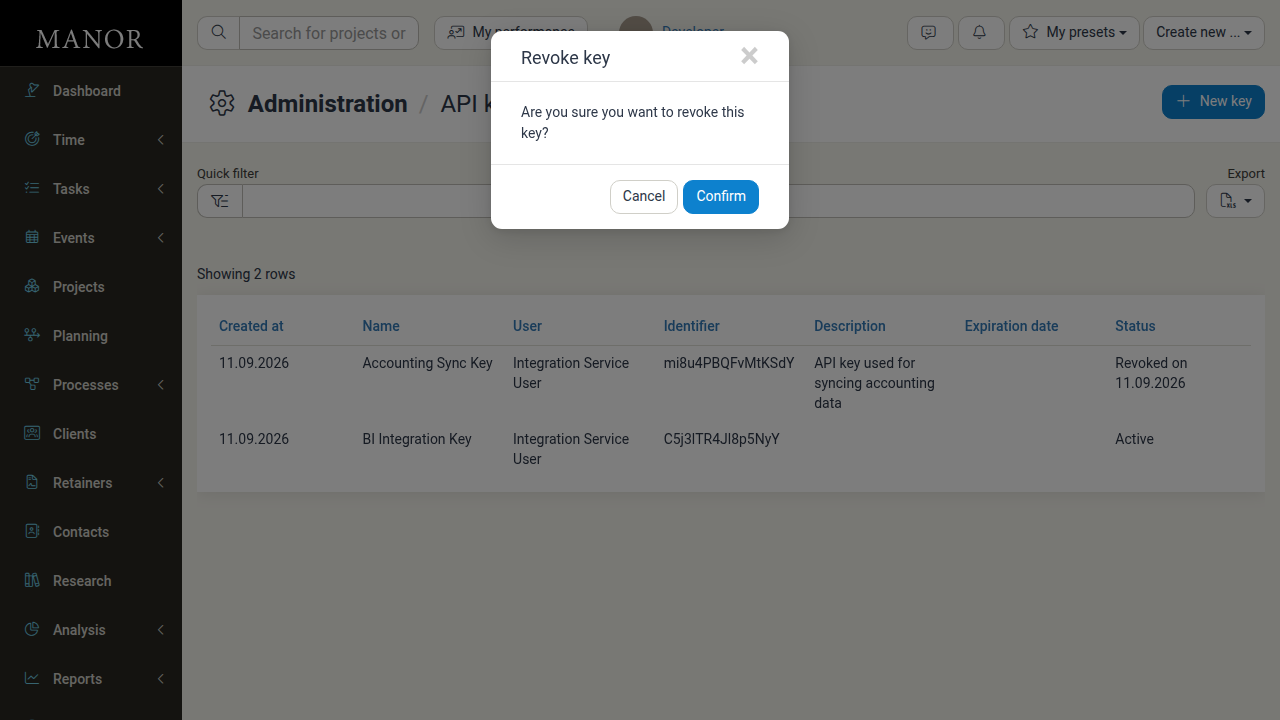
Once revoked, the key immediately stops accepting requests, and its status changes to Revoked on [date]. Revoked keys cannot be reactivated.
Best Practices
- Principle of least privilege: When setting up system users for API keys, assign only the minimal roles necessary for the integration to function.
- Dedicated keys per service: Create separate API keys and system users for each distinct tool or service. This makes auditing easier and allows you to revoke access for one tool without impacting others.
- Use expiration dates: Set expiration dates for third-party developer access or trial integrations to prevent forgotten keys from remaining open indefinitely.
- Rotate keys regularly: Periodically generate new keys, update your external services, and revoke the old keys.
- Never share tokens in plaintext: Store generated keys exclusively in secure secret vaults or environment configuration files, never in version control or team chats.