
Introduction
A payroll batch is a processed set of payroll data for a firm. Creating a batch collects the logged time, travel and per-diem entries for the payroll-eligible employees in the firm's completed pay periods, processes them into payroll lines, and makes the result available as an Excel document for the payroll run. Batches give payroll administrators a dated, repeatable record of each payroll processing.
Requirement: Payroll batches are only available when Enable payroll is set to Enabled with advanced payroll batches in Management > Settings > Features. With plain Enabled, the Payroll batches entry does not appear in the Payroll menu.
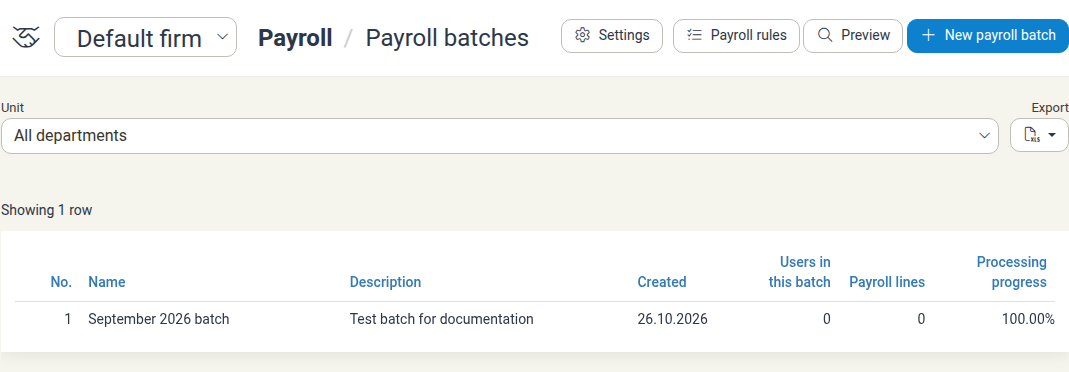
Accessing Payroll Batches
- Open Payroll in the main navigation.
- Select Payroll batches.
The page lists every batch for the selected firm with these columns:
| Column | Description |
|---|---|
| No. | The batch number. |
| Name | The batch name you gave it. |
| Description | Optional description. |
| Created | The date the batch was created. |
| Users in this batch | How many employees the batch covers. |
| Payroll lines | The number of payroll lines produced. |
| Processing progress | The percentage of processing completed. |
Use the Unit filter to restrict the list to a department, and Export to download the list.
Previewing a Batch
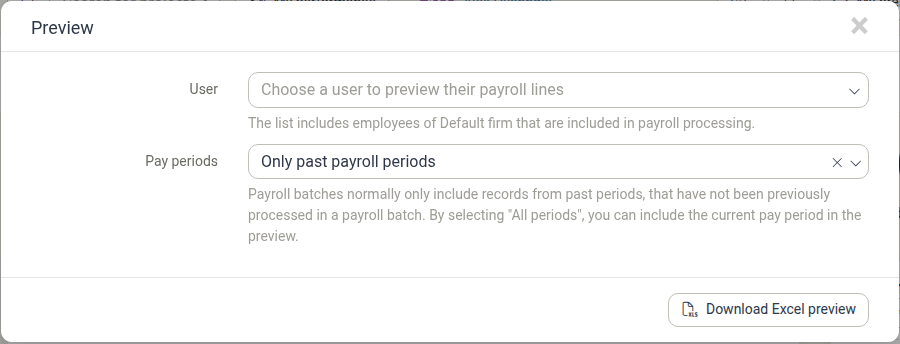
Before creating a batch, click Preview to see what it would contain.
- Click Preview at the top of the Payroll batches page.
- Choose a User to preview that employee's payroll lines. The list includes employees of the firm that are included in payroll processing.
- Select the Pay periods to include:
- Only past payroll periods (default) — batches normally include only completed periods that have not already been processed in a batch.
- All periods — also includes the current pay period in the preview.
- Click Download Excel preview to download a spreadsheet preview.
Creating a Payroll Batch
-
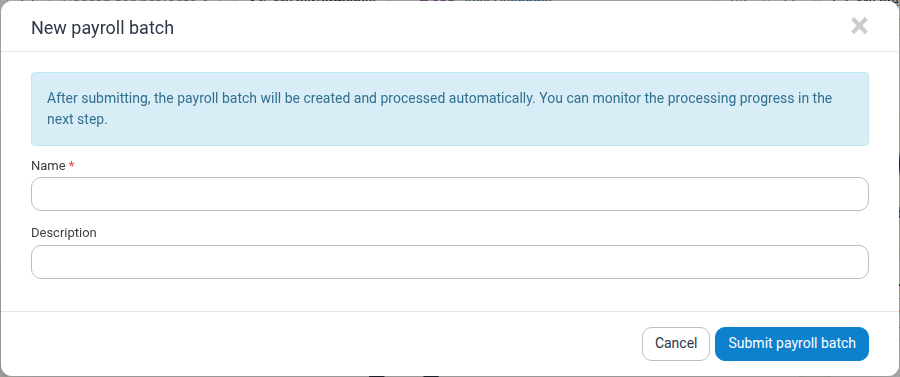
On the Payroll batches page, click New payroll batch.
-
Enter a Name for the batch (required) and an optional Description.
-
Click Submit payroll batch.
After submitting, the batch is created and processed automatically. You can follow the Processing progress column on the list, and open the batch to see the result once processing is complete.
Viewing a Batch
Click a batch row to open its details.
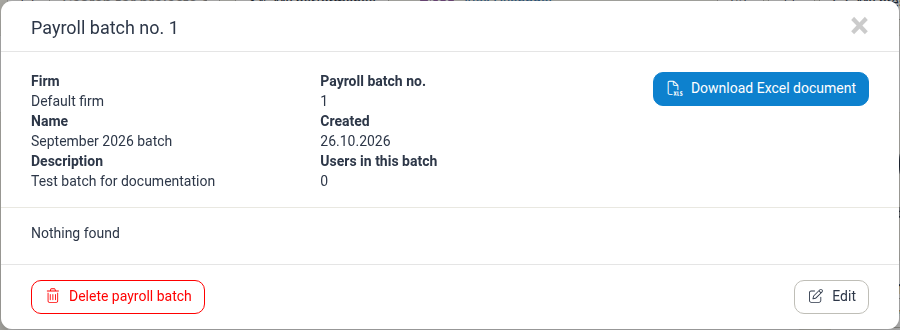
The details show the batch's Firm, Name, Description, Payroll batch no., Created date and Users in this batch, along with the list of payroll lines the batch produced. Use Download Excel document to download the processed payroll data.
- Edit — change the batch's name or description.
- Delete payroll batch — remove the batch. A confirmation asks you to confirm before the batch is removed, stating that all entries will become editable by the user unless they have been invoiced.

Deleting a batch does not delete the underlying time, travel or per-diem entries. It releases them from payroll so they become editable again — unless they have already been invoiced, or they fall in a closed pay period, in which case they stay locked.
Best Practices
- Preview before processing — always run a preview to confirm the right users and periods are included before creating a batch.
- Review completed periods — batches normally include only past, unprocessed periods, so review and confirm hours first. See Confirmations and Pay Periods.
- Name batches clearly — include the period, for example "September 2026 salary", so the list is easy to audit.
- Download and archive — download the Excel document for each batch and store it with your payroll records.
Related Documentation
- Payroll — Overview of the Payroll section
- Pay Periods — Period dates, work quotas and closing periods
- Confirmations — Confirming employee hours before processing
- Firm Payroll Settings — Period dates, working hours and payroll rules