
Introduction (Purpose & Benefit)
Custom roles allow you to define specific sets of permissions for users, providing granular control over access to different parts of the system. While Manor provides standard built-in roles (Employee, Manager, Administrator), custom roles let you tailor permissions precisely to match distinct job responsibilities, such as project managers, billing specialists, or external contractors.
Key Fields & Concepts
- Role Name: The descriptive title of the custom role (e.g., "Project Manager", "Billing Specialist", "Auditor").
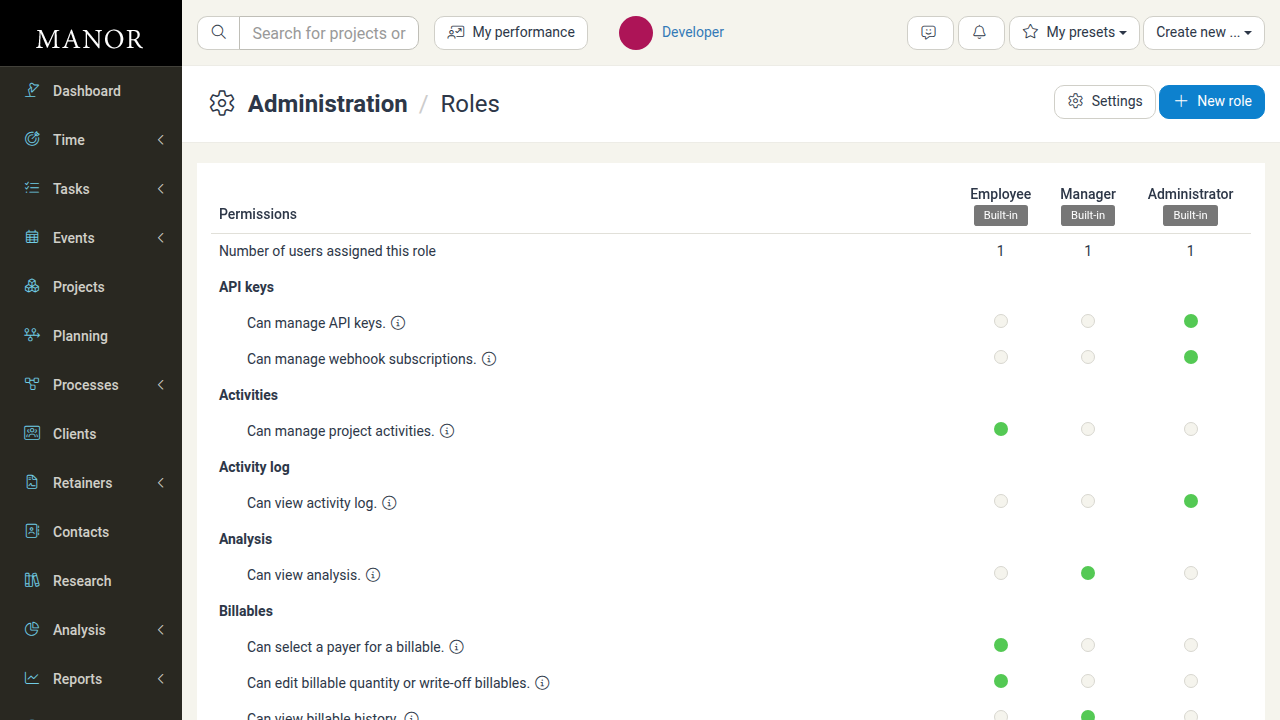
- Permissions Matrix: The grid displaying system capabilities organized into logical functional modules. Each column represents a role, and rows indicate granted capabilities.
Permission Structure
Permissions are grouped alphabetically into operational modules with granular checkboxes:
- API keys & Webhooks — Manage API credentials and webhook subscriptions
- Activities & Tasks — Control project activity setups and task operations
- Activity log & Data — Audit user activity logs and access raw data tables
- Clients & Contacts — Manage client accounts and address books
- Expenses, Travels, Per Diems & Bundles — Manage non-time project expenditures
- Invoices & Prices — Invoicing permissions, proposals, delivery tracking, credit notes, and price controls
- Payroll (Pay periods) — Manage payroll periods, analysis reports, and hour confirmations
- Planning — Operate the resource planner firm-wide, by department, or view as a member
- Projects & Assets — Creation, visibility (confidential/sensitive), editing, and financial margin oversight
- Rates, Currencies & VAT rates — Configure pricing tables, exchange currencies, and tax rates
- Roles & Users — User administration and custom role governance
- Settings & Templates — System preferences, firm management, and document templates
- Time — Self time tracking, editing entries for others, or department manager time approvals
- Vacation requests — Submit, view overviews, and approve vacation leave
For the complete list of individual permissions and descriptions, see Custom Role Permissions.
Creating a New Custom Role
To create a new custom role:
-
Navigate to Administration from the main navigation.
-
Click on Roles.
-
Click the New role button in the top right.
-
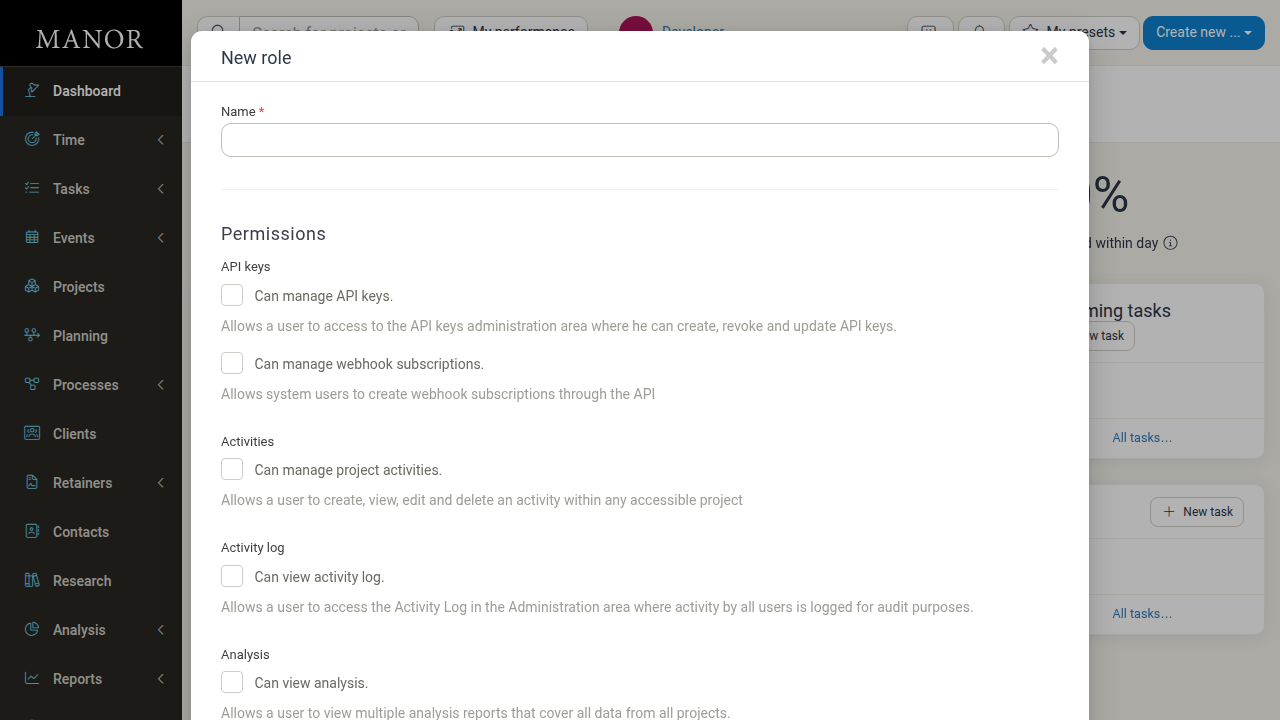
Enter a descriptive Name for the role.
-
Select the desired permissions by checking the corresponding checkboxes across the permission categories.
-
Click the Save button to create the role.
The newly created role will now appear as a column in the permissions matrix on the Roles page.
Managing Custom Roles
Finding Custom Roles
- Go to the Roles page in the Administration section (
/administration/role). - You will see a permissions matrix listing all roles. Custom roles appear as columns alongside the built-in roles (Employee, Manager, Administrator).
Editing Custom Roles and Permissions
- Go to the Roles page in the Administration section.
- In the permissions matrix, locate your custom role column.
- Click the edit link next to the role name in the matrix header.
- Modify the role name or check/uncheck permissions to adjust access.
- Click Save to apply changes immediately for all users assigned to that role.
Deleting Custom Roles
- Go to the Roles page in the Administration section.
- In the permissions matrix, locate the custom role you wish to delete.
- Click the edit link next to the role name to open the role form.
- Click the Delete role button at the bottom of the form.
- Confirm the deletion in the confirmation dialog.
Note: A role cannot be deleted if active users are currently assigned to it. Reassign those users to another role in Administration → Users before deleting.
Assigning Custom Roles to Users
Once created, custom roles can be assigned to users:
- Navigate to Administration → Users.
- Click on the user whose permissions you want to change.
- In the user edit form, select the custom role under Roles.
- Click Save user.
Best Practices
- Follow the Principle of Least Privilege: Grant only the permissions necessary for users to perform their job duties.
- Use Descriptive Names: Clearly identify the purpose of the role (e.g., "Billing Specialist" or "Junior Project Lead").
- Review Permissions Periodically: Regularly audit role permissions and assignments to ensure they remain aligned with organizational responsibilities.
- Avoid Overlapping Roles: Design roles with distinct boundaries rather than creating duplicate or redundant roles with slight differences.
Related Topics
- Custom Role Permissions — Dedicated summary and permission structure reference
- User Roles — Overview of built-in system roles and general role management
- Users — How to create users and assign roles