
Introduction
Hour confirmations provide an approval layer that ensures the time entries logged during a pay period are reviewed and verified before payroll calculations are finalized. The Confirmations section has two levels:
- The confirmations list, which shows every pay period together with how many of its users have confirmed their hours.
- The pay-period detail view, which opens when you click a period and lists the individual users in that period with their confirmation status.
Confirmations help eliminate discrepancies between employees and payroll administrators by establishing mutual agreement on logged working hours, overtime and leave.
Note: The Confirmations pages are part of the optional Payroll feature and only appear once payroll is enabled. See Payroll for how to enable it.
Key Concepts
- Confirmed by user: The date and time at which the employee reviewed and confirmed their own logged hours for the period. Until then the column reads Not confirmed.
- Confirmed by manager: The date and time at which a manager confirmed the employee's hours on their behalf. This is a separate, optional step. The corresponding column appears whenever manager hour confirmation is enabled for the instance — it is not controlled by the firm's payroll settings.
- Confirmation ratio: The percentage of the period's active users who have confirmed their own hours (users who are Confirmed by user).
- Working quota: The expected working hours for a full-time employee in the period, based on the firm's daily working hours and excluding weekends and holidays.
- Enabled: Whether the user's account is active. Disabled users' rows are shown greyed out.
The Confirmations List
To open the list, go to Payroll > Confirmations. The page lists one row per pay period for the selected firm.
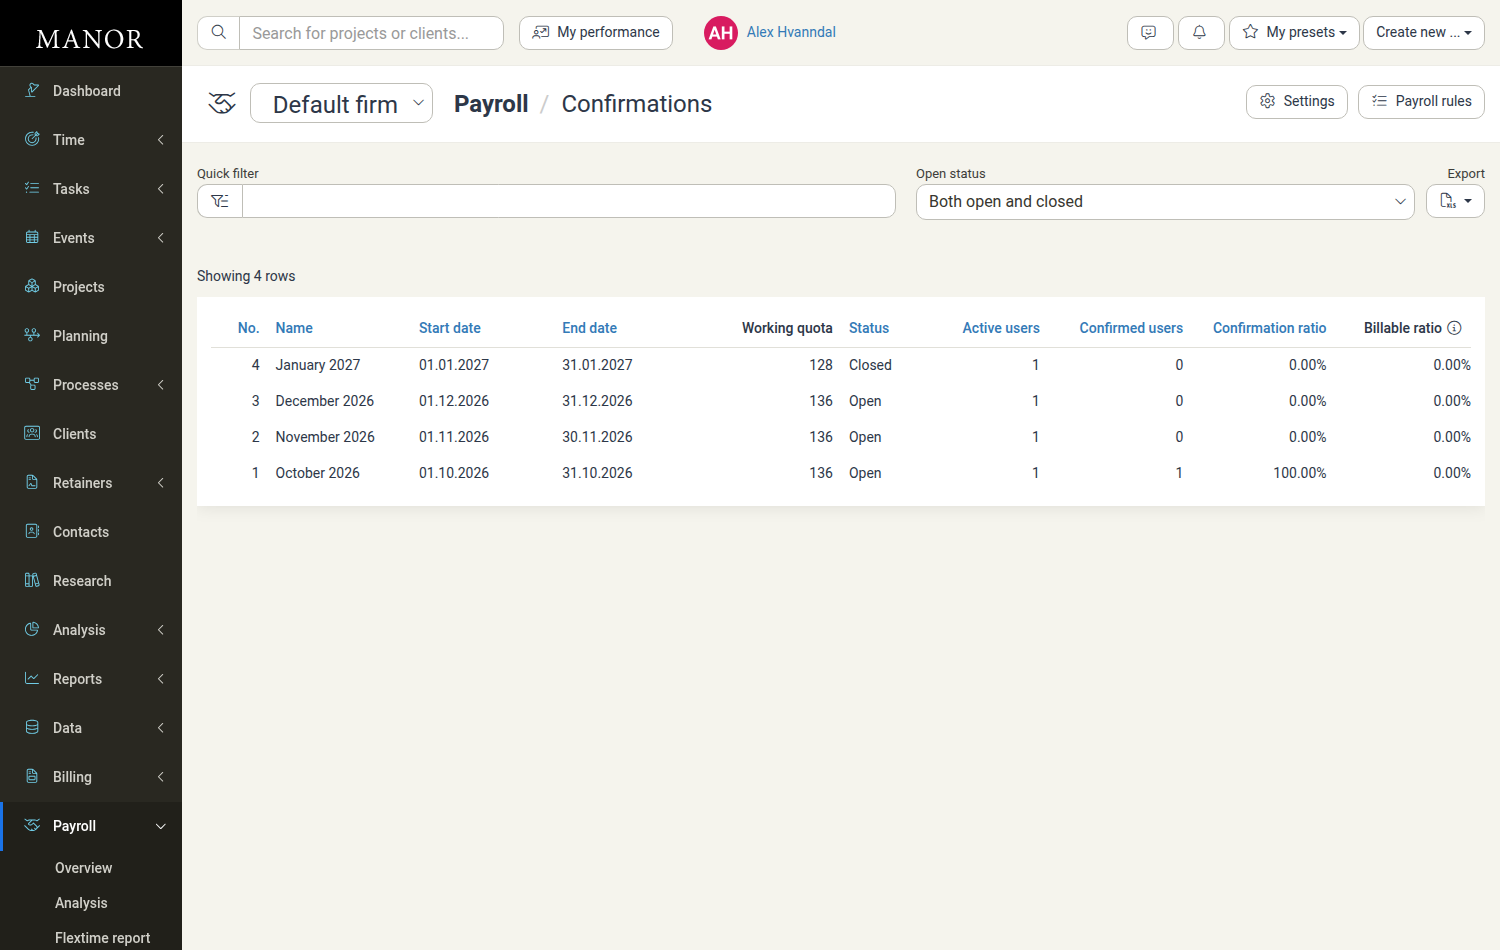
| Column | Description |
|---|---|
| No. | The pay period number. |
| Name | The period name, usually the month and year (for example "September 2026"). |
| Start date / End date | The first and last day of the period. |
| Working quota | The total expected working hours for a full-time employee in the period. |
| Status | Open or Closed. |
| Active users | The number of users included in the period. |
| Confirmed users | The number of users who have confirmed their hours. |
| Confirmation ratio | The percentage of active users who have confirmed. |
| Billable ratio | The percentage of logged hours that were added to billable projects. |
Use Quick filter to narrow the list and the Open status dropdown to show Both open and closed, Open or Closed periods. The firm shown at the top of the page restricts the list to a single firm; change it to view another firm's periods. Export downloads the list as a spreadsheet.
Note: The Quick filter matches the period's start date, end date, period number and creation date. It does not match the period's name, so typing a month name such as "December" returns no results. Search by a date or partial date (for example "2026-12") or by the period number instead.
Click any row to open that period's detail view. The Settings and Payroll rules links at the top of the page open the firm's payroll configuration.
The Pay-Period Detail View
Clicking a period — for example "September 2026" — opens the detail view for that individual period. The breadcrumb shows Payroll / Confirmations / [Period name].
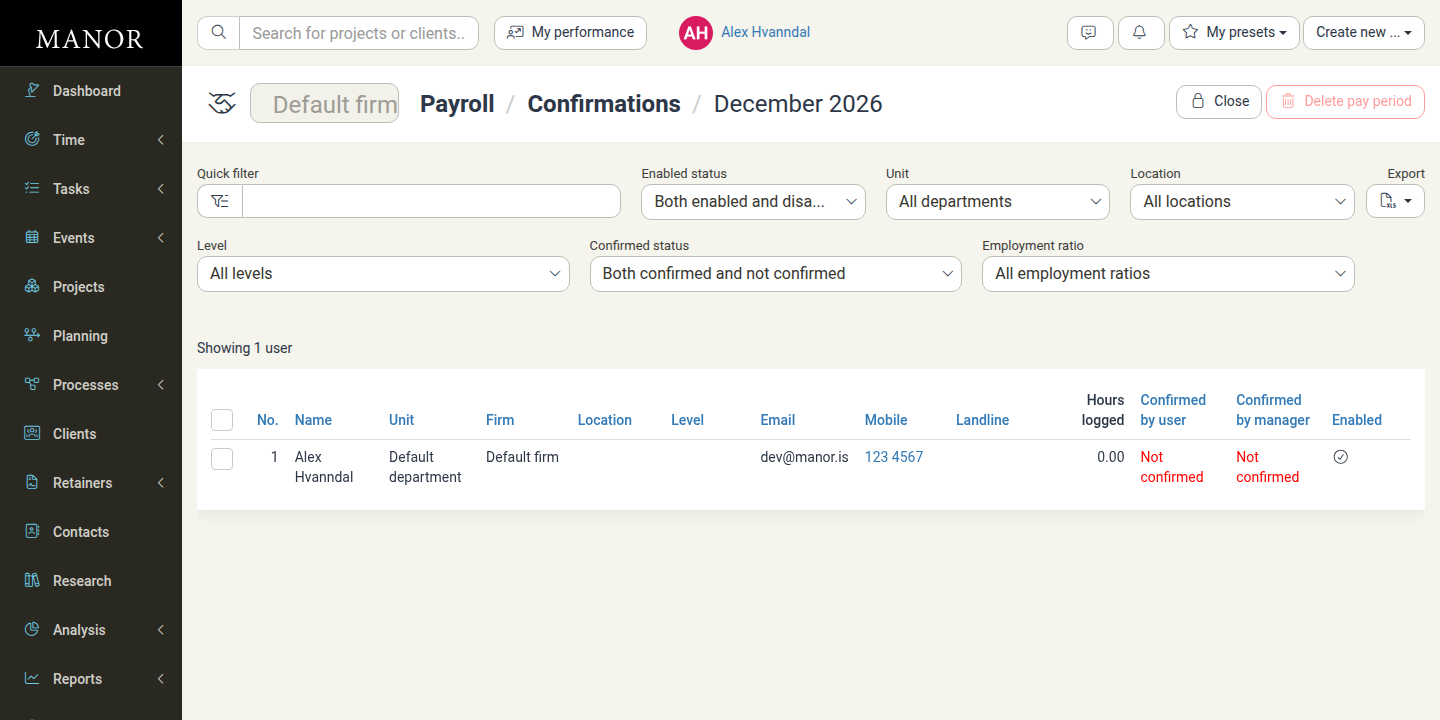
Period actions
At the top of the page:
- Close / Open — a toggle that closes or reopens the period. Closing locks the period's time records so no further time can be added, edited or deleted, and employees are no longer prompted to confirm it.
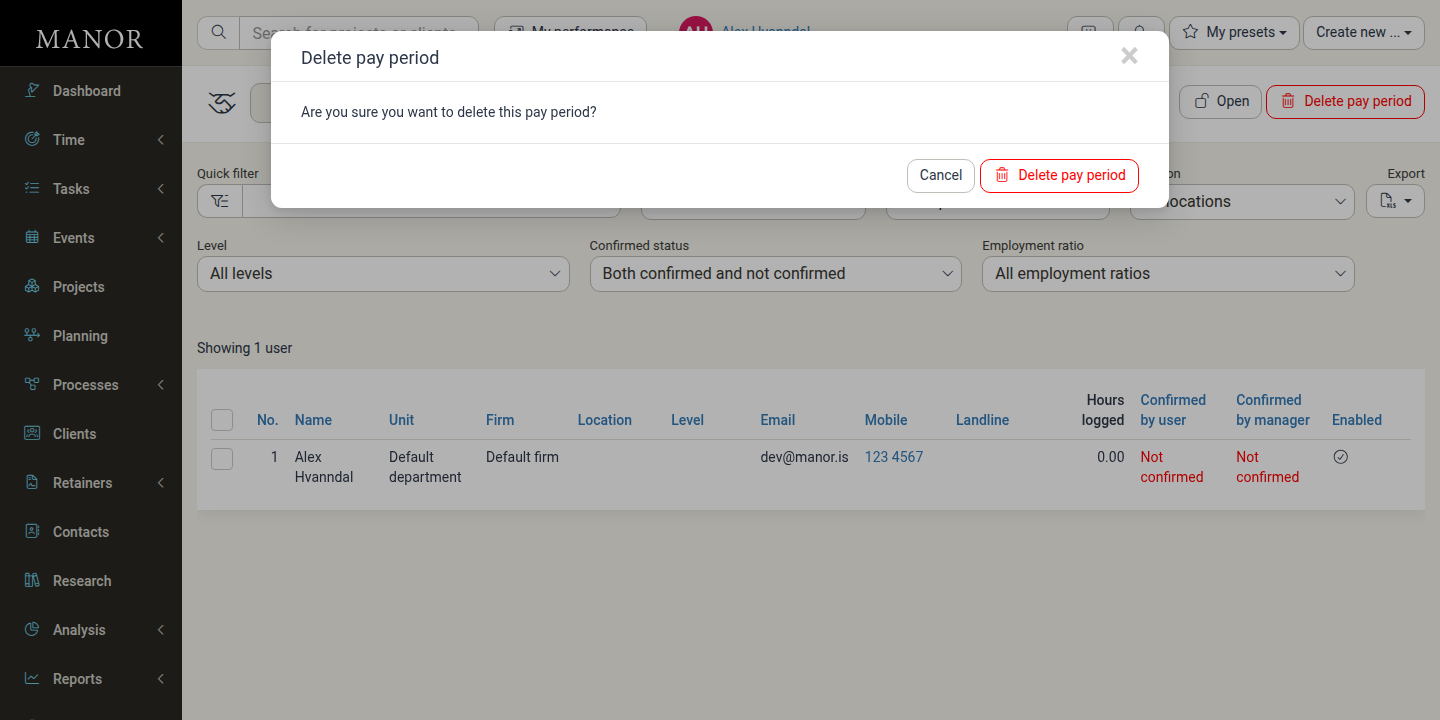
- Delete pay period — removes the period. This action is only available for the most recent pay period; for any earlier period the button is disabled and the note "Only the last pay period can be deleted." is shown next to it.
Clicking Delete pay period asks for confirmation before the period is removed.
The users table
Below the filters, the table lists the users included in the period. Columns are:
| Column | Description |
|---|---|
| No. | The row number. |
| Name | The user's name. |
| Unit | The user's unit (department). |
| Firm | The user's firm. |
| The user's email address. | |
| Mobile / Landline | The user's telephone numbers, shown as call links. |
| Hours logged | The total hours the user logged in the period. |
| Confirmed by user | The date and time the user confirmed their hours, or Not confirmed. |
| Confirmed by manager | The date and time a manager confirmed the user's hours, or Not confirmed. Shown when manager hour confirmation is enabled. |
| Enabled | Whether the user's account is active. Disabled rows are greyed out. |
The Location and Level columns appear between Firm and Email only when the firm has locations or levels defined (see Locations and Levels); if none are configured these two columns are hidden.
The header row shows the number of users (Showing N users). Selecting the header checkbox selects all rows and reveals the bulk confirmation actions (see below).
Filtering the user list
Use the filter controls at the top of the table to narrow the list:
- Quick filter — searches users by name, email or national ID.
- Enabled status — Both enabled and disabled, Disabled or Enabled.
- Unit — a specific unit or All departments.
- Confirmed status — Both confirmed and not confirmed, Confirmed or Not confirmed, to isolate pending approvals.
- Employment ratio — a specific employment ratio or All employment ratios.
The Location and Level filters (All locations / All levels) also appear only when the firm has locations or levels defined.
Export downloads the filtered list as a spreadsheet.
Each status filter stores the complete option labels, even when the closed dropdown is too narrow to display them in full. The options are:
- Enabled status: Both enabled and disabled, Disabled, Enabled.
- Confirmed status: Both confirmed and not confirmed, Confirmed, Not confirmed.
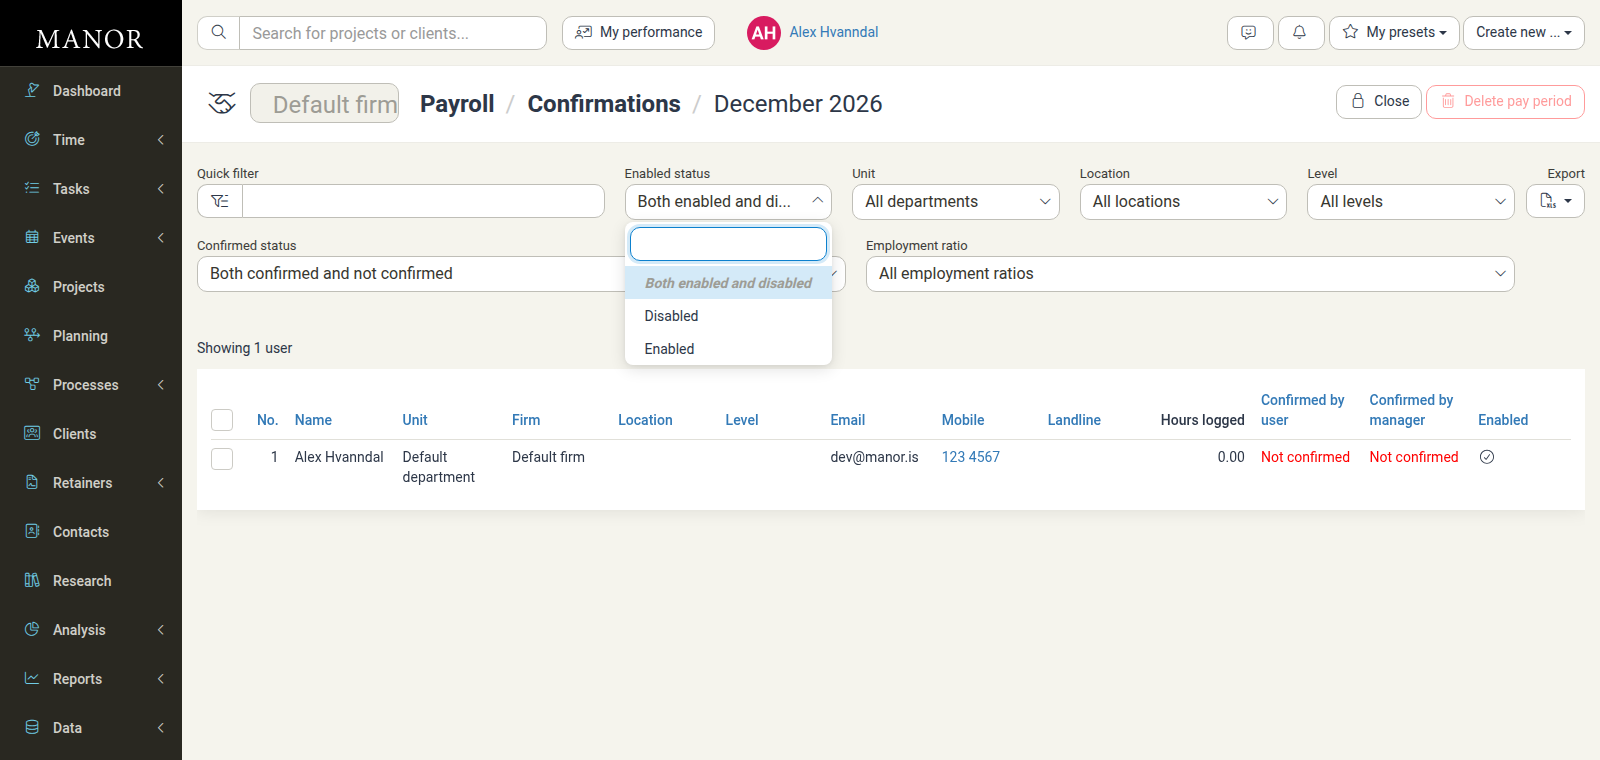
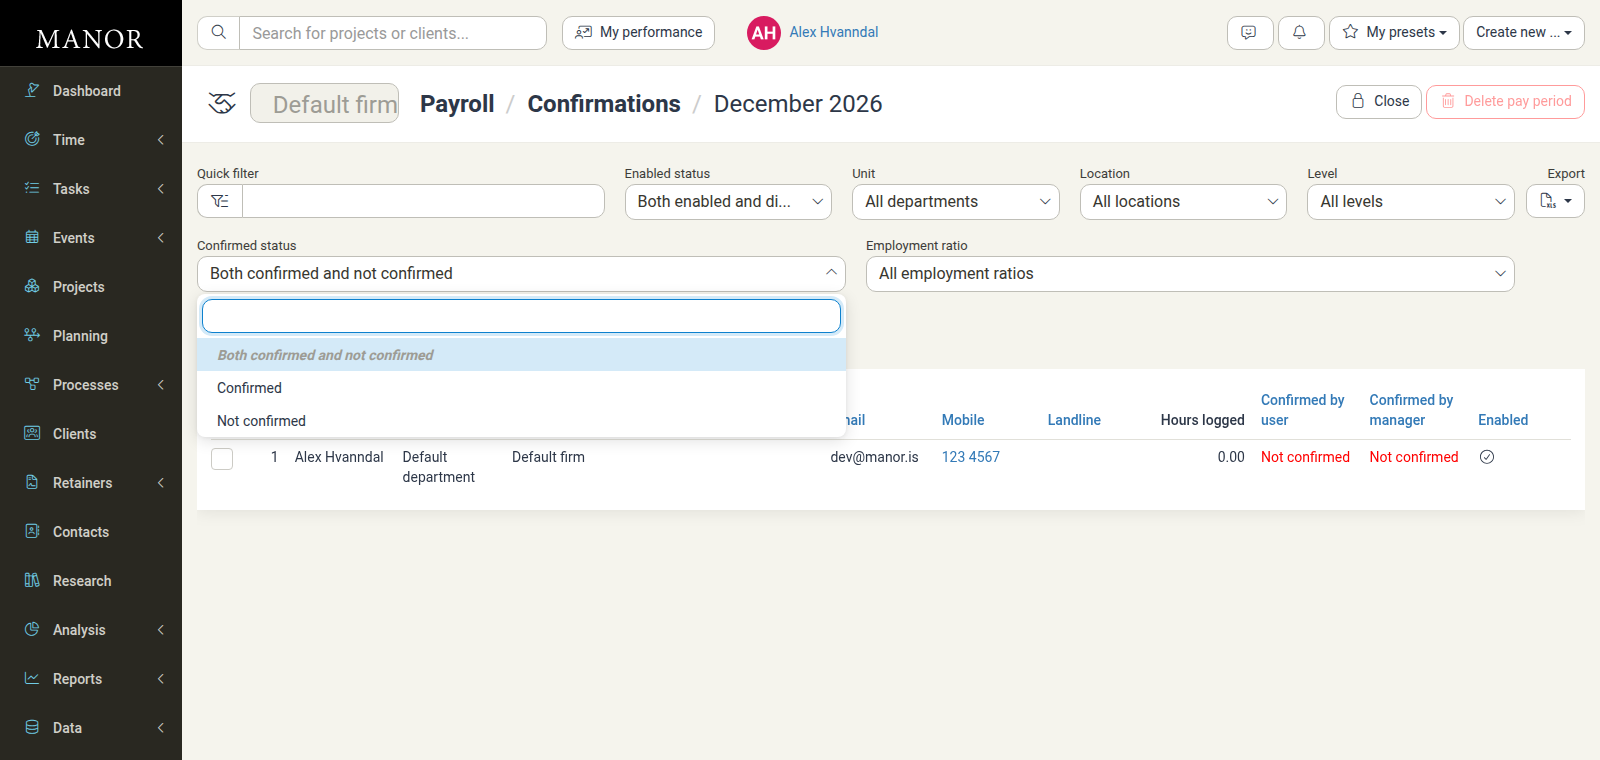
Note: At narrower window widths the value shown in the closed Enabled status and Confirmed status dropdowns is shortened with an ellipsis — for example Both enabled and disa… and Both confirmed and no…. This is only a display truncation: the stored option text is complete, and opening the dropdown reveals the full label (as shown above). Widening the window also shows the labels in full.
Confirming an individual user
Click a user's row to open the confirmation dialog for that user in that period, titled [Period name]: [User name].
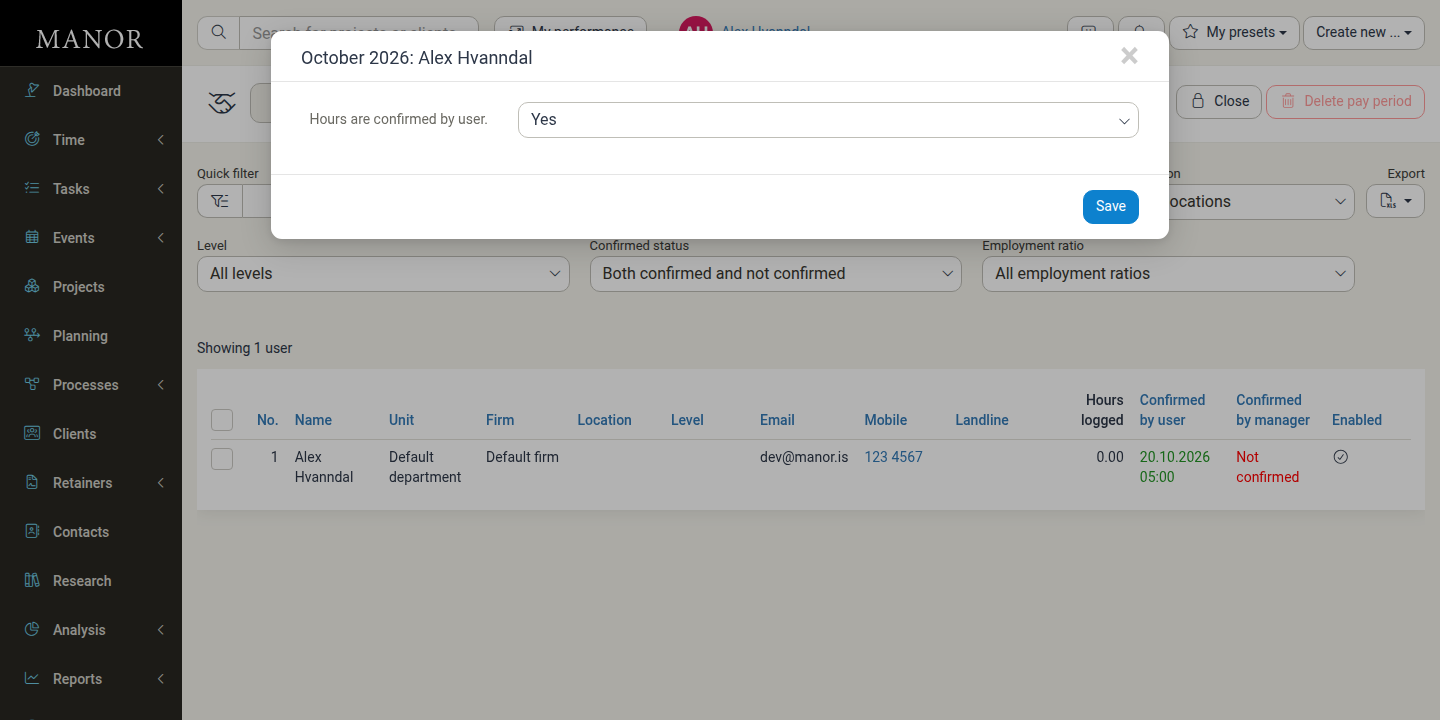
The dialog contains a Hours are confirmed by user. field with a Yes / No choice, which sets or clears the user's own confirmation for the period. Choosing Yes records the current date and time as the confirmation; choosing No clears it. Click Save to apply the change.
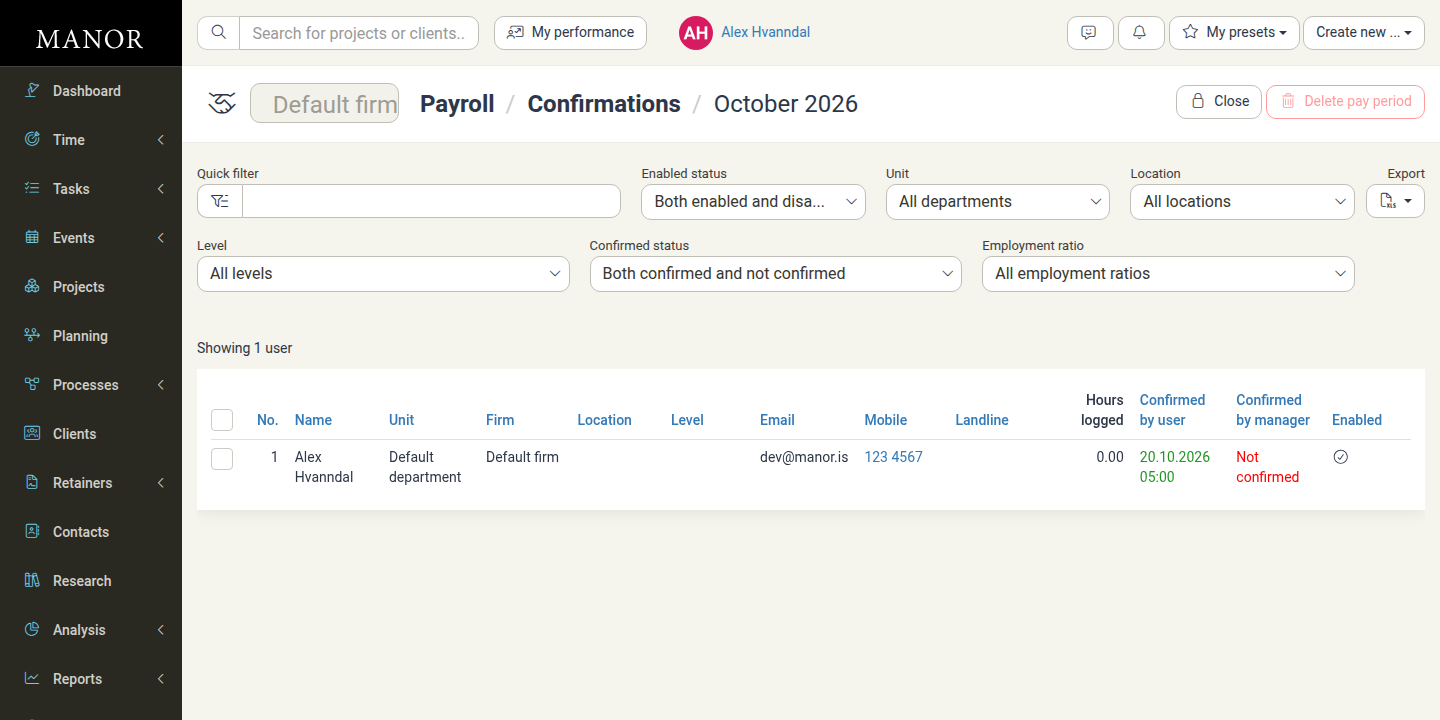
After saving, the user's Confirmed by user column shows the confirmation date and time instead of Not confirmed.
Confirming users in bulk
Select one or more users with the row checkboxes. The table header shows how many are selected and offers bulk actions:
- Confirmed by user — sets or clears the user confirmation for all selected users at once.
- Confirmed by manager — sets or clears the manager confirmation for all selected users at once. This action appears only when manager hour confirmation is enabled and you have the manager-confirmation permission.
Each bulk action opens a small dialog with a Confirmed status field (Yes or No) and a Save button.
Permissions
- Viewing and managing the Confirmations pages requires the payroll management permission — Can manage payroll (all firms) or Can manage payroll within own firm.
- Confirming hours on behalf of users requires the Can confirm hours as a firm or department manager, for users within the department permission. A manager can only confirm hours for users within the departments they manage.
Best Practices
- Monitor confirmation ratios regularly: check the confirmation ratios on the list page as the period deadline approaches to spot users who need a reminder.
- Use filter views for follow-ups: filter the user list by Not confirmed to build a targeted list of users who have not yet submitted their hours.
- Address discrepancies early: if a user's logged hours deviate significantly from their working quota, review their time entries before confirming.
- Close periods deliberately: only close a period once you are confident all time entries are complete, because closing prevents further edits.
Related Documentation
- Payroll — Overview of the Payroll section
- Pay Periods — Period generation, work quotas, closing and deleting periods
- Confirming your hours (self-service) — How employees confirm their own hours
- Payroll Alerts — Reminder alerts before a period closes
- Firm Payroll Settings — Setting working hours and confirmation permissions
- Employments — Managing employee employment ratios and schedules