
What are User Roles?
User roles define what users can see and do within Manor. Each role is assigned a set of permissions that control access to features, data, and administrative functions. Proper role management ensures security and appropriate access for every team member.
Why User Roles Matter
Managing roles effectively helps you:
- Control access - Limit users to only the features they need
- Maintain security - Prevent unauthorized access to sensitive data
- Simplify onboarding - Assign pre-configured roles to new users
- Enable compliance - Track who can access what information
- Customize workflows - Create roles that match your organization structure
Accessing User Roles
To manage user roles:
-
Navigate to Administration from the main menu.
-
Click on Roles.
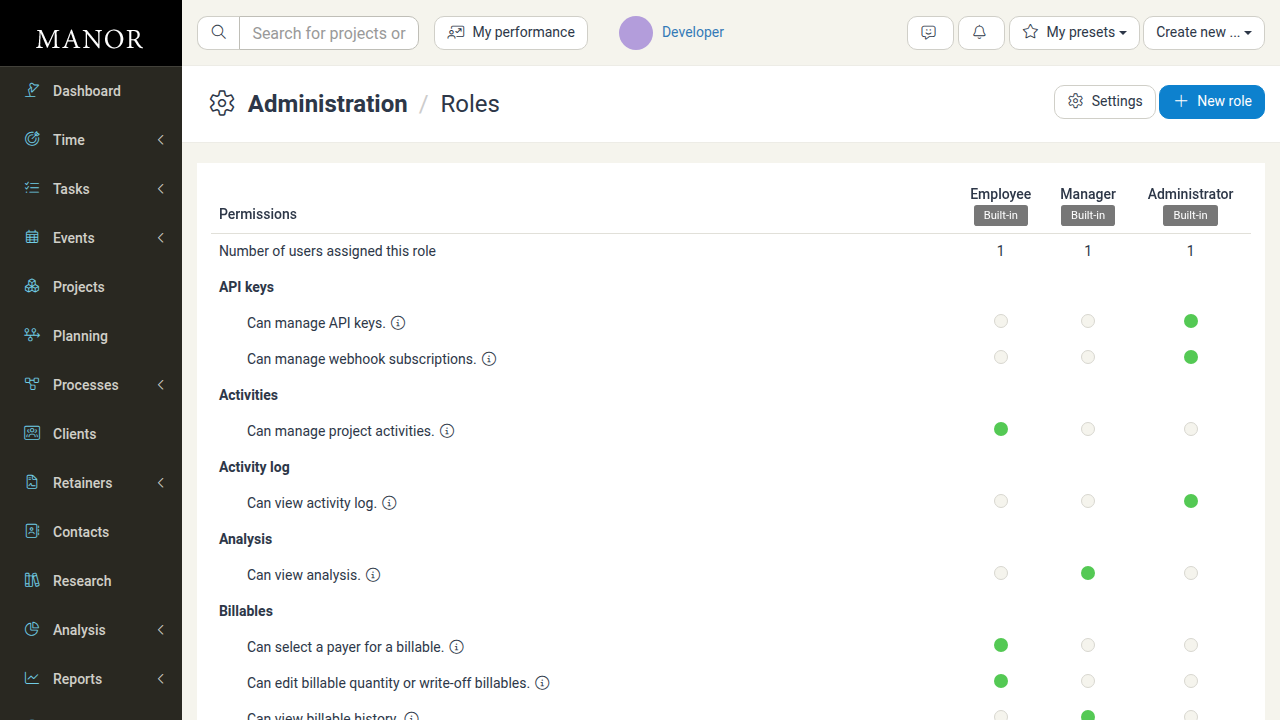
You will see a permissions table showing the three built-in roles and their associated permissions.
Configuring Default Roles for New Users
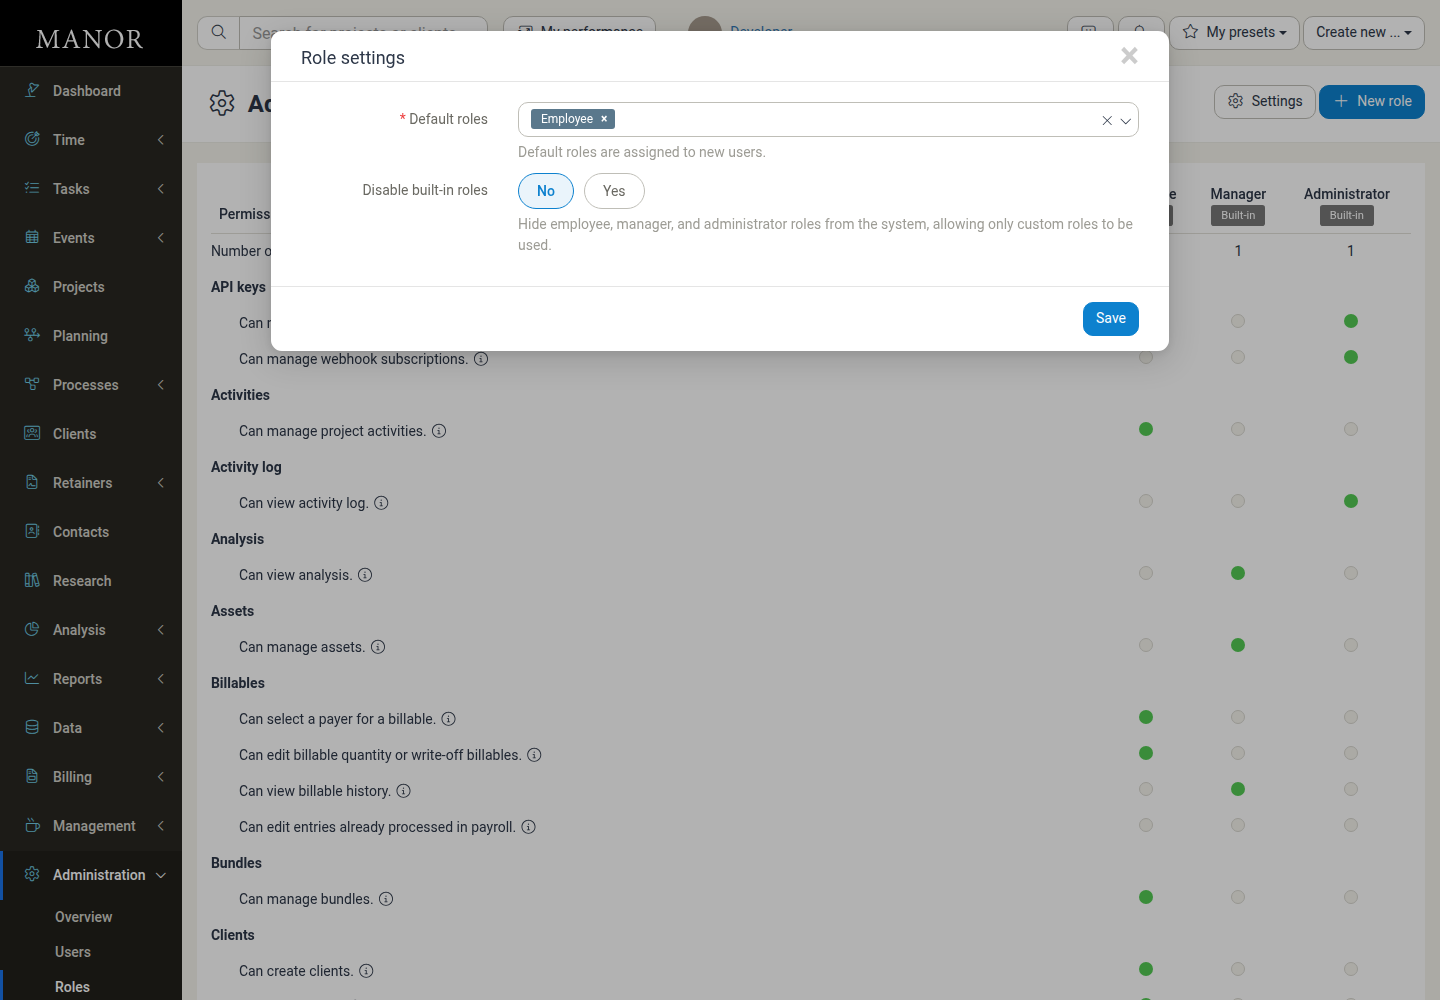
Default roles are automatically assigned to new users created via Single Sign-On (SSO) Just-In-Time provisioning, and are pre-selected when administrators add a user manually.
Settings are accessible from the Roles page for administrators:
- Navigate to Administration → Roles.
- Click the Settings button in the top-right corner of the page.
- In the Role settings dialog, use the Default roles multi-select field to choose which role or roles new users receive (built-in roles like Employee, Manager, Administrator, or any custom roles). Selected roles appear as removable tags.
- Out of the box, only the Employee role is selected as a default role.
- Choose whether to hide the built-in roles using the Disable built-in roles option (see Hiding Built-in Roles below).
- Click Save to apply your changes.
For a detailed explanation, see Default Role Settings.
Hiding Built-in Roles
The Role settings dialog also contains a Disable built-in roles setting that lets you prevent built-in roles from being used at all.
- No (default) - The built-in Employee, Manager, and Administrator roles remain available and can be assigned to users.
- Yes - The Employee, Manager, and Administrator roles are hidden from the system, so that only custom roles are available. Users can then only be assigned custom roles.
The helper text for this setting describes it as: "Hide employee, manager, and administrator roles from the system, allowing only custom roles to be used."
Click Save to apply your changes.
Creating a New Role
To create a custom role:
-
From the Roles page, click the New role button.
-
Enter a name for the role (e.g., "Project Manager", "Billing Specialist").
-
Configure permissions for the role by selecting which capabilities users with this role should have.
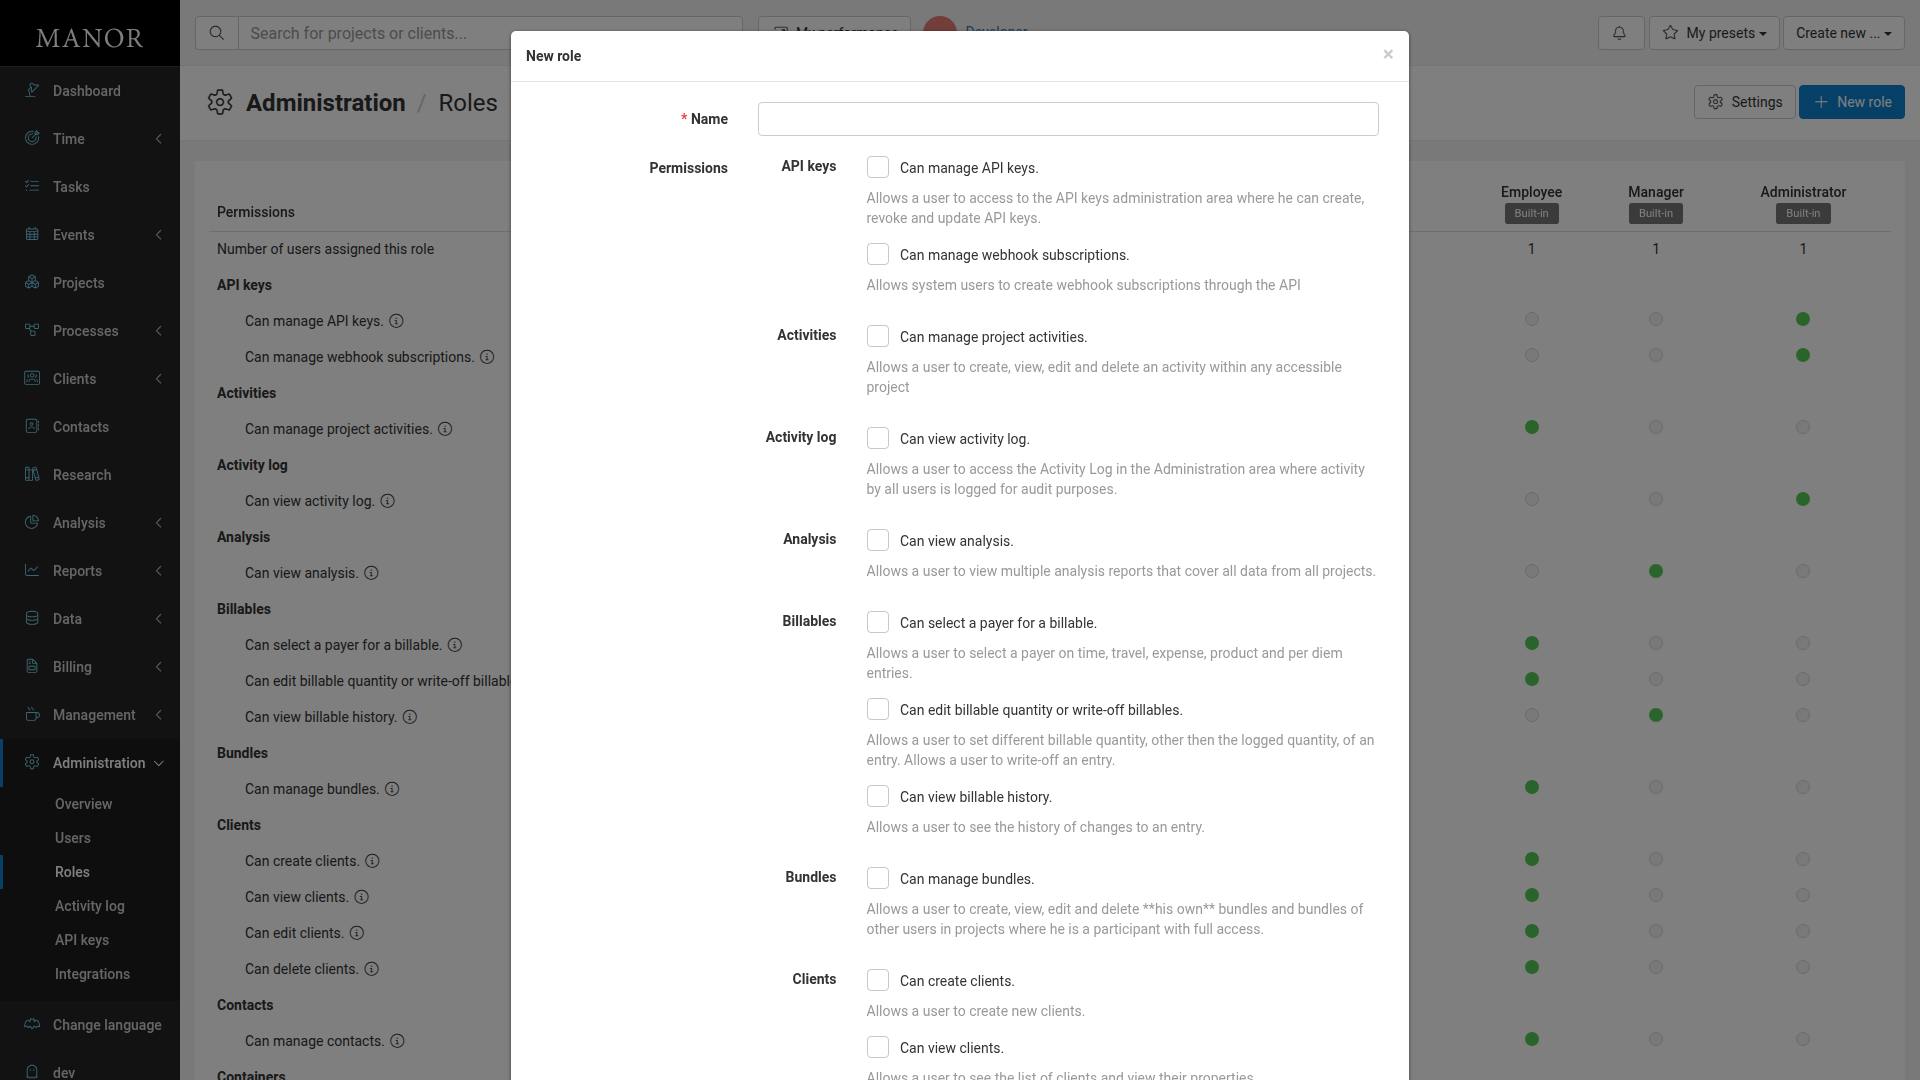
- Click Save role to create the custom role.
What You Can Do with Roles
Assign to Users
Give users their permissions by assigning them to appropriate roles.
Customize Permissions
Fine-tune exactly what each role can see and do in the system.
Create Specialized Roles
Build roles for specific job functions like billing, project management, or time entry only.
Review Role Assignments
See which users belong to each role.
Important Role Concepts
System Roles (Built-in)
Pre-defined roles that come with default permissions:
- Administrator - Full system access including all management and settings
- Manager - Broad access for managing projects, users, and invoices
- Employee - Limited access focused on time tracking, tasks, and project participation
Custom Roles
Roles you create to match your specific organizational needs, with fine-grained permissions tailored to your team structure.
Permissions
Individual capabilities that control access to features (e.g., "can create invoices", "can view all projects", "can manage users").
Note: No role has any vacation permission enabled out of the box. Because of this, the entire Vacation area — vacation requests, the vacation overview, and the manager vacation view — is hidden from every user until an administrator explicitly grants the permissions Can manage vacation requests, Can manage vacation requests as department manager, Can view vacation overview, and Can view vacation overview as department manager. This applies to the built-in roles as well as any custom role.
Managing Roles
Viewing Built-in Roles
All system roles are displayed on the Roles page in a permissions table showing:
- Number of users assigned to each role
- Detailed permission list for each role category (Clients, Invoices, Projects, Users, etc.)
Editing a Built-in Role
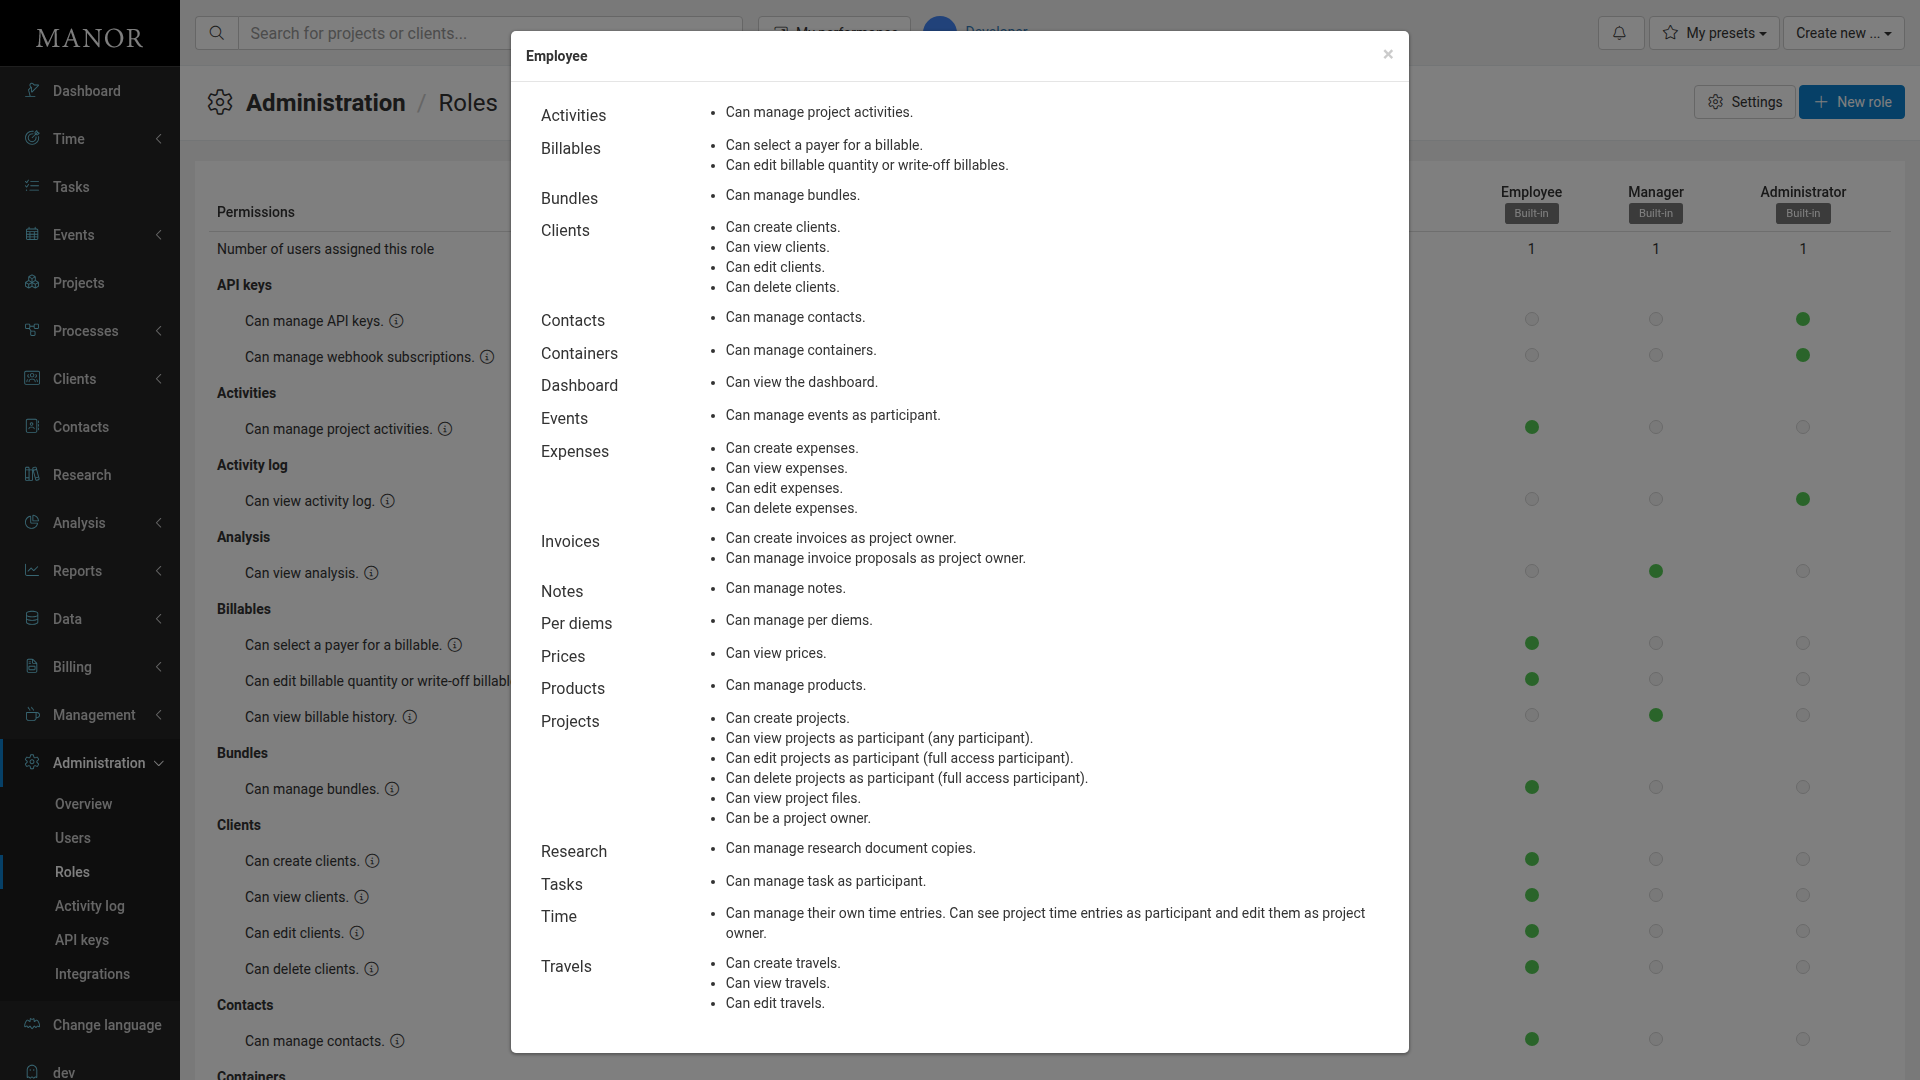
Click the Built-in badge next to a role name (such as "Employee", "Manager", or "Administrator") to view that role's detailed permissions. Built-in roles cannot be modified.
Creating a Custom Role
- Click New role on the Roles page
- Enter a role name
- Configure permissions as needed
- Click Save role
Deleting a Custom Role
You cannot delete a role that has users assigned to it. Reassign users to a different role first, then delete the custom role.
Assigning Roles to Users
- Navigate to Administration → Users
- Select a user
- Change their role in the user settings
- Click Save
Using Roles for Success
Security
Ensure users only have access to data and features relevant to their job function.
Efficiency
Users see only the features they need, reducing interface clutter and confusion.
Scalability
Easily onboard new users by assigning appropriate pre-configured roles.
Best Practices
Principle of Least Privilege
Give users only the minimum permissions they need to do their job. Start with a restrictive role and add permissions as needed.
Regular Review
Periodically review role assignments to ensure they still match current job functions and responsibilities.
Document Custom Roles
Keep notes on what each custom role is designed for and which team members should have it.
Use Clear Naming
Use descriptive names for custom roles that clearly indicate their purpose (e.g., "Billing Specialist" instead of "Role1").