
What is My Presets?
My Presets gives you quick access to your personal time-entry presets. A preset is a saved set of details for logging time — for example a project, duration and description that you use again and again. Instead of filling in the same information every time, you pick a preset and the Log time form opens with those fields already filled in.
Presets are personal: they are only visible to you, and every user builds their own list.
The My presets menu is specifically about time entries. It does not save list views, dashboard filters, or reports.
Opening the My presets menu
The My presets button is in the top toolbar, on the right side of the page next to Create new….
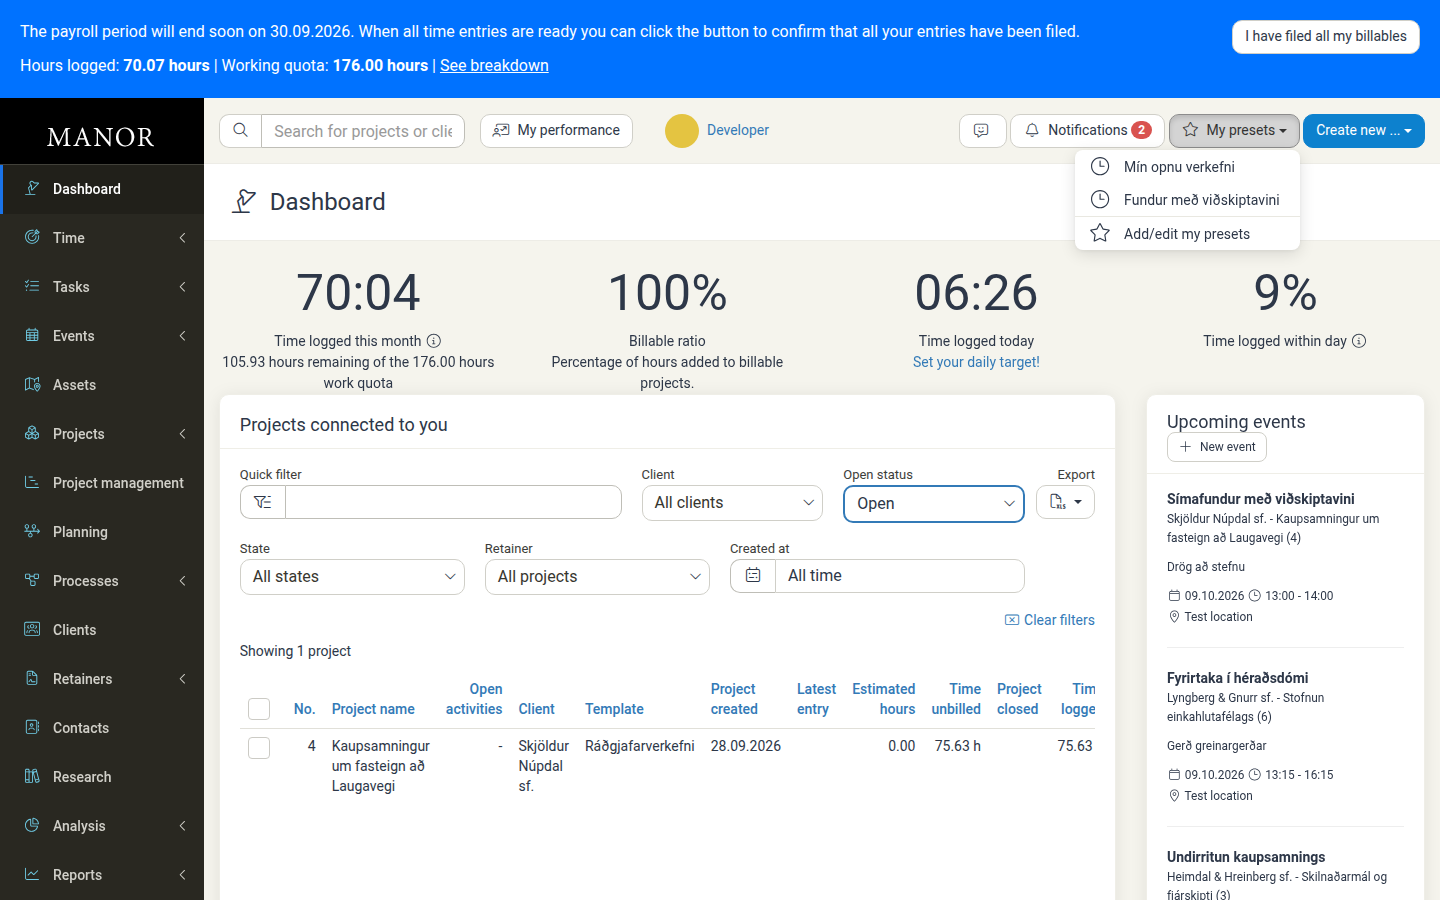
Click it to open a flat menu listing your saved presets. Below a divider at the bottom of the menu is the Add/edit my presets link, which takes you to the page where you create and manage your presets. There are no section headings or category groups — just your presets, then the management link.
Using a preset
- Click My presets in the top toolbar.
- Click the name of the preset you want to use.
- The Log time form (titled New time) opens with the preset's fields already filled in.
- Adjust anything that is different this time — for example the date, duration or description.
- Save the entry as usual.
The preset does not create the entry for you; it only pre-fills the form so you can review and confirm it.
There are no preset shortcut buttons inside the time form itself. To use a preset you always start from the My presets menu.
Creating a preset
-
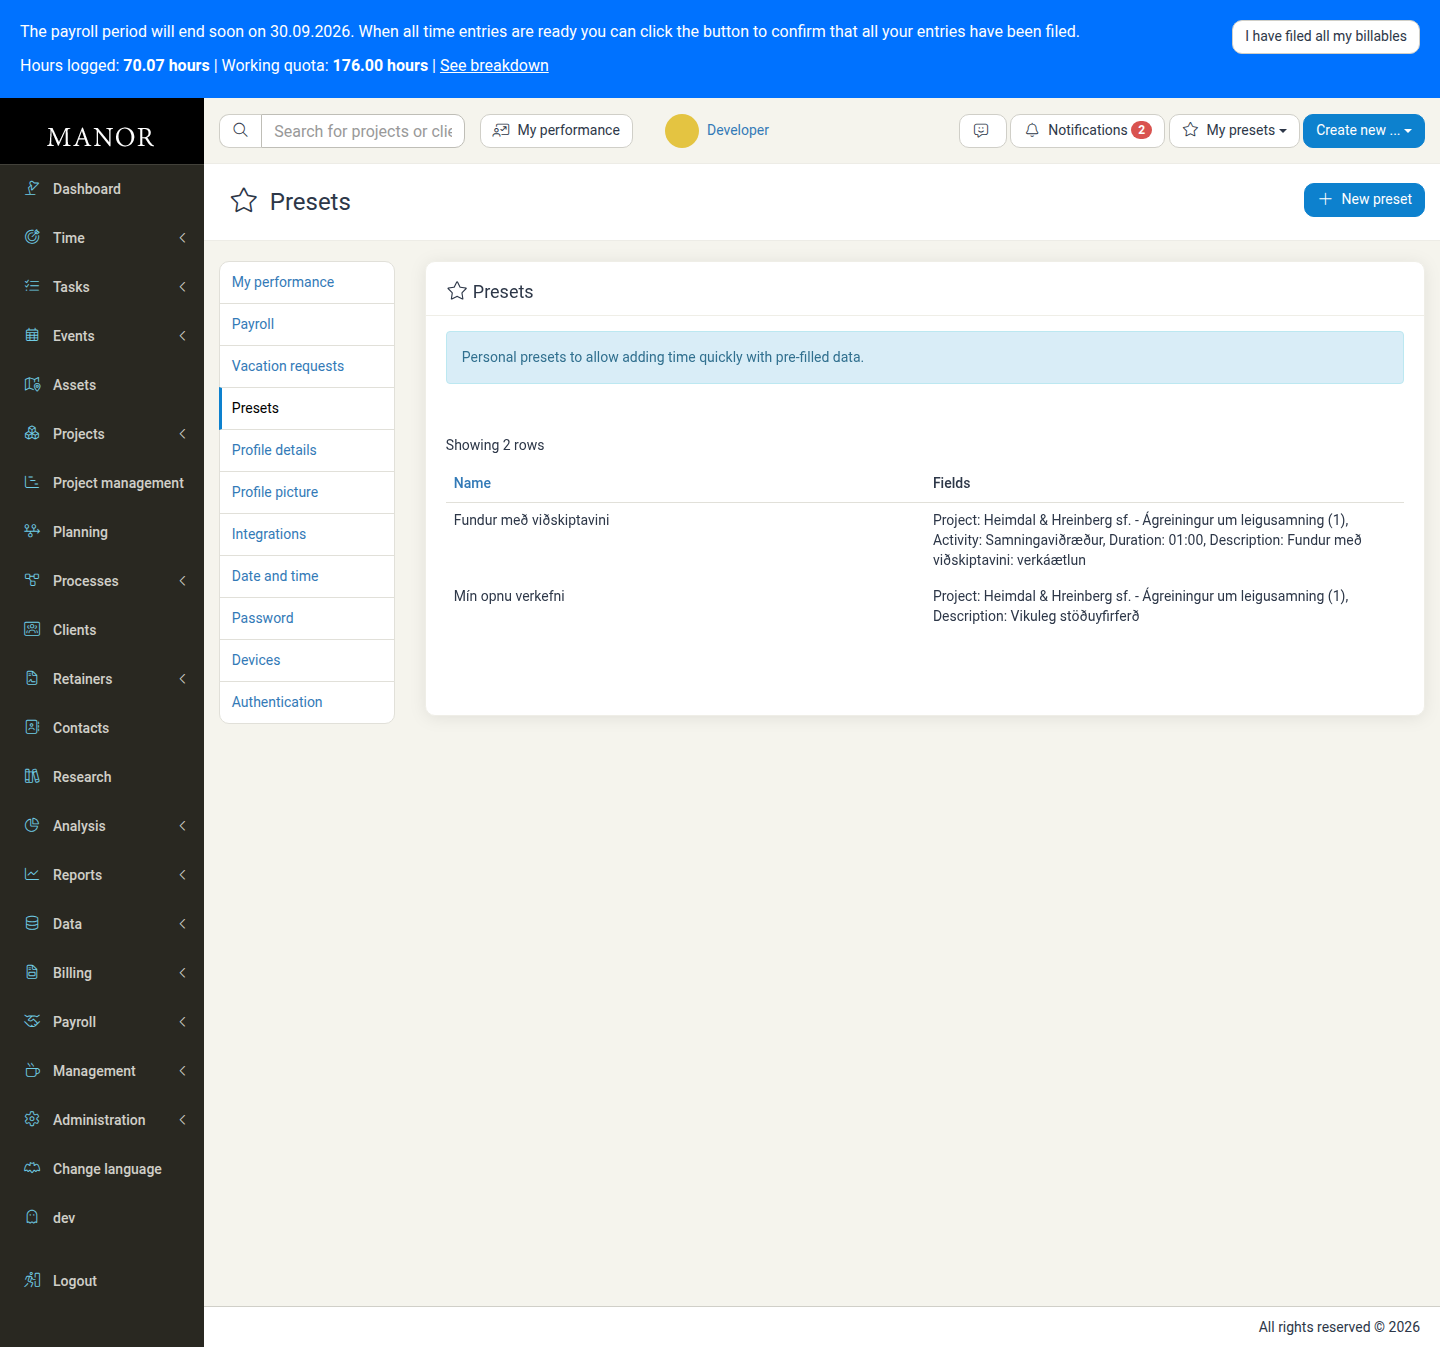
Open My presets and click Add/edit my presets at the bottom of the menu. This opens the Presets page under your profile.
-
Click New preset.
-
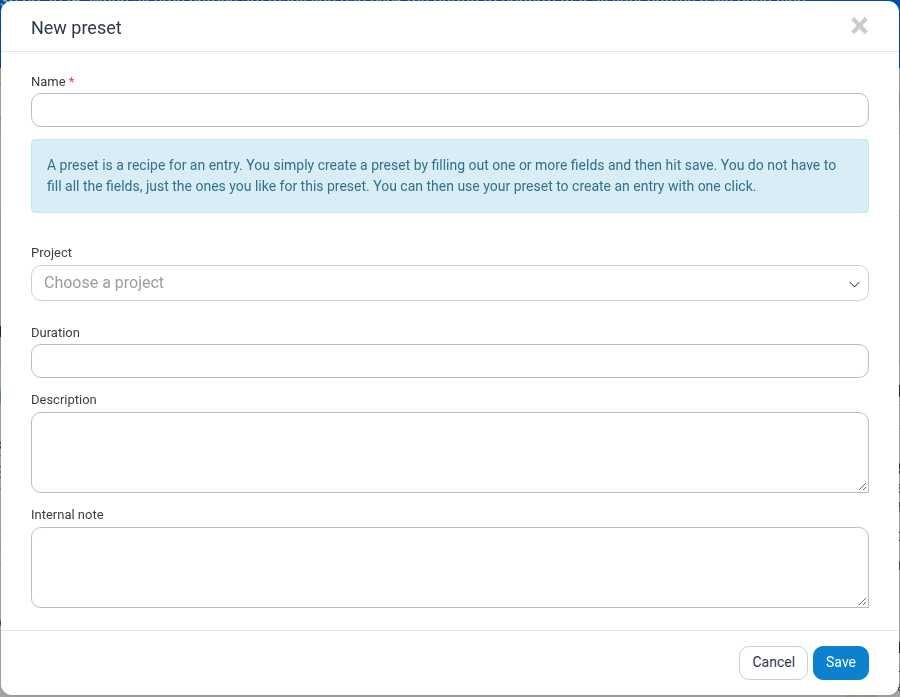
In the New preset dialog, fill in the fields you want to pre-fill. Only Name is required — you can leave the other fields empty.
-
Click Save.
The dialog explains the idea in its own words: a preset is a recipe for an entry, you fill in one or more fields and save, and you can then use it to create an entry with one click.
Editing or deleting a preset
-
Open the Presets page (My presets → Add/edit my presets).
-
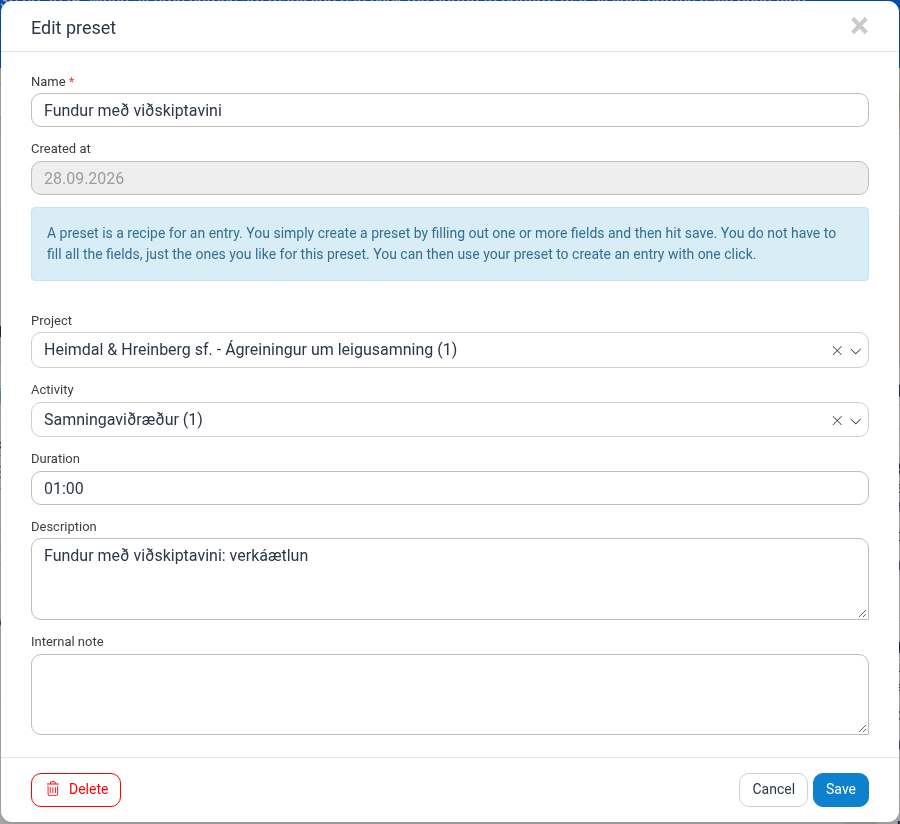
Click the row of the preset you want to change. The Edit preset dialog opens.
-
Change any fields you want to update.
-
Do one of the following:
- Click Save to keep your changes.
- Click Cancel to leave the preset unchanged.
- Click Delete (bottom left) to remove the preset.
The Edit preset dialog also shows a read-only Created at date so you can see when the preset was made. Deleting a preset does not affect any time entries you already created with it.
Preset fields
| Field | What it does |
|---|---|
| Name | The label shown in the My presets menu. Required. |
| Project | The project the preset logs time against. |
| Activity | The activity within the project (shown when editing an existing preset). |
| Duration | A default duration, for example 01:00. |
| Description | A starting description for the entry. |
| Internal note | A private note that is not visible on invoices or work reports. |
| Created at | Read-only. The date the preset was created. |
Notes
- Presets are personal. Other users cannot see or use your presets.
- Presets only apply to time entries. They do not save filters, columns or dashboard views.
- You do not have to fill every field. A preset with just a project, or just a description, is still useful.
- Update presets as your work changes. If a project closes or a routine changes, edit or delete the preset so your menu stays useful.
Related Documentation
- Presets — Detailed guide to creating and using time-entry presets.
- Saved List Views and Presets — Why list views and dashboards cannot be saved as presets.
- Time Tracking — How time entries work in Manor.