
Overview
This guide walks you through the complete lifecycle of managing a project in Manor—from initial creation through final closure. Whether you're a project manager, team member, or administrator, understanding this workflow will help you use Manor efficiently and keep all project information organized.
The Project Lifecycle
Projects in Manor follow a typical lifecycle with several key phases:
- Planning — Create the project and establish its structure
- Staffing — Assign team members and set up roles
- Execution — Log time, track activities, and manage work
- Delivery — Follow progress and keep the client informed
- Billing — Invoice for completed work
- Closure — Close, lock and analyze project outcomes
Phase 1: Planning & Creation
Step 1: Create the Project
Before any work begins, create your project in Manor:
- Click Projects in the main navigation
- Click New project in the top right corner
- Fill in the basic details:
- Project name (required) — a clear, descriptive name (e.g. "Website Redesign - Acme Corp")
- Description — free text describing the engagement
- Client — search for and select an existing client, or click New client to create one
- Click Advanced project properties to reveal the rest of the form, including Properties, Limits, Invoice details and the participant list. Only the participants list requires at least one person.
- Click Save project to create it
The full field-by-field description of the create dialog is in Project Creation. The most important optional settings for the workflow are:
- Contacts — add key contacts from the client organization
- Type — choose the project type (default: Billing enabled)
- Participants — the people who can work on the project; the owner is chosen by marking one participant as Owner with the radio button (there is no separate Owner field)
- Hours budget, Monetary budget and Balance warning under Limits — the project's budgets and warning thresholds
Tip: Use clear naming conventions like "Client Name - Project Type - Year" to make projects easier to find later.
Note: The New project dialog does not have a Labels field, and an individual project has no Status field you set by hand. Labels are applied to projects from the Projects list (select projects, then use the Add labels mass action); the Labels column shows the result. A project's status is controlled by the Close project ... and Lock project ... actions described later.
Step 2: Set Up Project Structure
Once your project is created, organize it with additional information:
Create Activities (if applicable)
- Click New activity in the project action bar (once the project already has activities, you can also use New activity in the Activities panel)
- Fill in the activity, for example Name (required), Description, Framework agreement, Payer, Contacts, Excluded from billing, Monetary budget, Required qualification, Assignee, Begins at/Ends at, Hours budget, Parent, Predecessors and Successors
- Click Save activity
- Assign activities to team members through the Assignee field, or later with Assign in Project management
Tip: Activities help you track time and budgets by work type. Create meaningful activity names like "Discovery", "Design", or "Development". See Activities for the full list of fields.
Upload Files
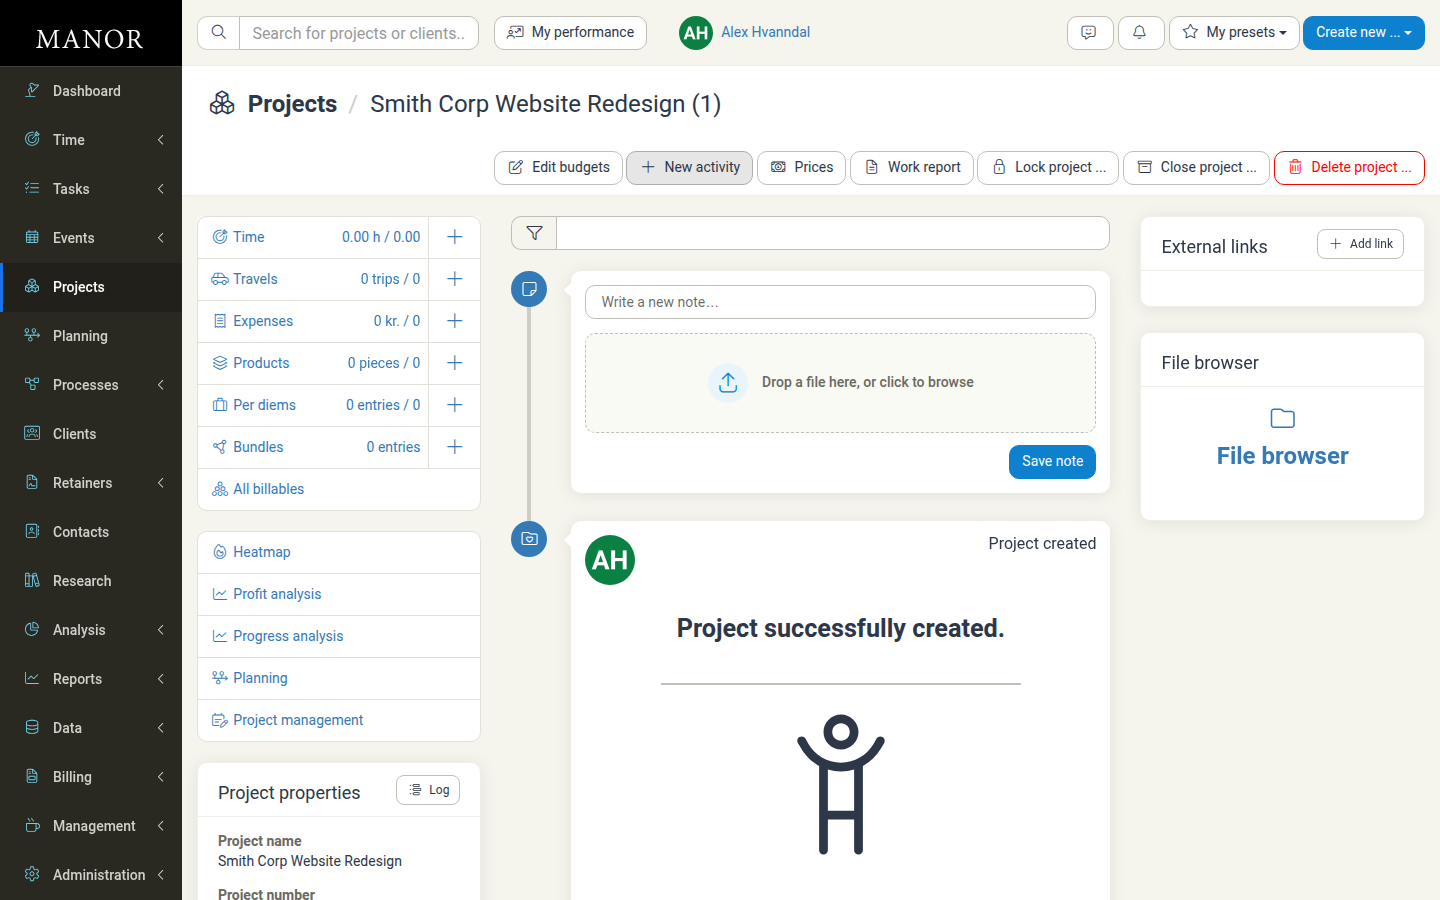
- Use the File browser panel on the project page (its File browser link opens the full view)
- Upload relevant documents (contracts, briefs, specifications) with Upload files, and add folders with Create a folder
Add Notes
- Use the note composer at the bottom of the project page (Write a new note...) and click Save note
- Notes, alongside system events such as Project created, appear on the project timeline as a running record of decisions, client feedback and scope changes
Phase 2: Staffing & Team Setup
Assign Team Members
- Add team members as Participants when creating the project, or later in the Edit project dialog
- Set the access level for each person: Full access (can edit all project properties and see all billable items) or Limited access (cannot edit project properties and can only see their own billable items, plus all notes)
Assign Activities to Team Members
- Open the project and click Project management
- Click the Assign button in the toolbar
- Select team members for each activity based on their qualifications
- Review estimated hours to balance workload across the team
Set Project Budget (if applicable)
- Define estimated hours or budget with Hours budget and Monetary budget (in the project's Limits), or distribute a budget across activities with Edit budgets in the project action bar
- Monitor progress against planned work using Progress analysis
- Use the Hours budget and Balance warning limits to surface warnings when the project approaches or exceeds them
Phase 3: Execution & Work Tracking
Log Time Entries
This is where your team captures work performed on the project:
-
Team members can log time through:
- The Create new ... menu (Create new ... > Time)
- The Time section (Day, Week, Month or Table view)
- The Time tile on the project page
-
In the New time dialog, record:
- Project (required) — select this project
- Activity — the specific activity within the project
- Date, Begins and Ends (required) — when the work was performed
- Duration — hours/minutes spent
- Billable hours — how much of the time is billable
- Description — what was accomplished
- Internal note — not visible on invoices or work reports
- Payer, Rate and User as needed
Expand Advanced time entry properties for Ends at (repeat the entry daily until a date, excluding weekends and holidays) and Duration options, then click Save time.
-
Time entries accumulate throughout the project and feed into:
- Progress tracking
- Invoice generation
- Project analysis
Best Practice: Log time the same day or next day. Don't batch entries at month-end.
Record Other Billables
Beyond time, you can record:
- Travels — Travel expenses (flights, hotels, mileage)
- Expenses — Out-of-pocket costs
- Per diems — Daily living allowances while traveling
- Products — Products or deliverables sold/provided
- Bundles — Multiple billables created together
All billables can be associated with the project, either from the Create new ... menu or from the project's own tiles, and are included in project analysis and invoicing. Use All billables for one combined view.
Track Activities & Tasks
- Use the Activities panel to see what work has been done
- Create Tasks in the Tasks section for project-specific to-do items
- Assign tasks to team members with due dates
- Check off tasks as they're completed
Manage Project Notes
- Regularly add notes with the Write a new note... composer on the project page
- This creates an institutional memory of the project
- Future team members can understand the project history from the timeline
Phase 4: Delivery & Management
Track Progress
-
Use Progress analysis on the project page to see:
- How much time has been logged vs. the Hours budget
- How the project is tracking against plan
-
Review the Work report to see:
- Time logged by team member
- Time by activity
- Breakdowns by billable type
Monitor Profitability
-
Use Profit analysis on the project page to understand:
- Revenue generated vs. costs
- Profit margin
- Where the project stands financially
-
Adjust pricing or scope if profitability is at risk
Visualize the Schedule
- Open the project's Project management view
- View activities and milestones on a Gantt-style timeline
- Use the numbered buttons (1, 2, 3) to set how many levels of the activity hierarchy are shown, and the slider to change the width of the day columns
- Click Download to export the timeline as a spreadsheet for client or stakeholder meetings

Communication
- Keep the project notes updated with client communications
- Use the File browser to exchange documents with the client
Phase 5: Billing & Invoicing
Generate Invoices
When the project is ready for billing:
-
Gather all billables from the project:
- Time entries
- Travel expenses
- Other costs
- Products delivered
-
Create an invoice:
- Go to Billing in the main navigation and click New invoice. The Balances list opens showing the outstanding, unbilled work.
- Select the balance(s) for this project and create the invoice(s)
- Review and adjust the lines, dates and totals as needed
- Issue and deliver the invoice
The full workflow is described in Invoices.
-
Track delivery:
- Monitor Delivery under Billing to confirm the client receives it
- Where payment data is available (for example from a connected accounting system), track payment status
Retainer Coverage (if applicable)
If you're working under a pre-paid service agreement:
- Link the project to a retainer using Add project to a retainer on the project page (the action is available when the project's client already has at least one open retainer)
- Billable work logged to the project then draws from the retainer balance
- Monitor retainer utilization to avoid unexpected overages
See Project Retainer Coverage for details.
Recurring Billing
For projects with recurring billables:
- Use the Automated invoices card on the project page and click Edit invoice automation to schedule recurring invoices
- This reduces manual invoice creation
- See Automated Invoices
Phase 6: Analysis & Closure
Analyze Project Outcomes
Before closing, review project performance on the project page and in the Reports section:
- Profit analysis — What was earned and what did it cost?
- Progress analysis — How much of the budgeted work was used?
- Work report — How were the hours and billables distributed?
- Heatmap — When was the work actually done?
- Reports such as Hours, Billable ratio, Efficiency and Billed revenue for wider comparisons
Use these insights to:
- Understand where you make the most profit
- Identify areas for improvement
- Inform future project estimates
Close the Project
When work is complete and invoicing is finished:
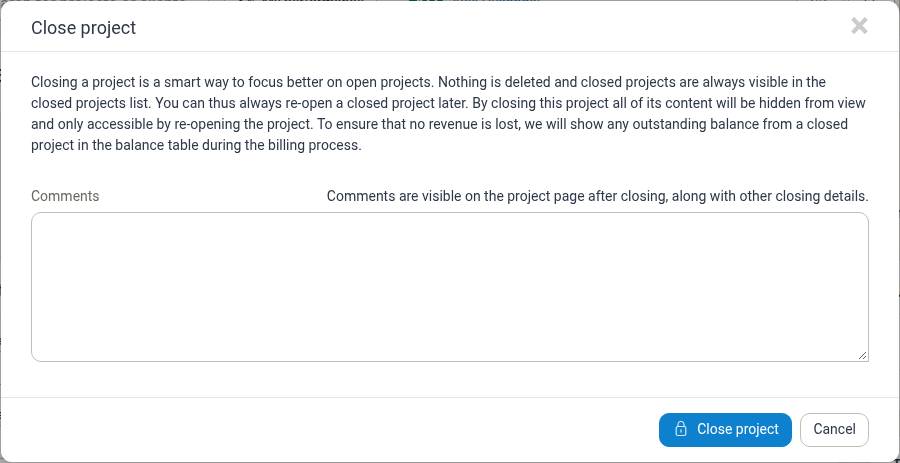
- Click Close project ... in the project action bar
- Optionally add a Comment (comments are visible on the project page after closing, along with other closing details) and confirm with Close project
Closing does not delete anything: closed projects remain visible in the closed projects list and can be reopened later. While closed, the project's content is hidden from daily views, and any outstanding balance is still shown in the balance table during billing.
Lock the Project
If a project should stay visible but no longer accept new work, use Lock project ... instead:
- Click Lock project ... in the project action bar
- Optionally set Lock until date (used only to lock a project from the start until, and including, that date; leave empty to lock regardless of time) and confirm
Locked projects remain visible, but no billables can be added, edited or deleted unless you are the project's owner or billing owner, or have permission to create invoices. A project can be unlocked again.
Common Workflows
Quick Workflow: Small Project with Simple Billing
- Create the project and attach a client
- Add a client contact if needed
- Log time (and other billables) as work is performed
- Create the invoice from the balance when complete
- Close the project once it is invoiced
Complex Workflow: Large Project with Multiple Team Members
- Create the project
- Add team members as participants and set their access levels
- Create activities and break down the work
- Upload documents and briefs
- Set budgets and milestones
- Monitor progress and profitability regularly
- Generate periodic invoices
- Close, and review the analysis
Retainer Workflow: Ongoing Monthly Work
- Create the project and add it to the client's retainer
- Add team members
- Log time (and other billables) as work is performed
- Set up automated invoicing if required
- Monitor profitability monthly
- Continue until the retainer ends
Tips for Efficient Project Management
Start Strong
- Invest time upfront setting up project structure
- Add all relevant team members and contacts
- Document initial scope in notes
Keep It Updated
- Log time same day or next day (don't batch at month-end)
- Update project notes after client communications
- Review project health regularly
Use the Dashboard
- The Dashboard shows Projects connected to you with a quick filter
- Monitor project metrics regularly
- Catch budget overruns early
Communicate Clearly
- Use project notes to document decisions
- Keep file names and folders clear
- Share status updates with team members
Analyze and Learn
- Review project profitability with Profit analysis after completion
- Compare planned vs. actual hours with Progress analysis
- Identify patterns to improve future estimates
Related Documentation
For more detailed information on specific project features, see:
- Project Creation — Step-by-step project creation guide
- Project Management — Timeline and milestones overview
- Activities — Breaking projects into activities
- Activity Assignment — Assigning work to team members
- Progress Analysis — Tracking project progress
- Profit Analysis — Understanding project profitability
- Work Report — Detailed project work breakdown
- Project Retainer Coverage — Linking a project to a retainer
- Invoices — Creating and managing invoices
- Retainers — Managing retainer agreements
Troubleshooting
I can't find my project
- Use the Projects main navigation page and its Quick filter
- Check your Dashboard, under Projects connected to you
- Check the Open status filter on the Projects list — closed projects are hidden from the default Open view
Time entries aren't showing on the project
- Ensure the project is selected in the time entry
- Check the Billable hours value on the entry
- Check the date range you're viewing
Invoice isn't including all project billables
- Review the project in the Balances list under Billing → New invoice
- Verify the billables are billable (not written off or excluded from billing)
- Check that they haven't already been invoiced
Project budget is exceeded
- Review logged time against the Hours budget
- Discuss scope changes with the client
- Adjust the invoice amount if scope has expanded