
What is the File browser?
The File browser stores all files and documents for a single project. You can upload documents, organise them into folders, download them again later, and filter the list to find what you need. Every file belongs to the project it was uploaded to, and it is available to the project's participants.
Opening the File browser
- Open the project from the Projects list.
- On the project page, find the File browser section in the right-hand column.
- Click the File browser heading.
The File browser opens on its own page, with the breadcrumb Projects / project name / File browser.
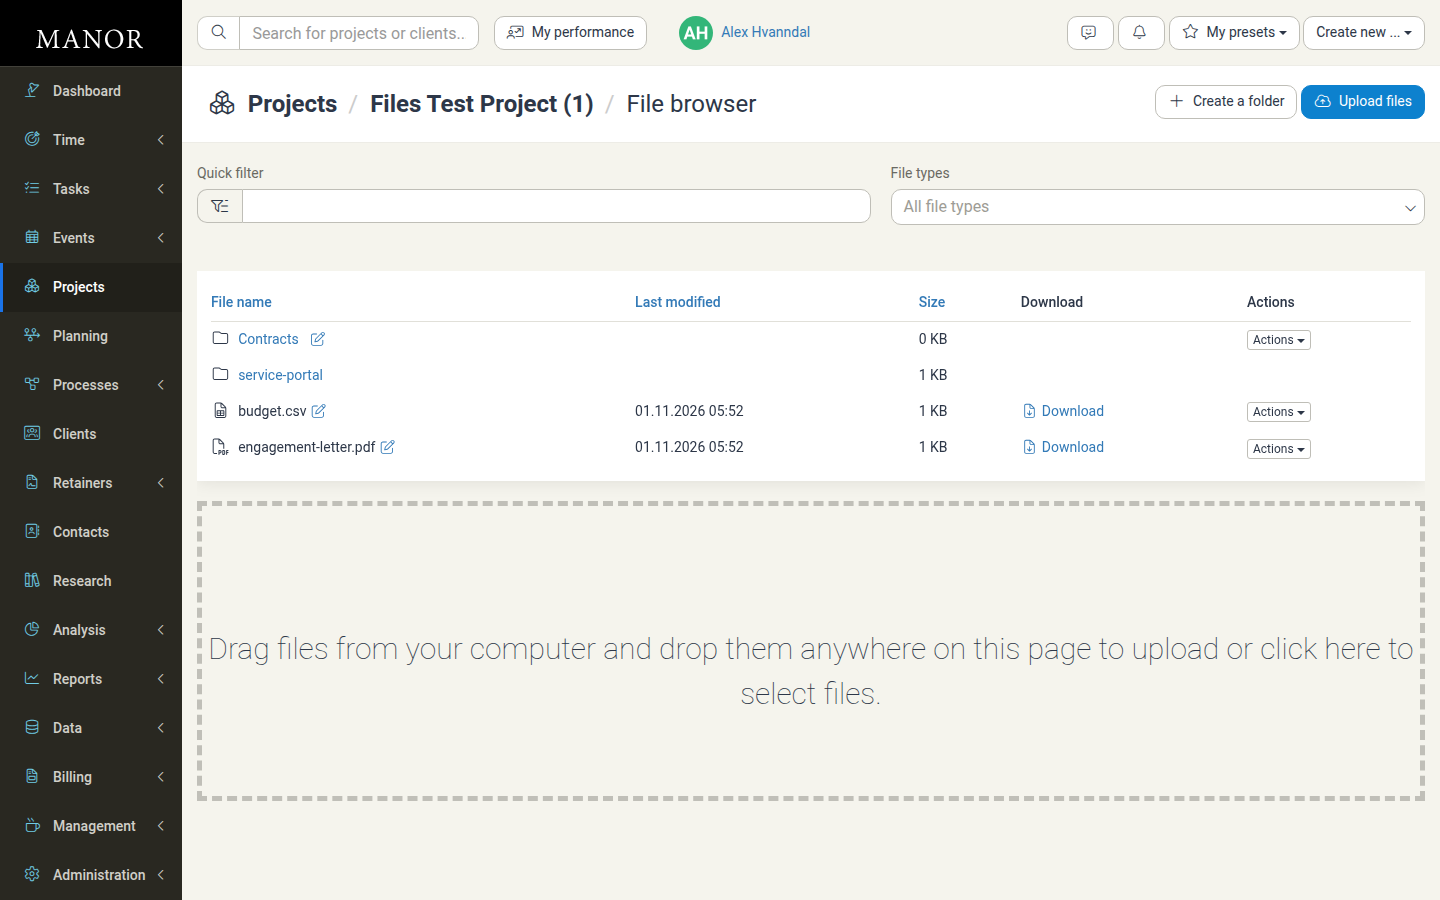
The page has, from top to bottom:
- Create a folder and Upload files buttons in the top right.
- A Quick filter field and a File types dropdown for narrowing the list.
- A table listing every folder and file in the current folder.
- A large drop area labelled Drag files from your computer and drop them anywhere on this page to upload or click here to select files.
The file list columns
| Column | What it shows |
|---|---|
| File name | The name of the folder or file. Click a folder name to open it. |
| Last modified | When the file was last uploaded or changed. Folders leave this blank. |
| Size | The file size in KB. For a folder, this is the combined size of everything inside it. |
| Download | A Download link for files. Folders leave this blank. |
| Actions | A dropdown with the actions available for that row (see Renaming and deleting). |
Click the File name, Last modified, or Size column heading to sort the list; click again to reverse the order.
When a folder contains no items, the list shows the message The folder is empty.
Uploading files
To add files to a project:
- Open the File browser for the project and go to the folder you want the files in (or stay at the top level).
- Either click Upload files in the top right and choose files from your computer, or drag files from your computer and drop them anywhere on the page.
- The files are uploaded to the folder you are currently viewing.
If you upload a file whose name already exists in the folder, Manor asks you how to handle the clash with the options Overwrite files, Rename files, or Skip uploading conflicting files.
Note: You must be a participant of the project to upload files. If you open the File browser of a project you do not participate in, you see the message You have to be a participant of this project to browse its files. and a Make me a participant button. Click it to join the project and gain access.
Creating folders
To keep files organised, create folders:
- In the File browser, click Create a folder.
- Enter a name in the Folder name field.
- Click Create a folder to confirm.
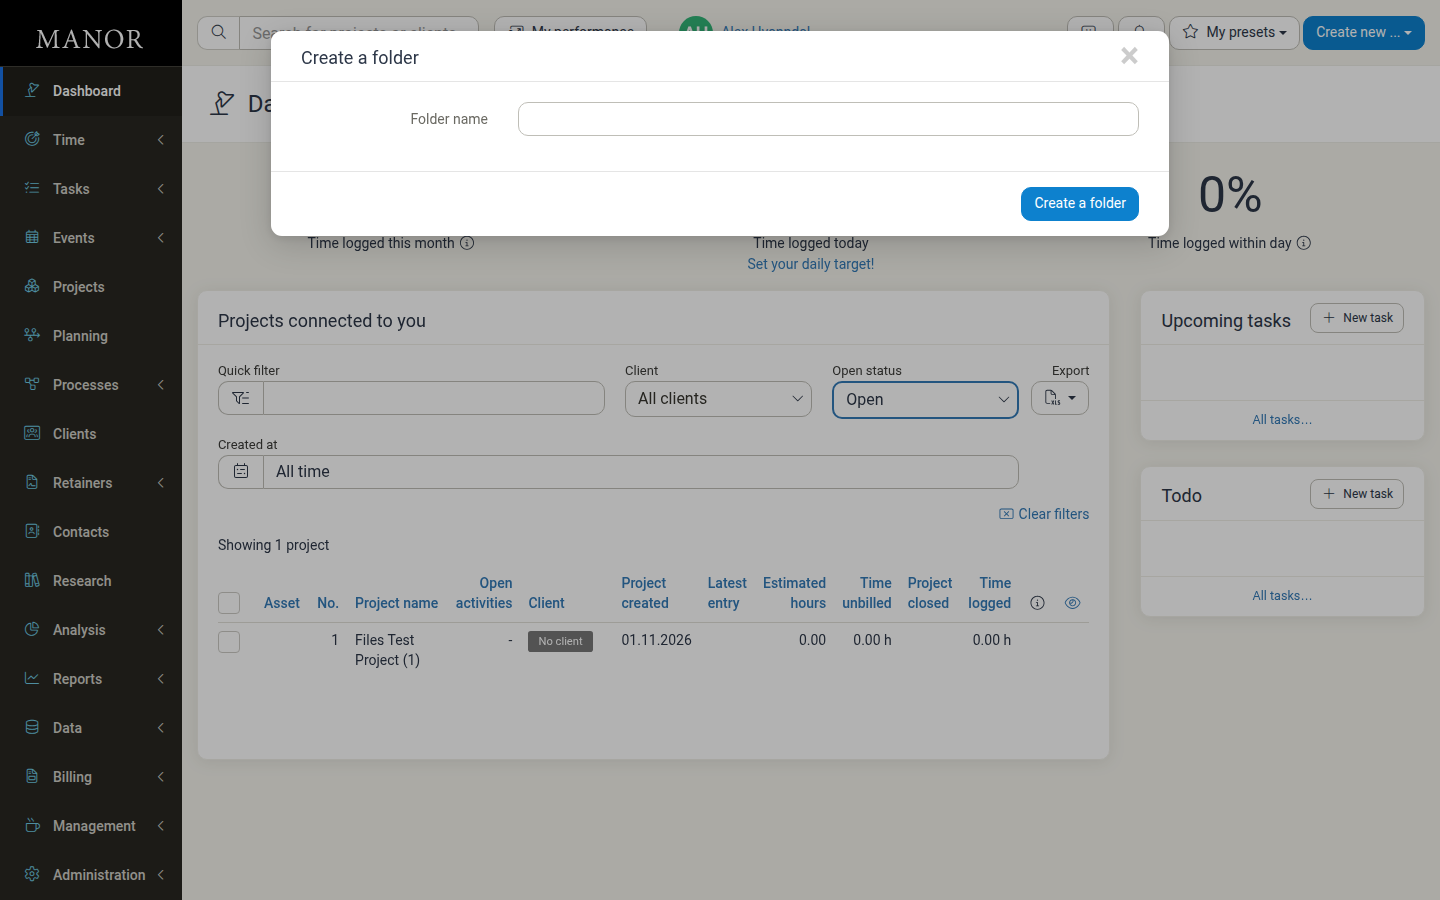
The new folder appears in the list with a folder icon. Click its name to open it, and you can create further folders inside it and upload files directly into it.
Downloading files
Each file row has a Download link in the Download column. Click it to download that file to your computer. Folders do not offer a download, so their Download cell is empty.
Renaming and deleting
To rename a file or folder, click the pencil icon next to its name, edit the name in place, and choose Save. Choose Cancel (or press Esc) to leave the name unchanged.
To delete a file or folder, open the Actions dropdown at the end of its row and choose Delete file or Delete folder. Manor asks you to confirm first; deleting a folder also deletes everything inside it.
Note: Delete actions are permanent and cannot be undone.
Moving files between folders
To move a file or folder into another folder, drag the row and drop it directly onto the destination folder's row. The item is moved into that folder. You cannot drop a folder onto itself.
Searching and filtering
Use the controls above the table to narrow the list:
-
Quick filter — Type part of a file or folder name to show only matching items. The results update as you type.
-
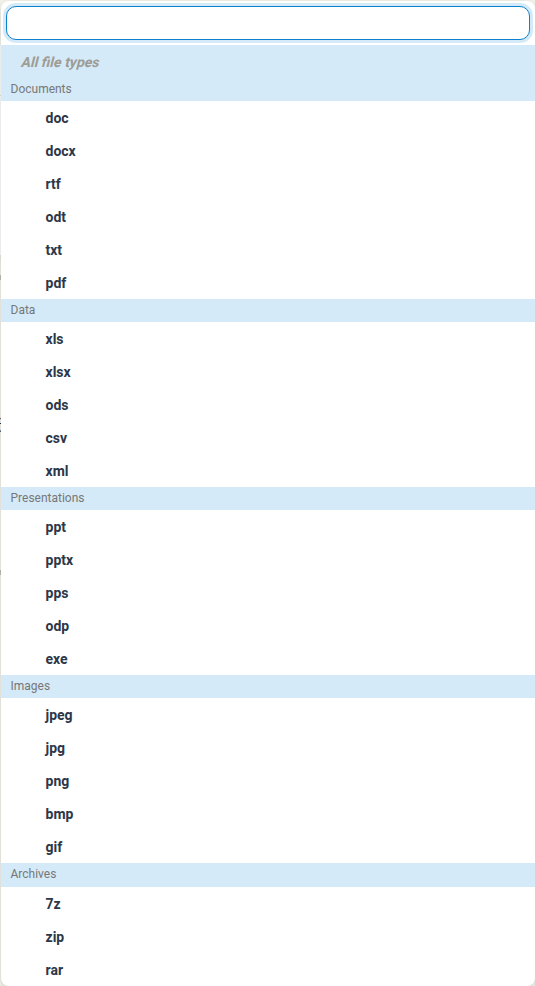
File types — Choose a category to show only files of that type. The categories and the file extensions they cover are:
- Documents — doc, docx, rtf, odt, txt, pdf
- Data — xls, xlsx, ods, csv, xml
- Presentations — ppt, pptx, pps, odp, exe
- Images — jpeg, jpg, png, bmp, gif
- Archives — 7z, zip, rar
-
Once a filter is active, a Clear filters link appears so you can reset the list.
Note: Both filters apply to the folder you are currently viewing. To search inside a subfolder, open that folder first.
Permissions
- Only project participants can open a project's File browser and upload to it.
- Files are project-specific: files uploaded to one project are not available in another.
- All participants of a project can see and download the files stored in it.