
Overview
Single Sign-On (SSO) allows your team members to authenticate into Manor using your organization's centralized identity provider (IdP). By integrating Manor with your enterprise identity management system, users can access Manor with their corporate credentials without maintaining separate usernames and passwords.
Why Use SSO with Manor?
- Centralized Identity Management: Manage user authentication, password policies, and account lifecycles in one central location.
- Enhanced Security: Enforce corporate security policies, including Multi-Factor Authentication (MFA), Conditional Access policies, and password complexity rules across all users.
- Streamlined User Experience: Eliminate password fatigue and simplify access. Users log in once to their corporate portal and can access Manor seamlessly.
- Automated Onboarding: Rapidly onboard employees with Just-In-Time (JIT) account provisioning upon their first successful login.
- Immediate Offboarding: Instantly terminate access to Manor by disabling an employee's account or revoking their assignment in your identity provider.
Supported Identity Providers
Manor supports industry-standard SAML 2.0 (Security Assertion Markup Language). Any SAML 2.0-compliant identity provider can be integrated with Manor, including:
- Microsoft Entra ID (formerly Azure Active Directory)
- Okta
- Google Workspace
- PingIdentity / PingFederate
- OneLogin
Configuration Process
Manor does not use an in-app self-service configuration page for Single Sign-On. To ensure maximum security, identity domain verification, and seamless backbone routing, all enterprise SSO connections are established in coordination with Manor Support.
Setup Workflow Overview
+--------------------------+       SAML Metadata & Tenant Details       +--------------------------+
|                          | -----------------------------------------> |                          |
|   Organization Admin     |                                            |      Manor Support       |
| (Microsoft Entra / IdP)  | <----------------------------------------- | (Identity Backbone Setup)|
+--------------------------+       SP Entity ID & ACS Reply URL         +--------------------------+
1. What Your Organization Needs to Prepare
Before contacting Manor Support, prepare the following details from your identity provider:
- Identity Provider Metadata:
- The Federation Metadata XML file (recommended), or the public App Federation Metadata URL.
- Entity ID / Issuer URL:
- The unique identifier of your IdP (e.g.,
https://sts.windows.net/<tenant-id>/).
- The unique identifier of your IdP (e.g.,
- Target Email Domain(s):
- The corporate email domain(s) used by your employees (e.g.,
@example.com).
- The corporate email domain(s) used by your employees (e.g.,
- Primary Technical Contact:
- The name and email address of the enterprise administrator overseeing the integration.
- Preferred Single Logout (SLO) Settings:
- Whether your organization requires central SLO redirection upon signing out of Manor.
Send these details to Manor Support to initiate the connection.
2. What Manor Support Provides Back
After configuring your organization on Manor's authentication backbone, Manor Support provides your administrator with the necessary Service Provider (SP) parameters:
- Service Provider Entity ID / Identifier: The unique URI identifying Manor as the relying party.
- Assertion Consumer Service (ACS) / Reply URL: The endpoint where your IdP sends SAML authentication assertions (e.g.,
https://auth.manor.app/login/callbackor firm-specific callback URL). - Relay State / Sign-On URL: The starting URL for SP-initiated logins for your firm instance.
Once you enter these parameters into your IdP and assign your users, the integration is ready for testing.
Setting Up Microsoft Entra ID (Azure Active Directory)
This section provides step-by-step guidance for enterprise administrators configuring Microsoft Entra ID as the SAML 2.0 Identity Provider for Manor.
Step 1: Create an Enterprise Application
- Sign in to the Microsoft Entra admin center or Azure Portal as a Cloud Application Administrator or Global Administrator.
- Navigate to Identity → Applications → Enterprise applications.
- Click + New application at the top of the page.
- Click Create your own application.
- In the form that appears:
- Enter a name for the application (e.g.,
Manor). - Select Integrate any other application you don't find in the gallery (Non-gallery).
- Enter a name for the application (e.g.,
- Click Create.
Step 2: Configure Basic SAML Settings
- On the application overview page, select Single sign-on from the left sidebar.
- Select SAML as the single sign-on method.
- In the Basic SAML Configuration tile, click Edit (pencil icon).
- Enter the values provided by Manor Support:
- Identifier (Entity ID): Paste the Service Provider Entity ID provided by Manor Support. Check the box to mark it as Default.
- Reply URL (Assertion Consumer Service URL): Paste the ACS URL provided by Manor Support. Check the box to mark it as Default.
- Sign on URL (Optional): Enter your firm's direct Manor login URL for SP-initiated logins.
- Relay State (Optional): Enter the Relay State if specified by Manor Support.
- Click Save at the top of the pane and close the panel.
Step 3: Configure User Attributes & Claims
Manor requires specific user claims to identify users and populate their profiles upon login.
- In the Attributes & Claims tile, click Edit.
- Verify or update the following claims:
| Claim Name | Meaning | Recommended Source Attribute |
|---|---|---|
Name ID (nameidentifier) |
Unique User Identifier | user.userprincipalname or user.mail |
| User Email Address | user.mail (or user.userprincipalname) |
|
| givenname | First Name | user.givenname |
| surname | Last Name | user.surname |
| displayname / name | Full Display Name | user.displayname |
Important: The email claim must match the user's corporate email address. Manor matches existing accounts and provisions new accounts using this email attribute.
- Click Save and close the panel.
Step 4: Download Federation Metadata
- In the SAML Certificates tile:
- Locate Federation Metadata XML and click Download, or copy the App Federation Metadata Url.
- Securely deliver this file or URL to Manor Support if you have not already done so.
Step 5: Assign Users and Groups
Users cannot authenticate through Entra ID until they are explicitly assigned to the application.
- From the enterprise application sidebar, select Users and groups.
- Click + Add user/group.
- Under Users, click None Selected to open the user selection panel.
- Select the specific employees or security groups who should have access to Manor.
- Click Select, then click Assign.
Tip: Assigning security groups (such as "All Employees" or "Manor Users") simplifies ongoing user provisioning as your team grows.
Step 6: Test Single Sign-On
- In the SAML Single Sign-On configuration blade, scroll to step 5: Test single sign-on with Manor.
- Click Test to initiate a test authentication flow.
- Verify that Entra ID issues a valid SAML response and grants access.
User Provisioning & Account Behavior
Just-In-Time (JIT) Provisioning
Manor supports Just-In-Time (JIT) provisioning. When an authorized corporate user authenticates via SSO for the first time:
- Manor checks whether an existing user account matches the incoming email claim.
- If no matching account is found, Manor automatically creates a new user profile using the name, email, and identity claims provided in the SAML assertion.
- The user is logged in immediately without requiring an administrator to pre-create their account manually.
Initial Role Assignment
When a user account is provisioned via JIT:
- First System User: If the user is the very first user created in your Manor instance, they are automatically granted all three core roles: Administrator, Manager, and Employee. This ensures your initial setup administrator has full access to configure your firm.
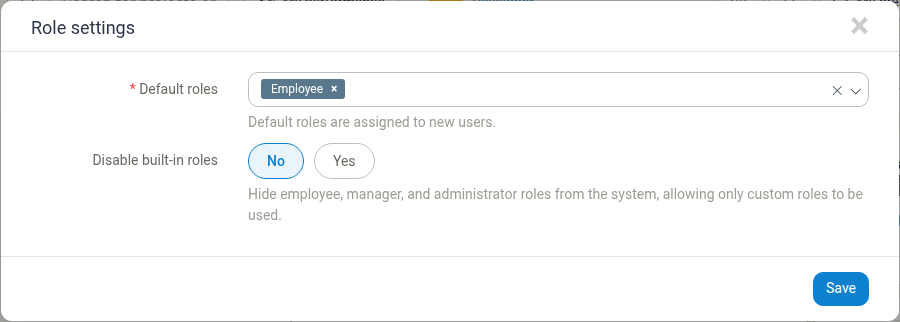
- Subsequent Users: Default roles for new users are configurable. Settings are accessible from the roles page for administrators (Administration → Roles → Settings). Out of the box, only the Employee role is selected as a default role.
- In the Role settings dialog, administrators can configure which roles (built-in or custom) are automatically assigned. Multiple default roles can be chosen if necessary.
- The same dialog also contains a Disable built-in roles setting that lets you hide the built-in roles entirely (see Hiding Built-in Roles below).
- To review step-by-step instructions for configuring default roles, see Default Role Settings.
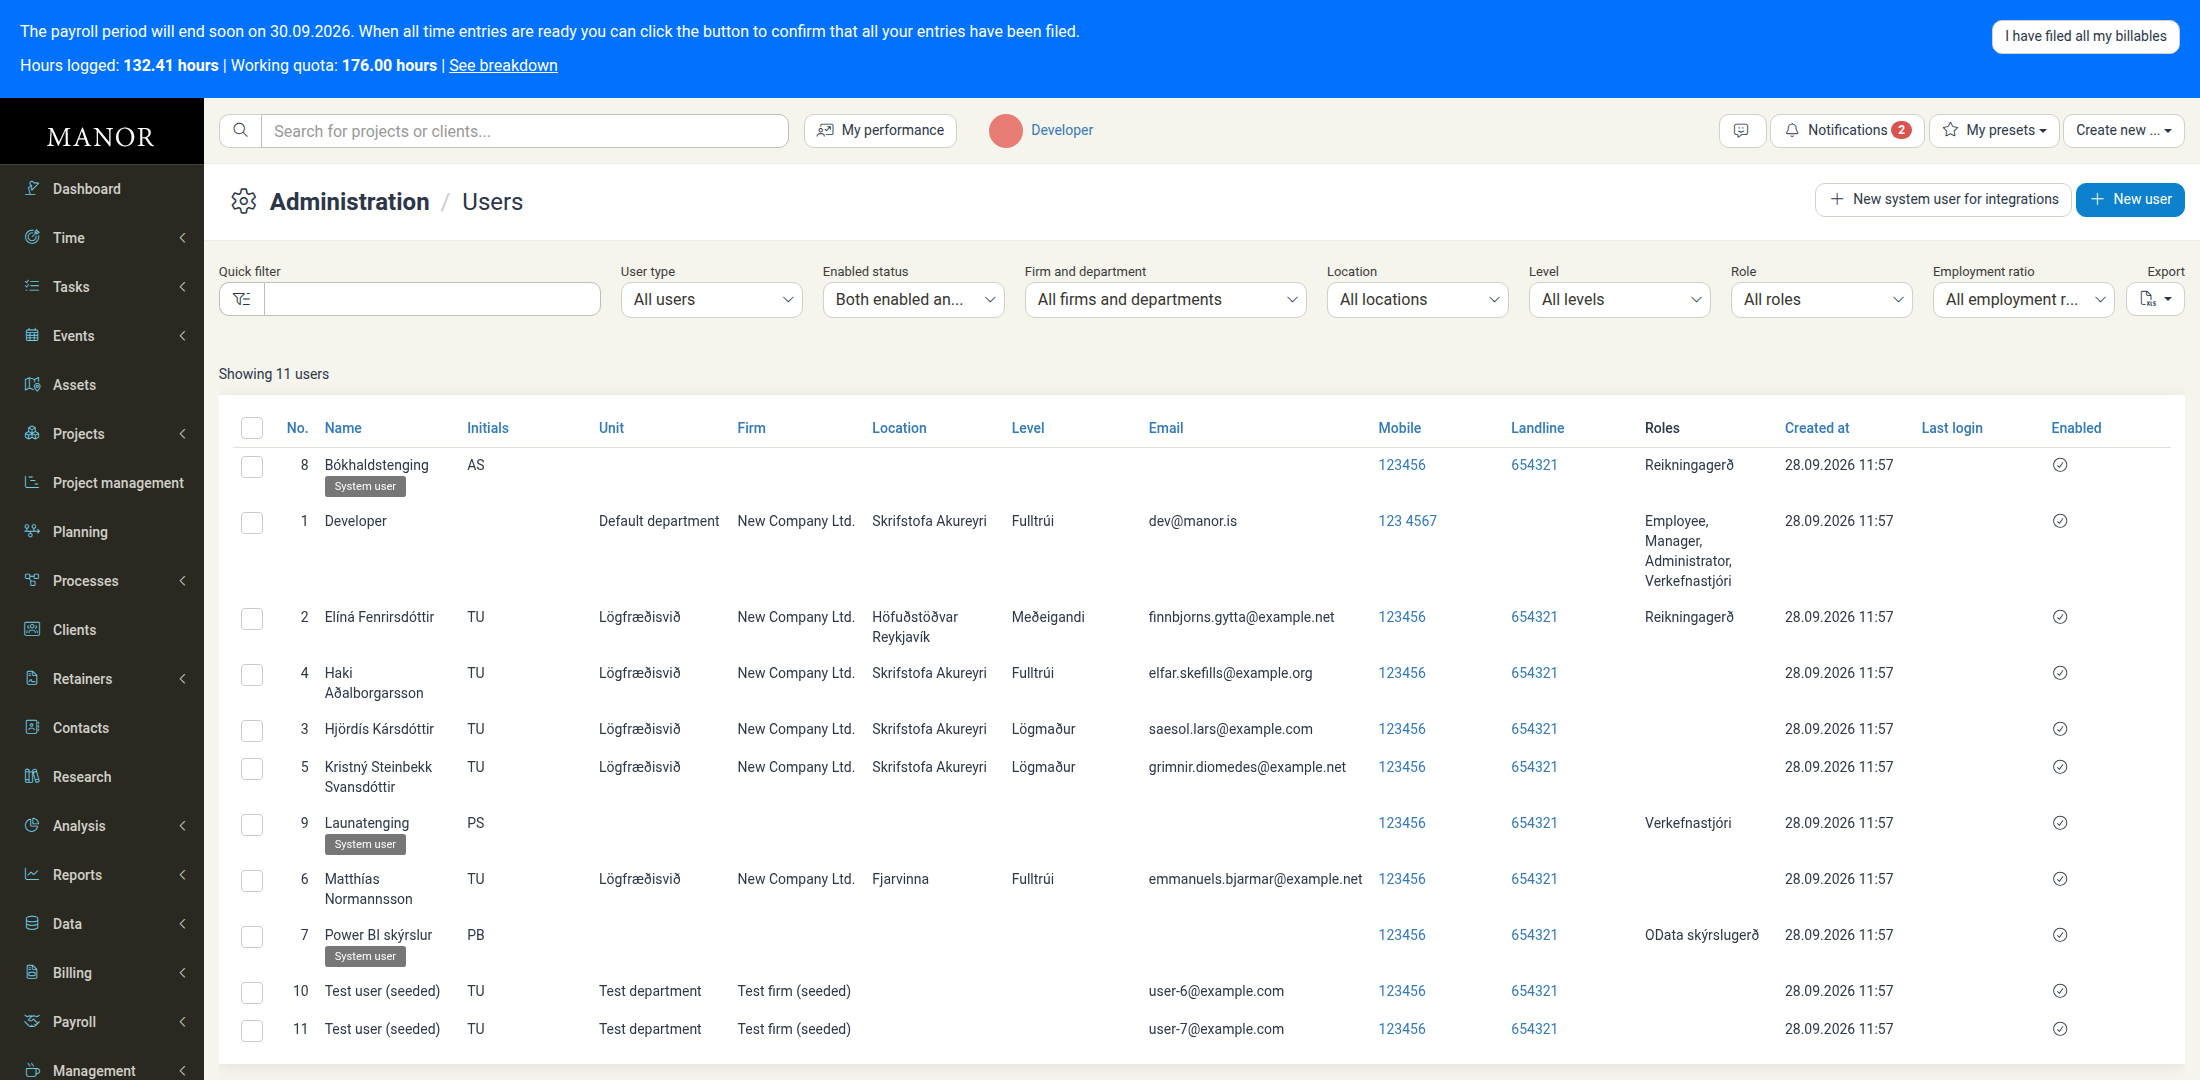
- Administrators can assign additional standard or Custom Roles to any user at any time under Users.
The same default-role behaviour applies when an administrator creates a user manually through Administration → Users → New user. In the Roles section of the New user form, only the Employee role is pre-checked, matching the default set in Role settings above. All other roles must be selected manually if they are also needed. New SSO/JIT users and manually created users therefore both start with the same default role, and additional roles are added afterwards under Administration → Users.
Hiding Built-in Roles
The Role settings dialog also contains a Disable built-in roles setting that lets you prevent built-in roles from being used at all.
- No (default) - The built-in Employee, Manager, and Administrator roles remain available and can be assigned to users.
- Yes - The Employee, Manager, and Administrator roles are hidden from the system, so that only custom roles are available. Users can then only be assigned custom roles.
The helper text for this setting describes it as: "Hide employee, manager, and administrator roles from the system, allowing only custom roles to be used."
Click Save to apply your changes.
Personal Rate Initialization
If your organization has enabled personal time rates in your firm billing settings, newly provisioned JIT users have their personal rate record initialized automatically. This ensures the employee is immediately ready to log time and participate in project planning without manual billing profile configuration.
The personal rate is stored against the employee's user record, in the Personal time rate section of the New user form (and of the corresponding edit form). The section contains three fields:
- Initial price (required): the starting billable price recorded for the employee.
- Cost price: the employee's internal cost price, used for profitability calculations.
- Product number: the product (item) number that the employee's time follows into the accounting system when it is invoiced.
Below the Product number field, the form displays the helper text: "If this field is left empty, the default product number is used. The default product number can be set in Management > Rates." Leaving Product number blank is therefore valid; Manor then falls back to the default product number configured under Management → Rates.
Profile & Password Management
Because identity verification is handled by your enterprise IdP:
- No Passwords Stored in Manor: Externally authenticated SSO users have no local passwords stored in Manor.
- Password Form Disabled: The password change tab (
/profile/password) is automatically hidden in the user profile menu during SSO sessions. - Centralized Credential Governance: All credential resets, password complexity enforcement, account lockouts, and expiration policies must be performed in your corporate identity provider (e.g., Entra ID admin center).
Soft-Deleted and Deactivated Accounts
Manor handles inactive and soft-deleted accounts smoothly:
- Automatic Account Restoration: If an employee was previously deactivated or soft-deleted in Manor, but subsequently logs in through an authorized corporate SSO session, Manor automatically restores the account (
deleted_atset to active), enabling immediate access. - Enforcing Complete Offboarding: Because active SAML assertions automatically restore deleted users, offboarding must be enforced at the Identity Provider level. When an employee leaves your organization, remove them from the Enterprise Application in Entra ID / Okta or disable their corporate directory account. In addition, disable their account in Manor under Users to cancel active user seat subscriptions.
User Login & Logout Experience
Login Flows
Manor supports both standard SAML authentication flows:
1. SP-Initiated Login (Service Provider Initiated)
- The user navigates to Manor's application login page.
- Manor detects the domain or prompts the user to enter their corporate email address.
- Manor redirects the browser to your corporate IdP (e.g., Microsoft Entra ID).
- The user completes authentication (including any required MFA or passwordless prompts).
- The IdP sends a signed SAML response back to Manor's ACS URL.
- Manor validates the assertion and logs the user into their personalized dashboard.
2. IdP-Initiated Login (Identity Provider Initiated)
- The user visits their corporate application launchpad, such as:
- Microsoft My Apps Portal (
https://myapplications.microsoft.com) - Microsoft 365 App Launcher
- Okta End-User Dashboard
- Google Workspace App Drawer
- Microsoft My Apps Portal (
- The user clicks the Manor application tile.
- The IdP generates a signed SAML assertion and posts it directly to Manor's Assertion Consumer Service.
- Manor authenticates the user and opens the application.
Logout Behavior
When an SSO user logs out of Manor:
- The local Manor session is terminated and local cookies are invalidated.
- The user is redirected to the identity backbone logout endpoint.
- If Single Logout (SLO) is configured, the identity provider terminates the shared session, ensuring shared workstation security.
Best Practices & Security Considerations
1. Maintain an Emergency Administrator
Maintain at least one internal administrator account with verified access independent of the corporate SSO provider. If your identity provider experiences an outage, a SAML signing certificate expires, or network federation fails, this emergency administrator can maintain critical system oversight.
2. Enforce Multi-Factor Authentication (MFA)
Enable MFA and Conditional Access policies directly in Microsoft Entra ID or your IdP. Because Manor delegates authentication to your IdP, all corporate security safeguards—such as FIDO2 security keys, Microsoft Authenticator push notifications, and compliant device requirements—apply directly to Manor access.
3. Coordinate Offboarding Procedures
Establish a formal offboarding checklist:
- Revoke IdP Access: Immediately remove the departed employee from the Manor enterprise application assignment in Microsoft Entra ID or disable their directory account.
- Deactivate in Manor: Navigate to Administration → Users in Manor and disable the user account to terminate active sessions and stop seat billing.
4. Monitor SAML Certificate Expiration
SAML signing certificates in Microsoft Entra ID typically have a 1-year or 3-year validity period.
- Set calendar reminders in advance of certificate expiration.
- Before a certificate expires, generate a new signing certificate in Entra ID and share the updated metadata with Manor Support.
- Rollover updates can be scheduled without user downtime.
5. Standardize Domain Naming
Ensure that user email addresses in Entra ID match their primary corporate domain exactly. Discrepancies between userPrincipalName and mail can lead to duplicate account creation if domains are altered.
Related Articles
- Users — Creating, editing, and disabling human user accounts in Manor.
- System Users — Creating non-human service accounts for automated integrations without consuming subscription seats.
- Default Role Settings — Configuring which roles are assigned automatically to newly provisioned SSO users.
- User Roles — Overview of built-in system permissions and roles.
- Custom Roles — Creating and tailoring granular custom roles for specialized job functions.
- Administration — The central control hub for security, users, and firm settings.