
What are Automated Invoices?
Automated invoices allow Manor to automatically generate and send invoices to clients on a scheduled date. Instead of manually creating and sending invoices, the system will collect the unbilled entries for a project and create an invoice on your specified date. This helps maintain a consistent billing schedule and reduces manual work.
Why Use Automated Invoices?
Automated invoicing provides several benefits:
- Consistent billing - Invoices go out on the same schedule every month
- Reduced manual work - No need to manually create invoices each period
- Better cash flow - Regular invoicing helps you get paid on time
- Less error-prone - The system automatically includes the unbilled work
- Client expectations - Clients know when to expect invoices
Before You Begin
Before you can enable automated invoicing, the project or client must have an email address, and depending on how your firm sends invoices it may also require the client's national ID. Manor validates these details when you save with automation set to Enabled:
- Email address - Manor uses the project's billing email address or, if that is empty, the client's email address. If neither is set, Manor shows "Project or client email address is required." If the resolved address is not valid, Manor shows "Project or client email address is not valid."
- National ID (kennitala) - If your firm's invoice delivery requires it and the client's national ID is missing, Manor shows "National ID of client is missing."
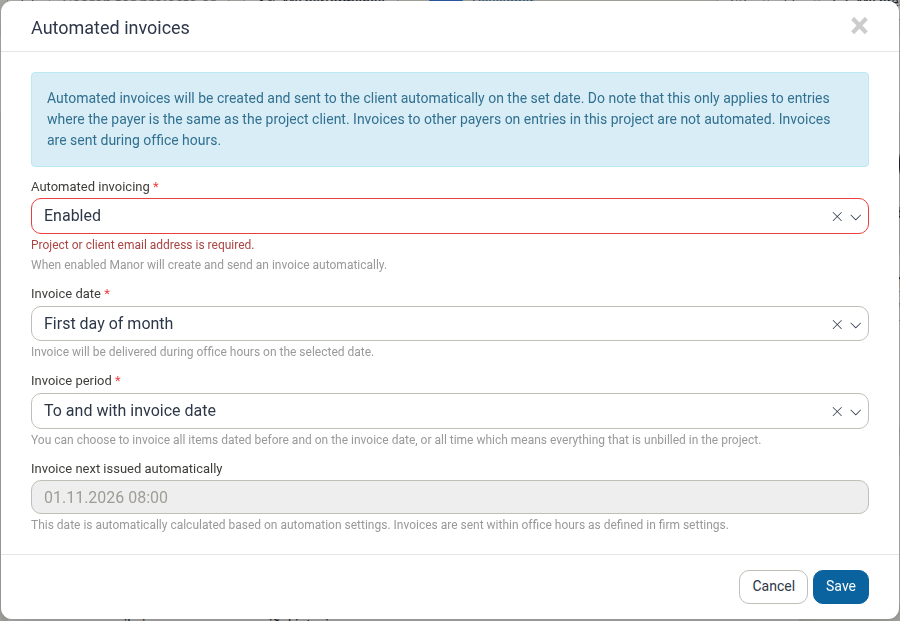
If you see any of these messages when saving, add the missing details to the client (see Clients) and save the automation settings again.
Key Fields
The dialog opens with an informational note explaining the rules that apply to automated invoices:
Automated invoices will be created and sent to the client automatically on the set date. Note that this only applies to entries where the payer is the same as the project client. Invoices to other payers on entries in this project are not automated. Invoices are sent during office hours.
Automated Invoicing
- Disabled - No automatic invoices will be created
- Enabled - Manor will automatically create and send an invoice on the set schedule
Important: Only entries where the payer is the same as the project client will be included in automated invoices. Invoices to other payers on entries in this project are not automated.
Invoice Date
Choose when invoices should be generated:
- First day of month - Invoices are issued on the 1st of each month
- Custom day of month - Invoices are issued on a specific day you choose
- Last day of month - Invoices are issued on the last day of each month
Choosing Custom day of month reveals an extra required field, Day of month. Enter a number from 1 to 28 for the day of the month on which the invoice should be delivered.
Invoices are sent during office hours on the selected date.
Invoice Period
Choose which items are included on the invoice:
- To and with invoice date - Include items dated before and on the invoice date (default)
- All time - Include everything that is unbilled in the project, regardless of date
Invoice Next Issued Automatically
This read-only field shows when the next automatic invoice will be issued. It displays both a date and a time (for example, 01.11.2026 08:00), and the value is calculated automatically from your automation settings and cannot be edited. When automated invoicing is off, this field shows Not set.
Setting Up Automated Invoices
1. Navigate to the Project
- Go to Projects from the main menu
- Click on the project where you want to enable automated invoices
2. Open Invoice Automation Settings
On the project page, look for the Automated invoices section in the sidebar.
- Click Edit invoice automation
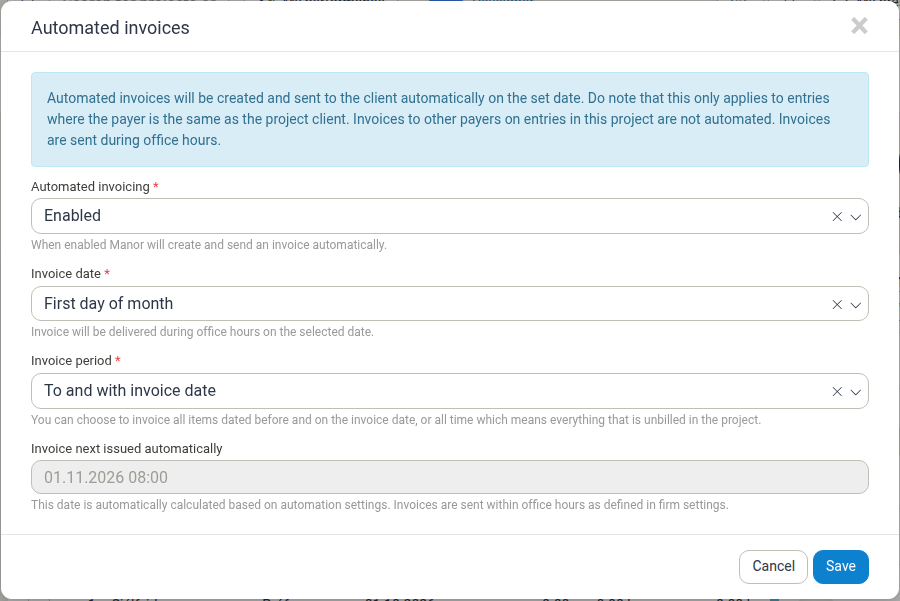
3. Enable Automation
- Change Automated invoicing to Enabled
- Select the Invoice date from the dropdown
- If you choose Custom day of month, also set the required Day of month (1-28)
- Select the Invoice period
- Click Save
The system calculates when the next invoice will be issued automatically.
Understanding Automated Invoice Behavior
What Gets Included
Automated invoices include:
- All unbilled time entries
- All unbilled expenses
- All unbilled products
- All unbilled per diems
- All unbilled travel entries
With To and with invoice date, only items dated before and on the invoice date are included. With All time, everything that is unbilled in the project is included, regardless of when it was logged.
What Gets Excluded
The following are NOT included in automated invoices:
- Entries where the payer is different from the project client
- Entries that have already been billed
Delivery Timing
Invoices are sent within office hours on the selected date, as defined in firm settings.
Modifying Automated Invoices
Changing the Invoice Date or Period
- Open the project
- Click Edit invoice automation
- Change the Invoice date (and Day of month if needed) or the Invoice period
- Click Save
The next invoice date will be recalculated automatically.
Disabling Automated Invoices
- Open the project
- Click Edit invoice automation
- Change Automated invoicing back to Disabled
- Click Save
No future invoices will be generated, but previously created automatic invoices remain unchanged. The Invoice next issued automatically field will then show Not set.
The dialog has only a Cancel and a Save button - there is no Delete button. To stop automated invoicing, switch Automated invoicing back to Disabled as described above.
The Sidebar Summary
When automation is enabled, the Automated invoices card in the project sidebar shows a summary of the current setup: Automated invoicing (with a check mark and the value Enabled), Invoice date, Invoice period, and Invoice next issued automatically. Below the summary is an Edit invoice automation button.
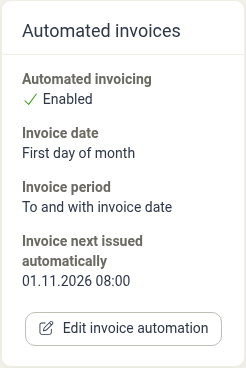
When automation is off, the card instead shows the message "Automated invoices are disabled."
Best Practices
Verify the Project Client
Ensure the project's client is correctly set with a national ID and email address, as only entries with that client as payer will be automatically invoiced, and both details are required before automation can be enabled.
Review Before Sending
While automation reduces manual work, check that your project has unbilled entries before the scheduled invoice date so clients receive timely invoices.
Align with Client Expectations
Choose invoice dates that align with your client agreement. Common options include:
- First day of month - for traditional monthly billing
- Last day of month - for end-of-period billing
Test with a Pilot Project
Before implementing automation across all projects, test with one project to ensure the feature works as expected.