
Manor lets you copy or move time entries and other billables from one project to another in bulk. This is useful when:
- Work was logged to the wrong project and needs to be reassigned.
- The same work must be billed to two different projects (for example, splitting a shared cost).
- You want to duplicate an entry onto another project and change the date.
Copy and Move are two of the mass actions available on Manor's billable lists. A mass action changes many billables at once instead of opening each entry individually: you tick the checkboxes for the rows you want, then choose an action from the selection bar that appears above the list.
This article first explains Copy and Move step by step, then provides a reference for every other billable mass action (Delete, Change rate, Change payer, Write-off, Undo write-off, Edit selected items, Change billable hours and Change user), including which billable types each action supports and the permissions they require.
Tip: "Project" and "Matter" refer to the same thing in Manor. Some screens use the term Matter in reference numbers (for example, "Seeded Matter 1 (1)").
Where mass actions are available
Mass actions appear on the billable lists that have a checkbox column. Not every list has them:
| List | Path | Available actions |
|---|---|---|
| Time > Table | Time > Table | All ten actions (time entries) |
| Time > All billables | Time > All billables | None — this list has no checkbox column and no selection bar |
| Data > Time | Data > Time | All ten actions (time entries) |
| Data > Billables | Data > Billables | Delete, Move, Copy, Change payer, Write-off, Undo write-off, Change user |
| Data > Travels | Data > Travels | Delete, Move, Copy, Change rate, Change payer, Write-off, Undo write-off, Edit selected items, Change user |
| Data > Expenses | Data > Expenses | Delete, Move, Copy, Change payer, Write-off, Undo write-off, Edit selected items, Change user |
| Data > Products | Data > Products | Delete, Move, Copy, Change rate, Change payer, Write-off, Undo write-off, Edit selected items, Change user |
| Data > Per diems | Data > Per diems | Delete, Move, Copy, Change rate, Change payer, Write-off, Undo write-off, Edit selected items, Change user |
Note: Time > All billables is a read-only overview. To act on those items in bulk, use the type-specific list under Data (Time, Travels, Expenses, Products, Per diems) or Data > Billables.
The quickest route to copy time entries is:
- Click Time in the main menu.
- Open Table.
Selecting rows
Tick the checkbox at the start of each row, or tick the header checkbox to select every row on the page. When at least one row is selected a selection bar appears above the table. It names the selection (for example "1 time selected" on Time > Table, or "1 billable selected" / "2 billables selected" on Data > Billables) followed by the available action buttons.
Directly beneath the action buttons a Calculated totals row appears for as long as rows are selected. It summarises the selection inline, aligned to the same columns as the table: Duration, Billable hours, Unit price, Total, Cost price, Discount, Effective price and Invoice. Columns without a value for the current selection show a dash (—). There is no hover tooltip — the totals are always visible while a selection is active.

On lists that span several billable types, some actions are hidden to keep the selection valid — for example, Data > Billables hides Change rate, Edit selected items and Change billable hours.

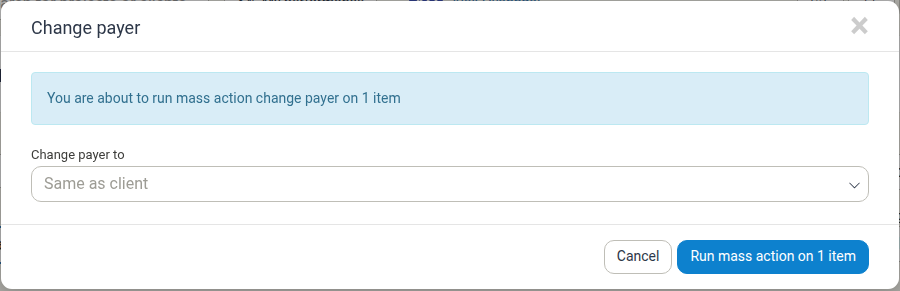
Each button opens a confirmation dialog that states the action and the number of selected items, e.g. "You are about to run mass action change payer on 1 item". Fill in the dialog and click Run mass action.
Copying Entries to Another Project
Step 1: Select the entries
- Find the entries you want to copy. Use the filters (Quick filter, Client, Project, Entry date, and so on) to narrow the list.
- Tick the checkbox at the start of each row you want to copy. You can also tick the header checkbox to select everything on the page.
When at least one entry is selected, a selection bar appears above the table showing the number and type of selected rows along with the available actions.

Step 2: Click Copy
Click Copy in the selection bar. The Copy dialog opens.
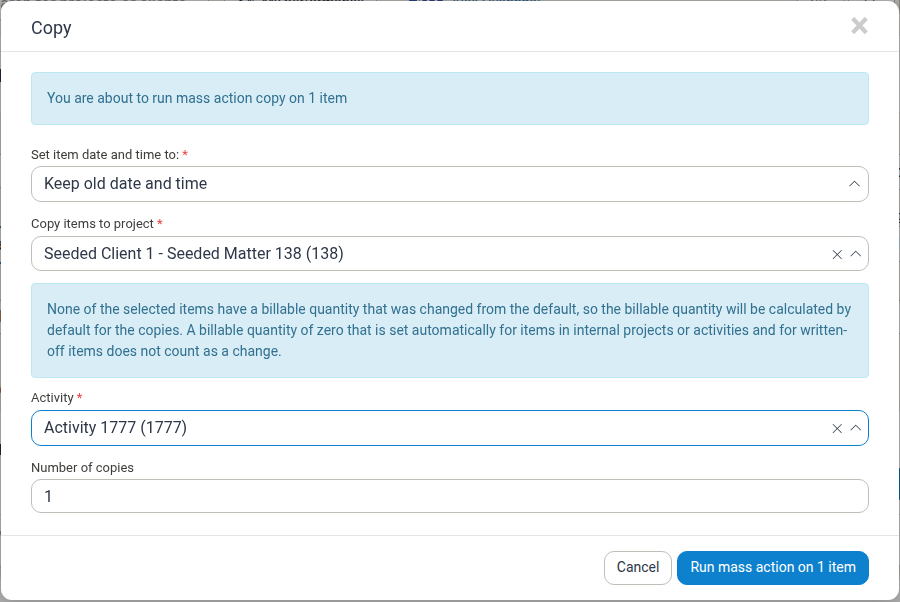
Step 3: Fill in the Copy dialog
| Field | What it does |
|---|---|
| Set item date and time to: (required) | Choose Keep old date and time to keep the original date, or Current date and time to stamp the copies with today's date and the current time. |
| Copy items to project (required) | Search for and select the destination project. This is the project the copies will belong to. |
| Set billable quantity (e.g. billable hours) of items to: (required when shown) | Only shown when at least one selected entry has a billable quantity that was changed from its default, and the copies go to a billable project and activity. Entries in internal projects or activities and written-off entries don't count, because their billable quantity is zero automatically. No option is pre-selected, so you must choose one. Reset to the default (do not copy) recalculates each copy's billable quantity from its actual quantity (for time entries, the duration). Keep original billable quantity carries the original entry's billable quantity over to the copies, except for entries in internal projects or activities, whose copies always get the default. When the field is not shown, a message explains why: the billable quantity is calculated by default, or is zero because the copies go to an internal project or activity. |
| Activity (required when the destination project has any open activity) | Select the activity the copies should be logged against. If the destination project has no activities, this field is not shown. |
| Number of copies | How many copies to create for each selected entry. Defaults to 1; you can create up to 100 copies of each entry. |
Once the required fields are filled in, click Run mass action, then confirm. A short confirmation ("Mass action successfully finished.") appears and the copies are added.
What gets copied
Each selected entry is replicated onto the destination project and activity, keeping the details of the original — description, rate, duration/quantity, and pricing are recalculated for the destination project. The copies are created as new, unbilled entries, so they can be invoiced independently of the originals.
What is not carried over
- The copies are not linked to the original entry and are removed from any invoice or payroll association the original had.
- If you choose Current date and time, the date (and, for time entries, the clock time of day) is reset to today; Keep old date and time preserves the original date and time.
Moving Entries to Another Project
Moving reassigns the selected entries to a different project instead of duplicating them.
Step 1: Select the entries
Select the rows exactly as described above for copying.
Step 2: Click Move
Click Move in the selection bar. The Move dialog opens.
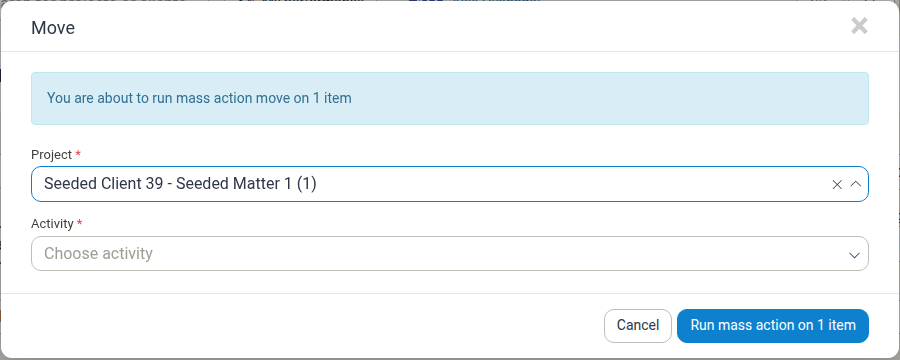
Step 3: Choose the destination project
- In the Project field, search for and select the destination project.
- If the destination project has activities, select the Activity as well.
- Click Run mass action, then confirm.
The entries are reassigned to the new project. They keep their original dates, descriptions, rates, and billable quantities.
Limitations of Move
Move is deliberately more restrictive than Copy, because it changes existing records:
- Only unbilled entries can be moved. Entries that have already been invoiced are not moved.
- If internal settlement is used, only entries whose settlement entry is also unbilled are moved.
- Entries whose project change would affect payroll are skipped. When some entries are skipped, Manor shows a warning telling you how many were processed and how many were left out — the rest are moved successfully.
- Bundled billables and previously billed or settled entries may be excluded; Manor warns you when a selection contains such items.
Note: Because Move only handles unbilled entries, use Copy if you need to work with entries that have already been invoiced — then delete or write off the originals manually if required.
Other Billable Mass Actions
Besides Copy and Move, the selection bar offers the following actions. Which ones you see depends on the list and the billable types selected.
Delete
Deletes the selected billables. The dialog warns "Are you sure you want to continue?".
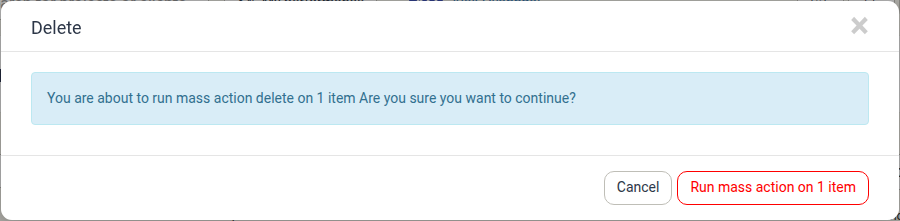
- Billable types: time, travels, expenses, products, per diems.
- Batch limit: none.
- Permission: you can only delete billables you are allowed to edit. Deleting expenses additionally requires the permission Can delete expenses.
Change rate
Changes the rate applied to the selected billables. Choose the new rate from the Change rate to dropdown.
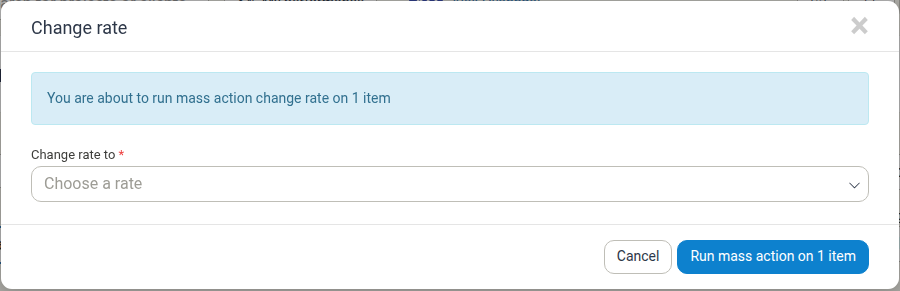
- Billable types: time, travels, products and per diems — the types that are priced by a rate. It is not available for expenses, which are billed by amount.
- One type at a time: you can only change the rate on a single billable type per action, so select only time entries, only travels, and so on.
- Travels additionally support changing to a per-trip or per-distance rate, depending on how the travel is priced.
- Batch limit: none.
- Not available on: Data > Expenses and Data > Billables.
Change payer
Sets a new payer (client/payer) for the selected billables. Choose Same as client or pick a specific payer.
- Billable types: time, travels, expenses, products, per diems.
- Batch limit: none.
- Permission: Can select a payer for a billable (allows selecting a payer on time, travel, expense, product and per diem entries).
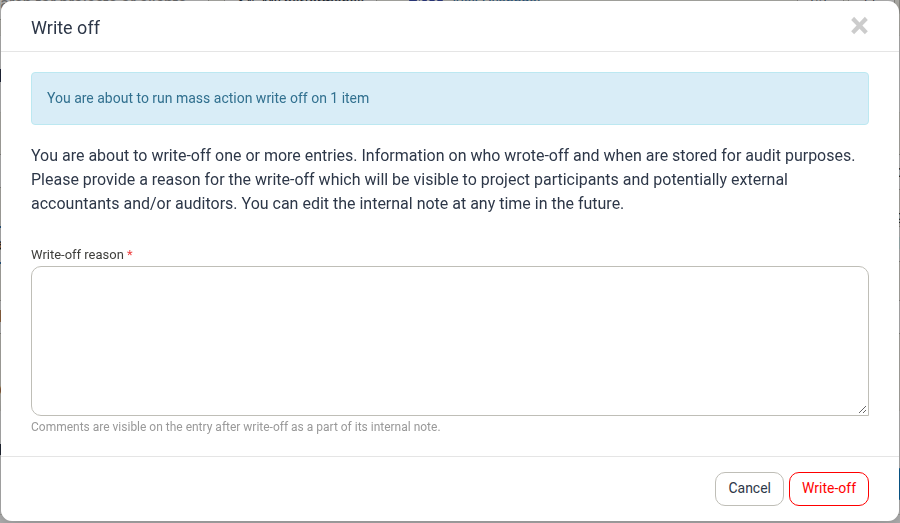
Write-off
Writes off the selected billables — they remain in the records but are no longer billed. A reason is required; it is stored for audit and shown on the entry's internal note.
- Billable types: time, travels, expenses, products, per diems.
- Batch limit: none.
- Permission: Can edit billable quantity or write-off billables.
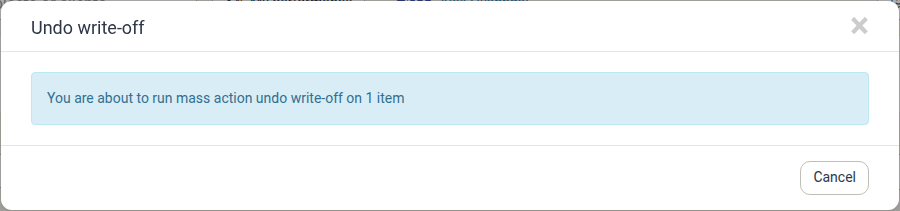
Undo write-off
Reverses a previous write-off so the selected billables become billable again. No extra input is needed.
- Billable types: time, travels, expenses, products, per diems.
- Batch limit: none.
- Permission: Can edit billable quantity or write-off billables.
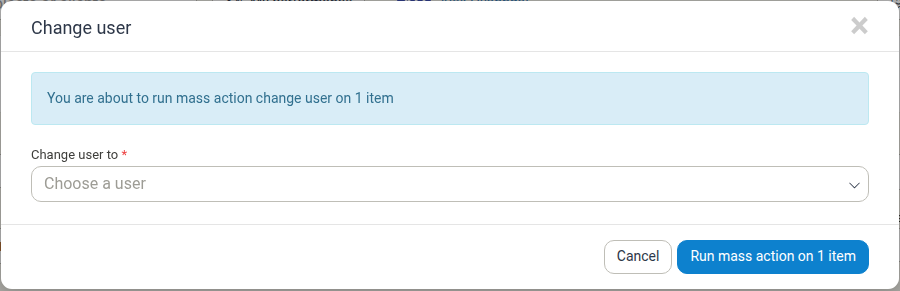
Change user
Reassigns the selected billables to a different user (the person they belong to and are billed/paid through).
- Billable types: time, travels, expenses, products, per diems.
- Batch limit: none.
- Permission: you can only change the user on entries of a type you are allowed to reassign:
- Time — Can change user, date and duration in time entries
- Travels — Can select user in travel entries
- Expenses — Can select user in expense entries
- Per diems — Can select user in per-diem entries
- Products — no extra permission required
Edit selected items
Opens a single table where you can edit the description and billable quantity of all selected entries inline, then save them together. Use Tab to jump between fields.
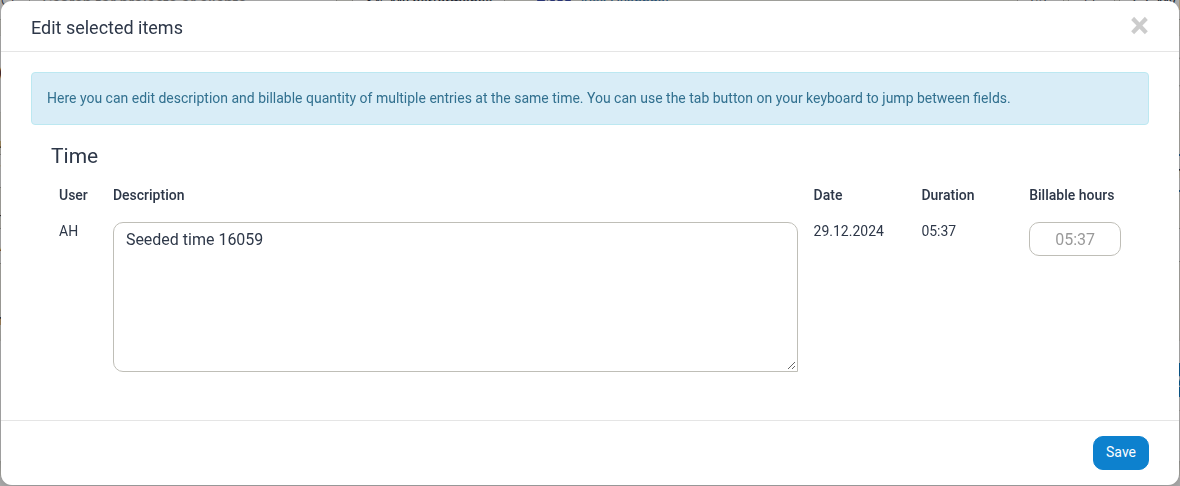
- Billable types: time, travels, expenses, products, per diems. The dialog shows one billable type at a time.
- What you can edit: description for every type; billable quantity for time (billable hours), travel (billable distance/trips), products (billable quantity) and expenses (billable amount). Per diems are description-only.
- Batch limit: none.
- Permission: editing the billable quantity requires Can edit billable quantity or write-off billables; you must also be allowed to edit each entry.
Change billable hours
Sets a new billable quantity (billable hours) for the selected time entries, overriding the logged duration.
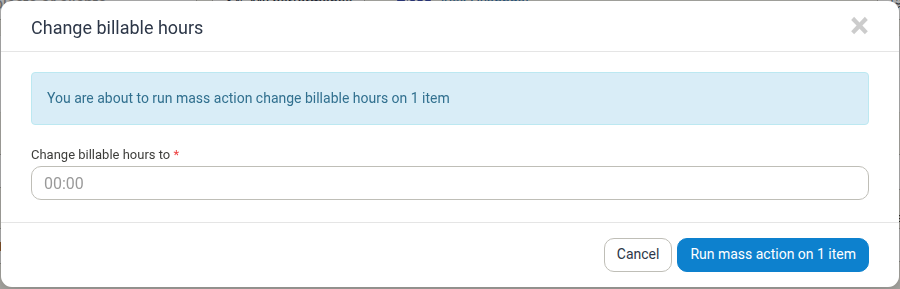
- Billable types: time only.
- Where: Time > Table and Data > Time.
- Batch limit: none.
- Permission: Can edit billable quantity or write-off billables.
Batch limits and selection size
- Billable mass actions do not enforce a fixed maximum number of selected items. You can select as many rows as the current page shows, and the page size can be set as high as 1000 per page.
- Selection applies to the rows currently displayed. Changing the page, filter or sort clears the selection, so process very large sets page by page.
- The only numeric cap within a billable action is the Number of copies in the Copy dialog (1–100 per selected entry).
Permissions at a glance
| Action | Permission required |
|---|---|
| Delete | Ability to edit the entry; Can delete expenses for expenses |
| Move | Ability to edit the entry and access the destination project |
| Copy | Ability to edit the entry and access the destination project |
| Change rate | Ability to edit the entry |
| Change payer | Can select a payer for a billable |
| Write-off | Can edit billable quantity or write-off billables |
| Undo write-off | Can edit billable quantity or write-off billables |
| Edit selected items | Ability to edit the entry; Can edit billable quantity or write-off billables to change quantities |
| Change billable hours | Can edit billable quantity or write-off billables |
| Change user | Per-type permission: Can change user, date and duration in time entries (time), Can select user in travel entries, Can select user in expense entries, Can select user in per-diem entries; products need none |
If an action is not shown, you are missing the permission it requires — or the action does not apply to the list or billable type you are viewing.
What happens to items that cannot be changed
Manor never silently changes an item that the action does not support. Depending on the action, unsupported entries are left untouched and a message reports how many were processed and how many were skipped. Typical reasons an entry is skipped include:
- It has already been billed or is a settlement billable.
- Moving it would affect payroll (Move only).
- Its date falls inside a closed payroll period (Copy).
- It belongs to another user you are not allowed to change.
- It is part of a bundle that would be affected as a whole.
Review the message after running an action and filter the list to confirm the result.
Verifying the Result
After Copy or Move, filter the list (for example by description, client, or project) to confirm the new or reassigned entries appear on the destination project.
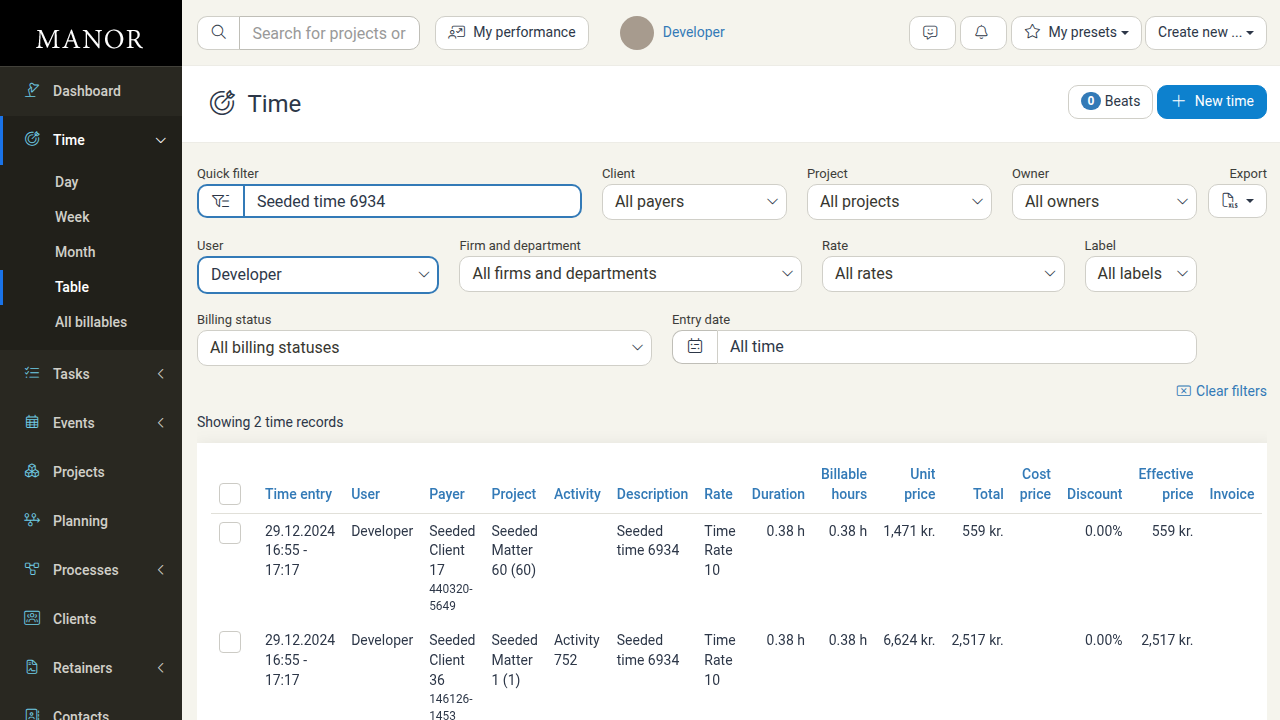
In the example above, the original entry on Seeded Matter 60 was copied to Seeded Matter 1 with Activity 752. The copy keeps the same date, time, duration, rate, and description, but belongs to the new project and activity.
Caveats and Things to Check
- Billing status matters. Check the Billing status column or filter before running Move. Only unbilled entries will be moved; billed entries are ignored.
- Closed pay periods. If you choose to stamp copies with today's date and today falls inside a closed pay period, the copy is not allowed. Entries that fall in a closed pay period are also excluded from copying when their original date is kept.
- Rates follow the destination project. Copying to a project with different rates or a framework agreement recalculates pricing, so the copied entry may have a different unit price and total than the original — review the result before invoicing.
- Activities. If the destination project uses activities, you must pick one; time is always logged against an activity when the project has open activities.
- Audit trail. Moves between projects and other mass actions are recorded in the activity log, so you can trace which entries were changed and when.
- Write-offs are auditable. The reason you enter is stored and visible to project participants and auditors; choose a meaningful note.
- Filter first. Narrow the list (client, project, billing status, entry date) before selecting so you only touch the rows you intend to.
- Select one billable type for Change rate. Because rate changes work on a single type at a time, filter by Billable type first.
- Permissions. You can only copy, move or otherwise change entries you are allowed to edit, and you can only copy or move to projects you can access.
- Large selections. There is no fixed maximum number of selected entries for Copy or Move, but selection applies only to the rows currently displayed on the page. To process very large sets, work page by page.
Copy vs. Move at a Glance
| Copy | Move | |
|---|---|---|
| Effect | Creates new entries on the destination project | Reassigns the original entries |
| Original entry | Stays exactly as it was | Is changed to the new project |
| Billed entries | Included (copies are new and unbilled) | Skipped |
| Date options | Keep old, or reset to today | Date is unchanged |
| Number of copies | 1–100 per entry | Not applicable |
| Typical use | Bill the same work to another project; duplicate with a new date | Fix an entry logged to the wrong project |
Related Documentation
- Time Entries — The full time entries data view
- All Billables — The unified list of all billable items
- Billables — Detailed billables view in the Data section
- Project Workflow Guide — The complete project lifecycle
- Invoices — Billing the resulting entries to clients