
Overview
The Pricing section in Management lets you configure all rates used for billing clients. You can create different types of rates (time, product, per diem, travel), organize them into categories, and set initial prices.
Key Features
- Manage rates - Create and edit billing rates for different billable types
- Organize with categories - Group similar rates together for easier management
- Set cost prices - Track profitability by comparing cost vs. billing prices
- Control access - Restrict rates to specific firms or departments
- Record product numbers - Give every billable type the product code your accounting software expects
Creating a Rate
To create a rate, go to Management > Pricing, click New rate, fill in the form, and click Save. See Rates for the full step-by-step procedure and a description of every field.
Note: Only active rates appear when creating billable entries. You can activate or deactivate rates as needed.
Product Numbers
A product number (also called an item code or, in Icelandic, vörunúmer) is the code your accounting software uses to identify what is being sold. Manor sends a product number with every invoice line, so the accounting software can book the sale against the right item.
You can record product numbers at two levels, and Manor uses the more specific one it finds:
- On the rate - a product number set on the individual rate, optionally overridden per department (used when the project owner belongs to that department).
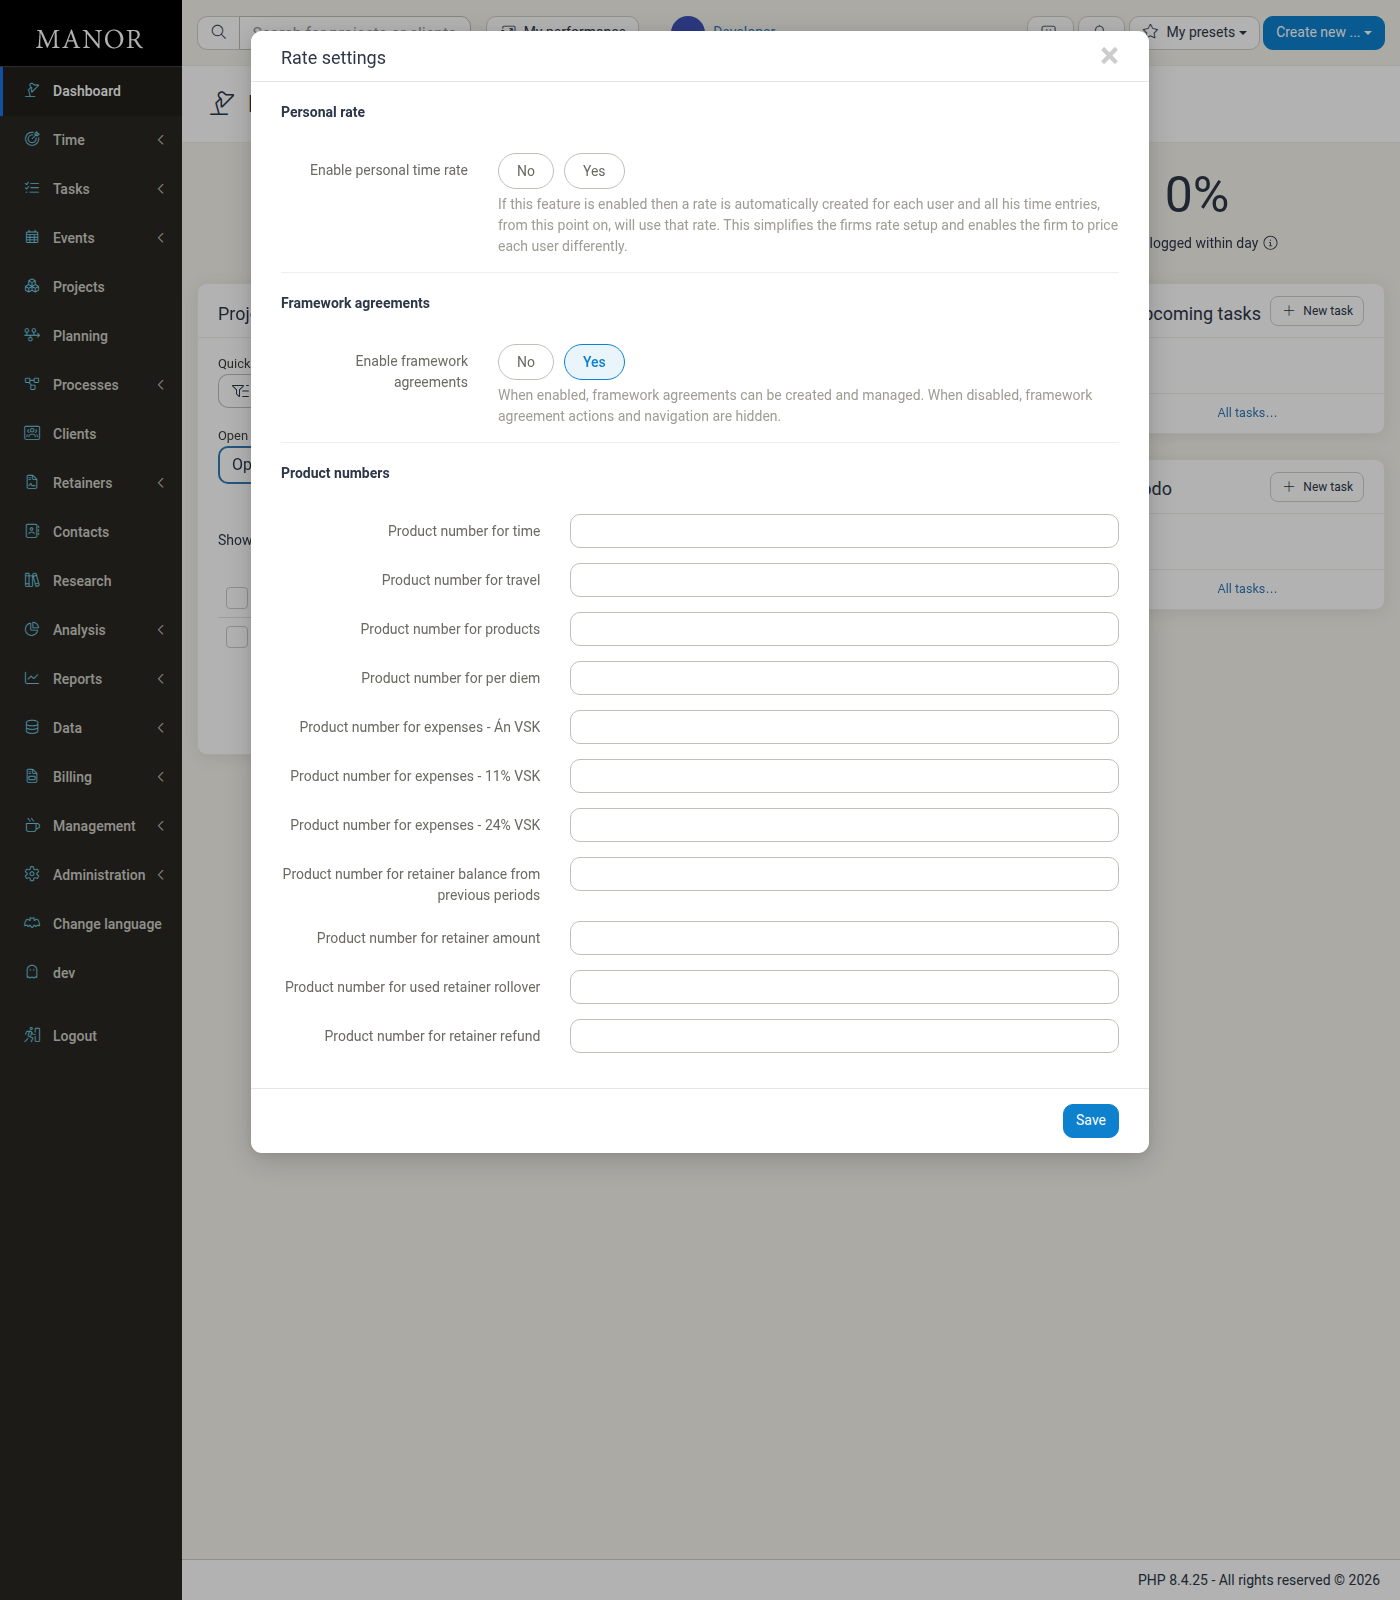
- Default per billable type - the fallback set under Management > Pricing > Settings (the Rate settings page), used when the rate has no product number of its own.
Setting the default product numbers
-
Navigate to Management > Pricing.
-
Click Settings in the top right.
-
In the Product numbers group, enter a default product number for each type:
- Product number for time
- Product number for travel
- Product number for products
- Product number for per diem
- Product number for expenses - one per VAT rate
- Retainer product numbers, if your firm uses retainers: the retainer balance from previous periods, the retainer amount, the used retainer rollover, and the retainer refund
-
Click Save.
Note: The Rate settings page also carries two feature toggles, Enable personal time rate (create a separate rate for each user automatically) and Enable framework agreements. They are not part of the product numbers; leave them as they are unless your firm uses those features.
Setting a product number on a rate
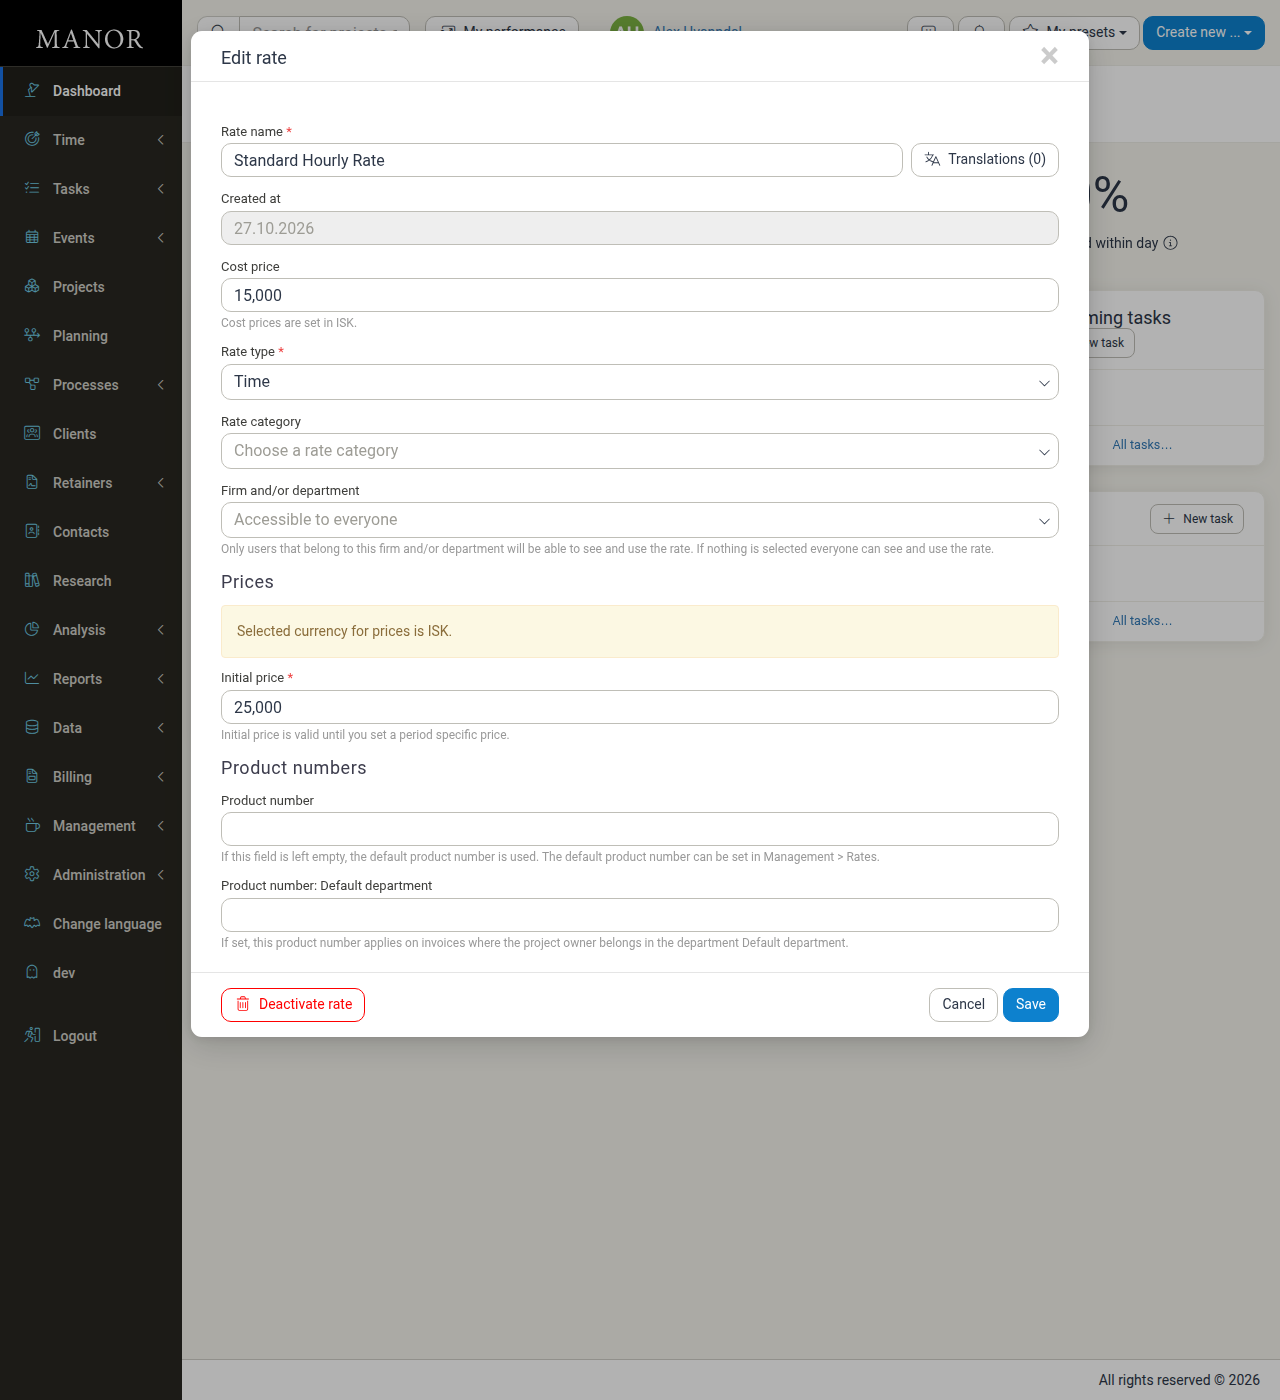
When you create or edit a rate, use the Product numbers section on the rate form:
- Product number - the code used for this rate. If it is left empty, Manor falls back to the default product number for the rate type.
- Product number:
- an optional override that applies on invoices where the project owner belongs to that department.
Why product numbers matter
Accounting integrations such as DK and Regla require a product number on every invoice line. If a required product number is missing, Manor does not post the invoice and warns you, for example:
This setting has not been set yet: Product number for time
Set the product numbers before you issue your first invoice. See Connecting to DK and Connecting to Regla for the full integration details.
Managing Rates
Viewing Rates
On the Pricing page, you can:
- Filter by Rate type, Rate category, Firm and department, and Active status
- Search with the Quick filter and reset everything with Clear filters
- Sort the list by clicking a column heading
- Export the rate list to Excel
The rate list also has a Product number column, so you can see at a glance which rates have their own product number.
Editing Rates
To edit a rate, click its name in the list, update the fields, and click Save. See Rates for the full procedure.
Existing billable entries keep their original rates; changes apply to new entries.
Deactivating Rates
Instead of deleting, deactivate rates that are no longer used to preserve historical data. Open the rate and click Deactivate rate at the bottom of the rate form.
Rate Categories
Rate categories help organize your pricing structure without affecting calculations.
Creating a Category
-
Navigate to Management > Pricing > Rate categories.
-
Click New rate category.
-
Enter the Rate category name.
-
Click Save.
Assigning Rates to Categories
When creating or editing a rate, select the category from the Rate category dropdown.
Best Practices
- Use rate categories - Group rates by practice area, service type, or team
- Track cost prices - Helps you understand true profitability
- Keep rate names descriptive - Makes it easier to select the right rate
- Review pricing regularly - Update rates to match market conditions
- Set product numbers before invoicing - DK and Regla need a product number on every invoice line, so configure the defaults (and any rate- or department-specific ones) up front