
Overview
A process is a named workflow definition that describes the states a project can move through. Each process contains an ordered list of states (steps) that represent the stages of your project lifecycle, from intake through completion. You create processes once under Processes, then move individual projects between the states of their process as work progresses.
You can also link a project template to a process and an initial state, so that projects created from that template start in the right workflow stage automatically. For details, see Templates.
Key fields
A process has the following fields:
- Name — The name of the process, for example "Litigation" or "Contract Review". Required.
- Note — An optional description of what the process is for.
- Created at — The date the process was created. Shown on the edit form and in the processes list.
- Projects — The number of projects currently using the process. Shown as a column in the processes list.
- States — The number of states defined in the process. Shown as a column in the processes list.
Each state has:
- Name — The name of the stage, for example "Intake" or "Discovery". Required.
- Description — An optional note explaining what happens during the state.
States are ordered. You control their order with the Move drag handle, and that order is the order shown on the project.
Viewing processes
Click Processes in the main navigation menu to open the processes list.
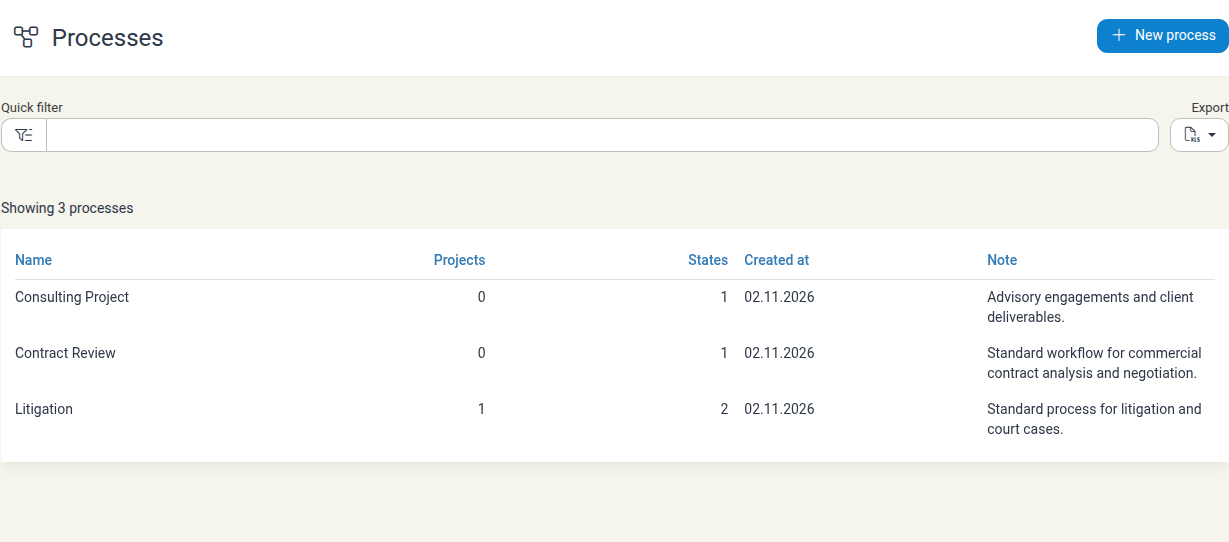
The table shows the following columns:
- Name — The process name. Click it to open the process.
- Projects — The number of projects currently using the process.
- States — The number of states defined in the process.
- Created at — The date the process was created.
- Note — The process description.
Use the Quick filter box above the table to find a process by name or note, and click Export to download the list.
If no processes have been defined yet, the list shows There are no processes yet.
Creating a process
-
Click Processes in the main navigation menu.
-
Click the New process button in the top right.
-
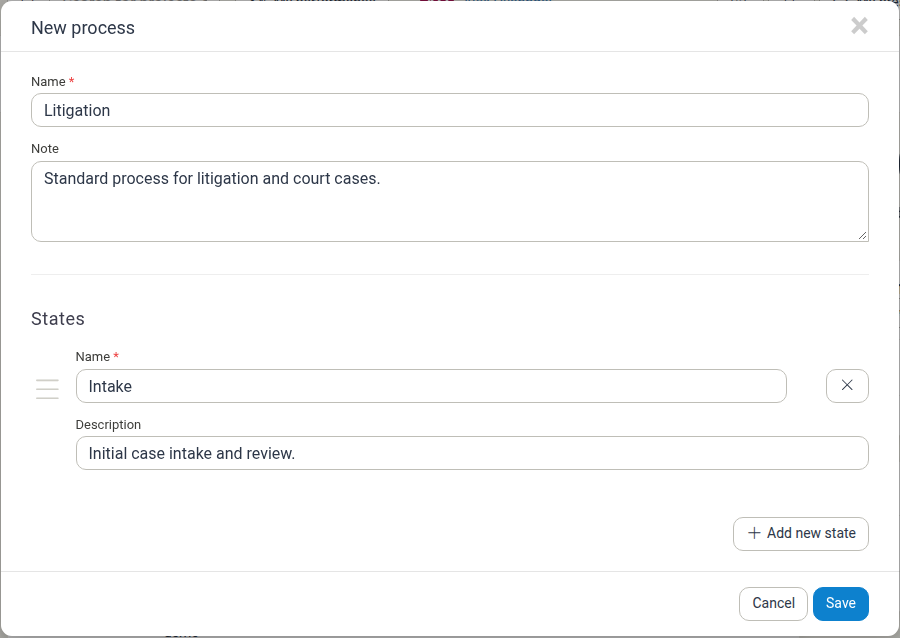
In the New process dialog, enter a Name for the process.
-
Optionally, enter a Note describing what the process is for.
-
Under States, enter the Name of the first state, and an optional Description.
-
Click Add new state to add the next stage, and repeat for each state you need.
-
To reorder states, drag the Move handle next to a state. To remove a state you no longer need, click the remove icon on the right of the state row.
-
Click Save.
Name is required. If you try to save without a name, Manor shows The Name field is required. and highlights the field.
Editing a process
-
Click Processes in the main navigation menu.
-
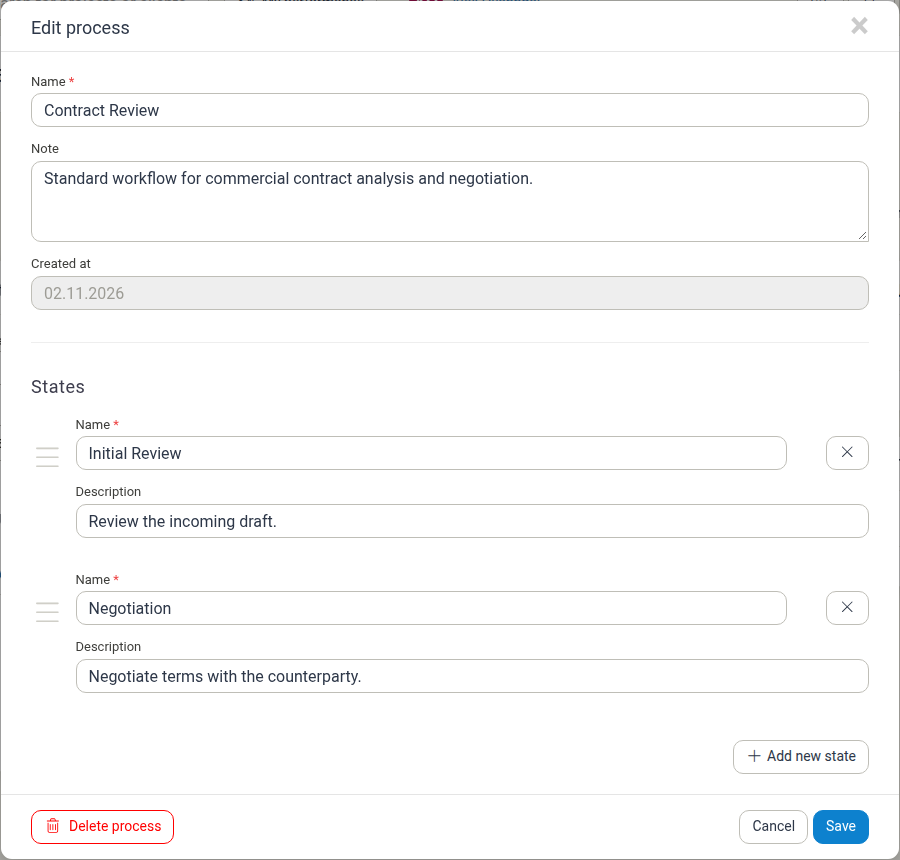
Click the process name to open the Edit process dialog.
-
Update the Name or Note, and change the states as needed:
- Add a state with Add new state.
- Reorder states by dragging the Move handle.
- Edit a state's Name or Description.
- Remove a state with the remove icon on the right of the state row.
-
Click Save.
Note: If a process is already used by one or more projects, the dialog warns you that your changes will affect those projects and that the changes cannot be undone. Review the affected projects before you change a process that is in use.
Deleting a process
-
Click Processes in the main navigation menu.
-
Click the process name to open the Edit process dialog.
-
Click Delete process at the bottom left of the dialog.
-
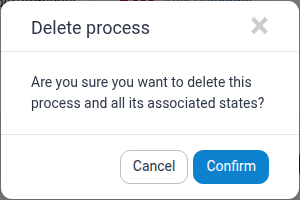
A confirmation dialog appears asking Are you sure you want to delete this process and all its associated states?
-
Click Confirm to delete the process and all of its states.
A process that is currently used by projects cannot be deleted. In that case the Delete process button is disabled and the dialog shows This process can not be deleted because it is in use. Remove the process from those projects first, or keep the process and edit it instead.
Starting and moving a project through a process
A project's state is managed from the project itself, not from the process editor.
-
Open the project. The Process box shows a Start process button when the project has no state yet.
-
Click Start process. In the Start process dialog, choose a state from the State field (labelled Choose a process and a state) and click Start process. States are grouped by process, so you pick the process and state at the same time.
-
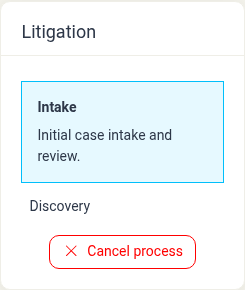
Once a process is running, the box is titled with the process name and lists its states in order. The current state is highlighted and shows its description.
-
To move the project to another state in the same process, click that state. Manor asks you to confirm the switch, then updates the project's state.
-
To stop the process on the project, click Cancel process at the bottom of the box.
The project's current state is also shown in the Current state column in the projects list, so you can filter and report on projects by state.
Linking a process to a project template
To have new projects start in a specific workflow stage, link a template to a process and an initial state:
-
Go to Management > Templates and create or edit a template.
-
In the Process and initial state field, choose a process and one of its states.
-
Save the template. Projects created from the template start in that state.
The template dialog links to the process area if you do not have a process yet. See Templates for more.
Examples of processes
The following workflows are common in professional services firms. Use them as inspiration, and adapt the states to how your firm actually works:
| Process name | Typical states | Common use case |
|---|---|---|
| Litigation | Intake → Discovery → Trial → Closed | Court cases, disputes, and trial proceedings |
| Contract Review | Initial Review → Negotiation → Executed → Closed | Drafting, reviewing, and executing agreements |
| Consulting Project | Planning → Execution → Review → Delivery → Completed | Advisory engagements and client deliverables |
Best practices
- Keep state names clear and concise — Use descriptive names such as "Initial Review" or "Awaiting client signature" instead of vague terms like "Pending".
- Reflect real workflows — Map states to how work actually flows in your firm, and avoid unnecessary stages.
- Use consistent end states — Give the final state the same name (such as "Closed" or "Completed") across processes to keep reporting uniform.
- Plan before creating — Decide on the full lifecycle before you define a process, since changing a process in use affects the projects that use it.
- Link processes to templates — Associate templates with a process and initial state so new projects start in the correct stage.
Related documentation
- Project Creation — Creating a new project
- Templates — Linking a template to a process and initial state
- Project Workflow Guide — The full project lifecycle
- Project Management — Activities, milestones, and timelines