
Sometimes a single project has to be invoiced to more than one paying party. Typical examples are a joint venture where two companies share legal fees, a shared litigation cost split between co-defendants, or a parent company and its subsidiary that divide the cost of one engagement.
Manor supports this at three levels, and you can combine them on the same project:
| Method | What it does | Allocation | Configured on |
|---|---|---|---|
| Invoice split | Divides the project's entire billing across several clients | Percentage of every invoice line | Project → Invoice split card |
| Payer preferences | Makes additional clients selectable as the payer of individual entries | 100% to one payer per entry | Project → Payer Preferences card |
| Payer on a billable | Chooses who pays for one specific time, travel, expense, product or per diem entry | 100% to one payer per entry | The entry form (for example, New time) |
This article is a starting point for the topic. The detailed mechanics of splitting invoices live in Invoice Splits, and the field-by-field project settings live in Project Billing Settings. Follow those articles for the exhaustive reference and use this one to decide which approach fits your engagement.
Note: Invoice splits are not available for projects covered by a retainer. Because retainer-covered work is drawn from the retainer balance, such a project cannot be divided across multiple payers. If your project is covered by a retainer, use payer preferences or a per-entry payer instead. See Invoice Splits for the split feature and Project Retainer Coverage to understand how retainer coverage works.
Prerequisites
Before you can bill several payers on one project:
- A project with a client. Every project has one Main client (the Client field on the project). Additional payers are added on top of that main client.
- The additional clients must exist. Create or confirm the other paying companies under Clients first, so you can select them in the split and payer-preference dialogs.
- Billing enabled on the project. The project Type must be Billing enabled so the work can be invoiced. See Project Creation.
- Permission to select a payer on a billable. Choosing a payer on an individual entry requires the billable-permission Can select a payer for a billable; editing a project's payer configuration requires permission to edit projects. Roles are managed under Administration → Roles (see Custom Role Permissions).
- Configuration done before invoicing. Invoice splits and payer preferences are applied when invoices are prepared, so set them up before you generate invoices for the period.
Choosing the right approach
- Use an invoice split when the same agreed percentage should apply to everything billed on the project — for example, two joint-venture partners sharing all costs 50/50.
- Use payer preferences when the project is billed to one client overall, but certain entries should be paid by a different company. Adding a payer preference makes that company selectable in the Payer field of new entries.
- Use the per-entry payer when only an occasional item belongs to another payer — you can pick the payer directly on that single entry without changing the project's default.
You can combine them: a project can have both a percentage split and extra payers available for individual entries.
Assigning multiple payers with an invoice split
An invoice split divides the project's billing across clients by percentage. The project's main client is always the first row (defaulting to 100.00%) and you add co-paying clients to it.
- Open the project (Projects → select the project).
- In the right-hand sidebar, find the Invoice split card and click New Split (or Edit split configuration if a split already exists).
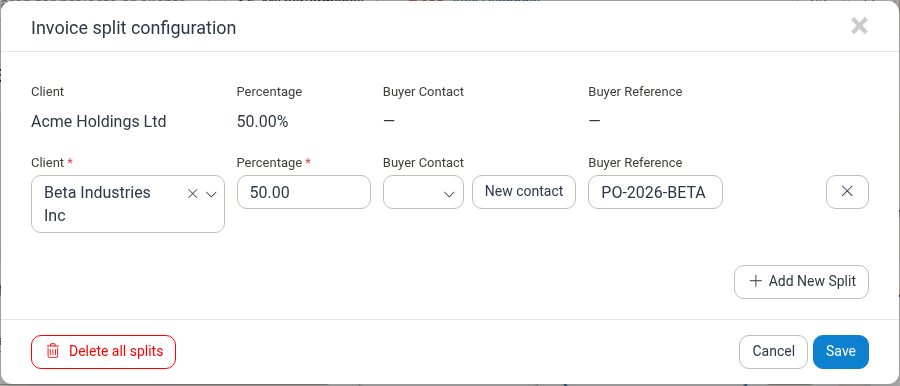
- In the Invoice split configuration dialog, click Add New Split to add a co-payer row.
- For each co-payer, choose the Client and enter a Percentage. Optionally set a Buyer Contact and a Buyer Reference for that party.
- The main client's percentage is calculated automatically as the remainder, so the rows always total 100.00%.
- Click Save.
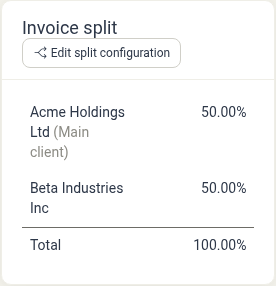
Once configured, the Invoice split card summarises the allocation, with the main client and each co-payer and their percentages, and a Total line that must read 100.00%.
You can change the split at any time with Edit split configuration, or remove every split at once with Delete all splits in the dialog.
How an invoice split is allocated
- Each split row is a percentage of the whole project balance. When you invoice, Manor takes the unbilled time, travel, expenses, products and per diems and divides them proportionally across the configured clients.
- Manor keeps the total balanced for you: you set only the co-payers' percentages, and the main client's share is calculated automatically so the rows always add up to 100.00%.
- Each paying client receives their own invoice for their share, carrying their own buyer contact and buyer reference number.
- Each resulting invoice is tracked and marked paid separately, so you can follow up with each payer independently.
For the full walkthrough, see Invoice Splits.
Adding additional payers with payer preferences
Payer preferences let you make other clients selectable as the payer of individual entries on the project, each with its own buyer reference number.
- Open the project and locate the Payer Preferences card in the sidebar.
- Click Edit Payer Preferences.
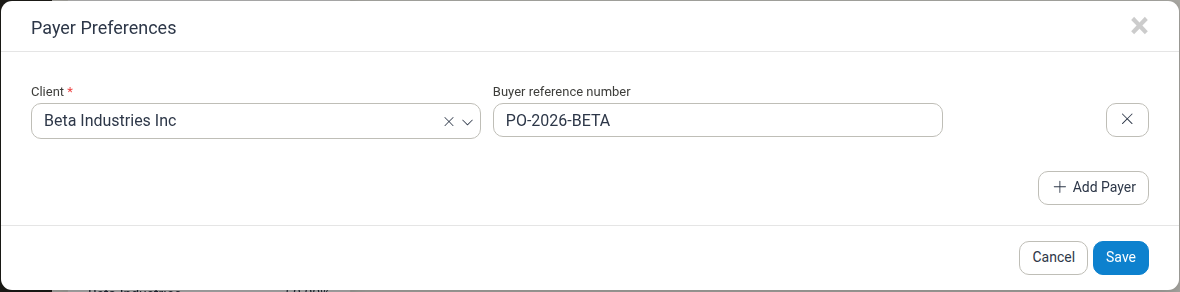
- In the dialog, choose the Client and, optionally, enter that client's Buyer reference number.
- Click Add Payer to add further payers, then click Save.
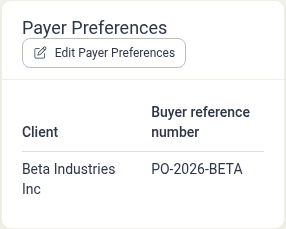
The Payer Preferences card then lists the additional payers and their buyer reference numbers.
Adding payer preferences does not by itself move any billing. It only makes these clients available to be chosen as the payer when you log an entry. You then pick the payer on the entry itself (see the next section). The project's own default payer remains the client set on the project. A payer preference can be added even for a client that is not the project's main client, as long as the client record exists.
Choosing a payer on an individual billable
Time, travel, expense, product and per diem entries each have a Payer field. It defaults to Same as client (the project's client or the project's split arrangement). If the project has payer preferences configured, the additional clients appear as options.
- Create the entry as usual (for example, New time, New expense, New travel, New product or New per diem).
- Open the Payer dropdown and select the company that should pay for this entry, or leave Same as client to use the project default.

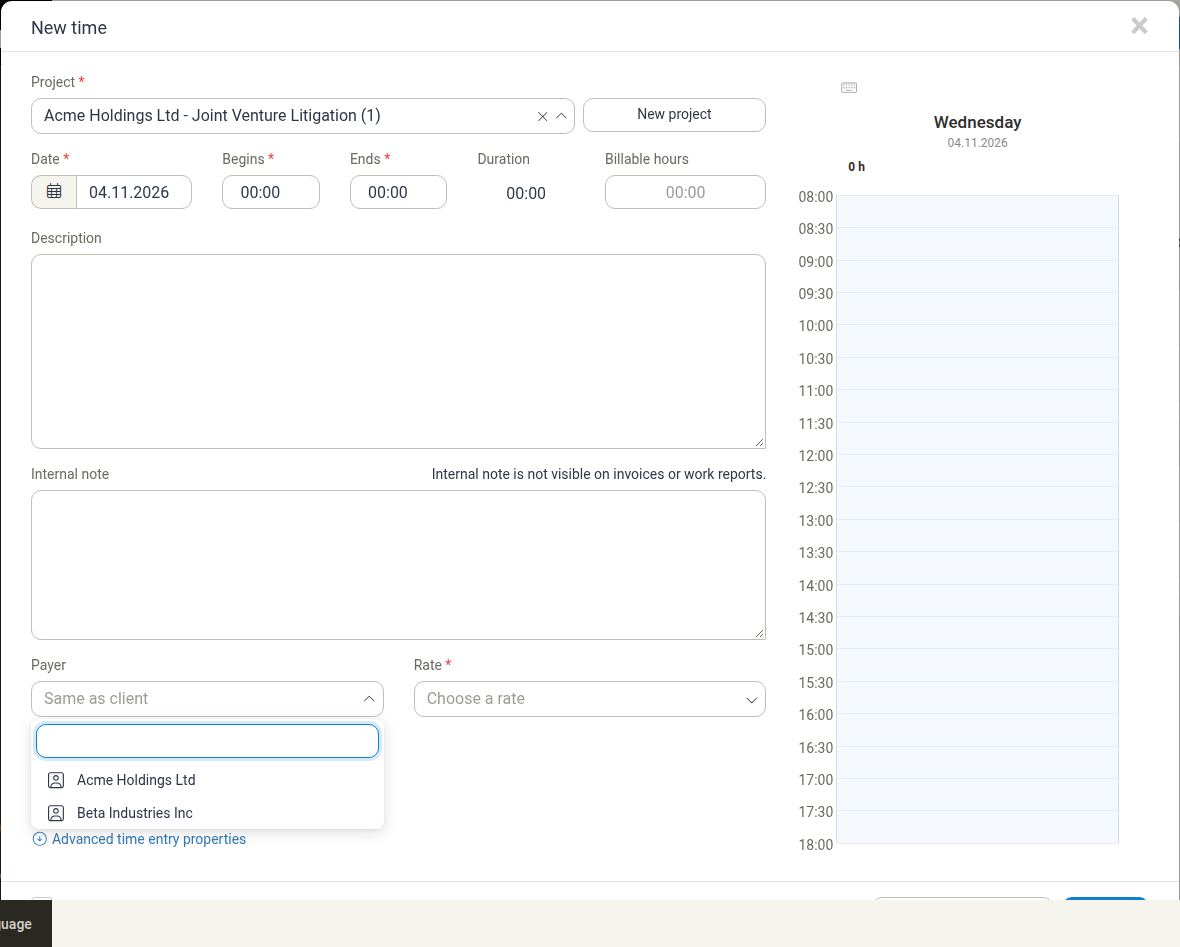
Selecting a payer on an entry assigns 100% of that entry to the chosen payer — it is a reallocation of a single item, not a percentage. This is different from an invoice split, which shares every line across clients by proportion.
Tip: If you need to change the payer of an entry that has already been logged, edit the entry and change its Payer field, provided you have permission to select a payer for billables.
How multiple payers appear on invoices and billing
- With an invoice split: issuing an invoice for the project produces a separate invoice per split client, each for that client's percentage of the billed items and each carrying its own buyer contact and buyer reference. The invoices are listed and paid independently in Billing → Invoices.
- With payer preferences and per-entry payers: entries keep their assigned payer, and when you invoice, the work is addressed to the payer responsible for it. The billables list and balances show the Payer for each line, so you can see at a glance who each item will be billed to.
- On the project page: the Invoice split card shows the percentage allocation, and the Payer Preferences card lists the additional payers and their buyer references.
- On balances and in the Data section: the Payer column (on the Billables and Time data tables, for example) shows the client responsible for each item, which is useful for auditing multi-payer projects before invoicing. See Balances Overview and Billables.
- Payment tracking: because split invoices are separate documents, each payer's invoice is marked paid, partially paid or unpaid on its own.
For how invoices are created, previewed and delivered, see Invoices.
Best practices
- Agree the split before billing. Confirm the percentages with all parties and set them up before generating invoices for the period.
- Watch fractional percentages. In three-way splits such as 33.33 / 33.33 / 33.34, decide which party absorbs the rounding difference.
- Give each payer its own reference. Enter the correct Buyer reference number per split row and per payer preference so each company's accounts payable can match the invoice.
- Use billing instructions for internal guidance. Put reminders for the biller (for example, "this project is always split 50/50") in the project's Billing instructions, which are not printed on the invoice. See Project Billing Settings.
- Keep the main client first. The project's client is always the full-payer default and the first split row; add other companies as co-payers or payer preferences rather than changing the project client.
Related articles
- Invoice Splits — detailed guide to dividing a project's billing across clients by percentage, with buyer contacts and references.
- Project Retainer Coverage — how linking a project to a retainer works; retainer-covered projects cannot use invoice splits.
- Project Billing Settings — all project billing fields, including invoice details, buyer reference, and special billing arrangements.
- Invoices — the full invoicing workflow, including payer and split handling.
- Balances Overview — reviewing and filtering the amounts you invoice from.
- Billables — the unified billables list, including the Payer column.
- Project Creation — creating a project and setting its billing options from the start.
- Clients — creating and managing the client records used as payers.
- Custom Role Permissions — including permission to select a payer on a billable.